Introduction
In this article we will dive into how Activepieces works and the basics of the platform. We will walk about the flows, the different tools you can use with Activepieces and how to test, publish and debug your automations.
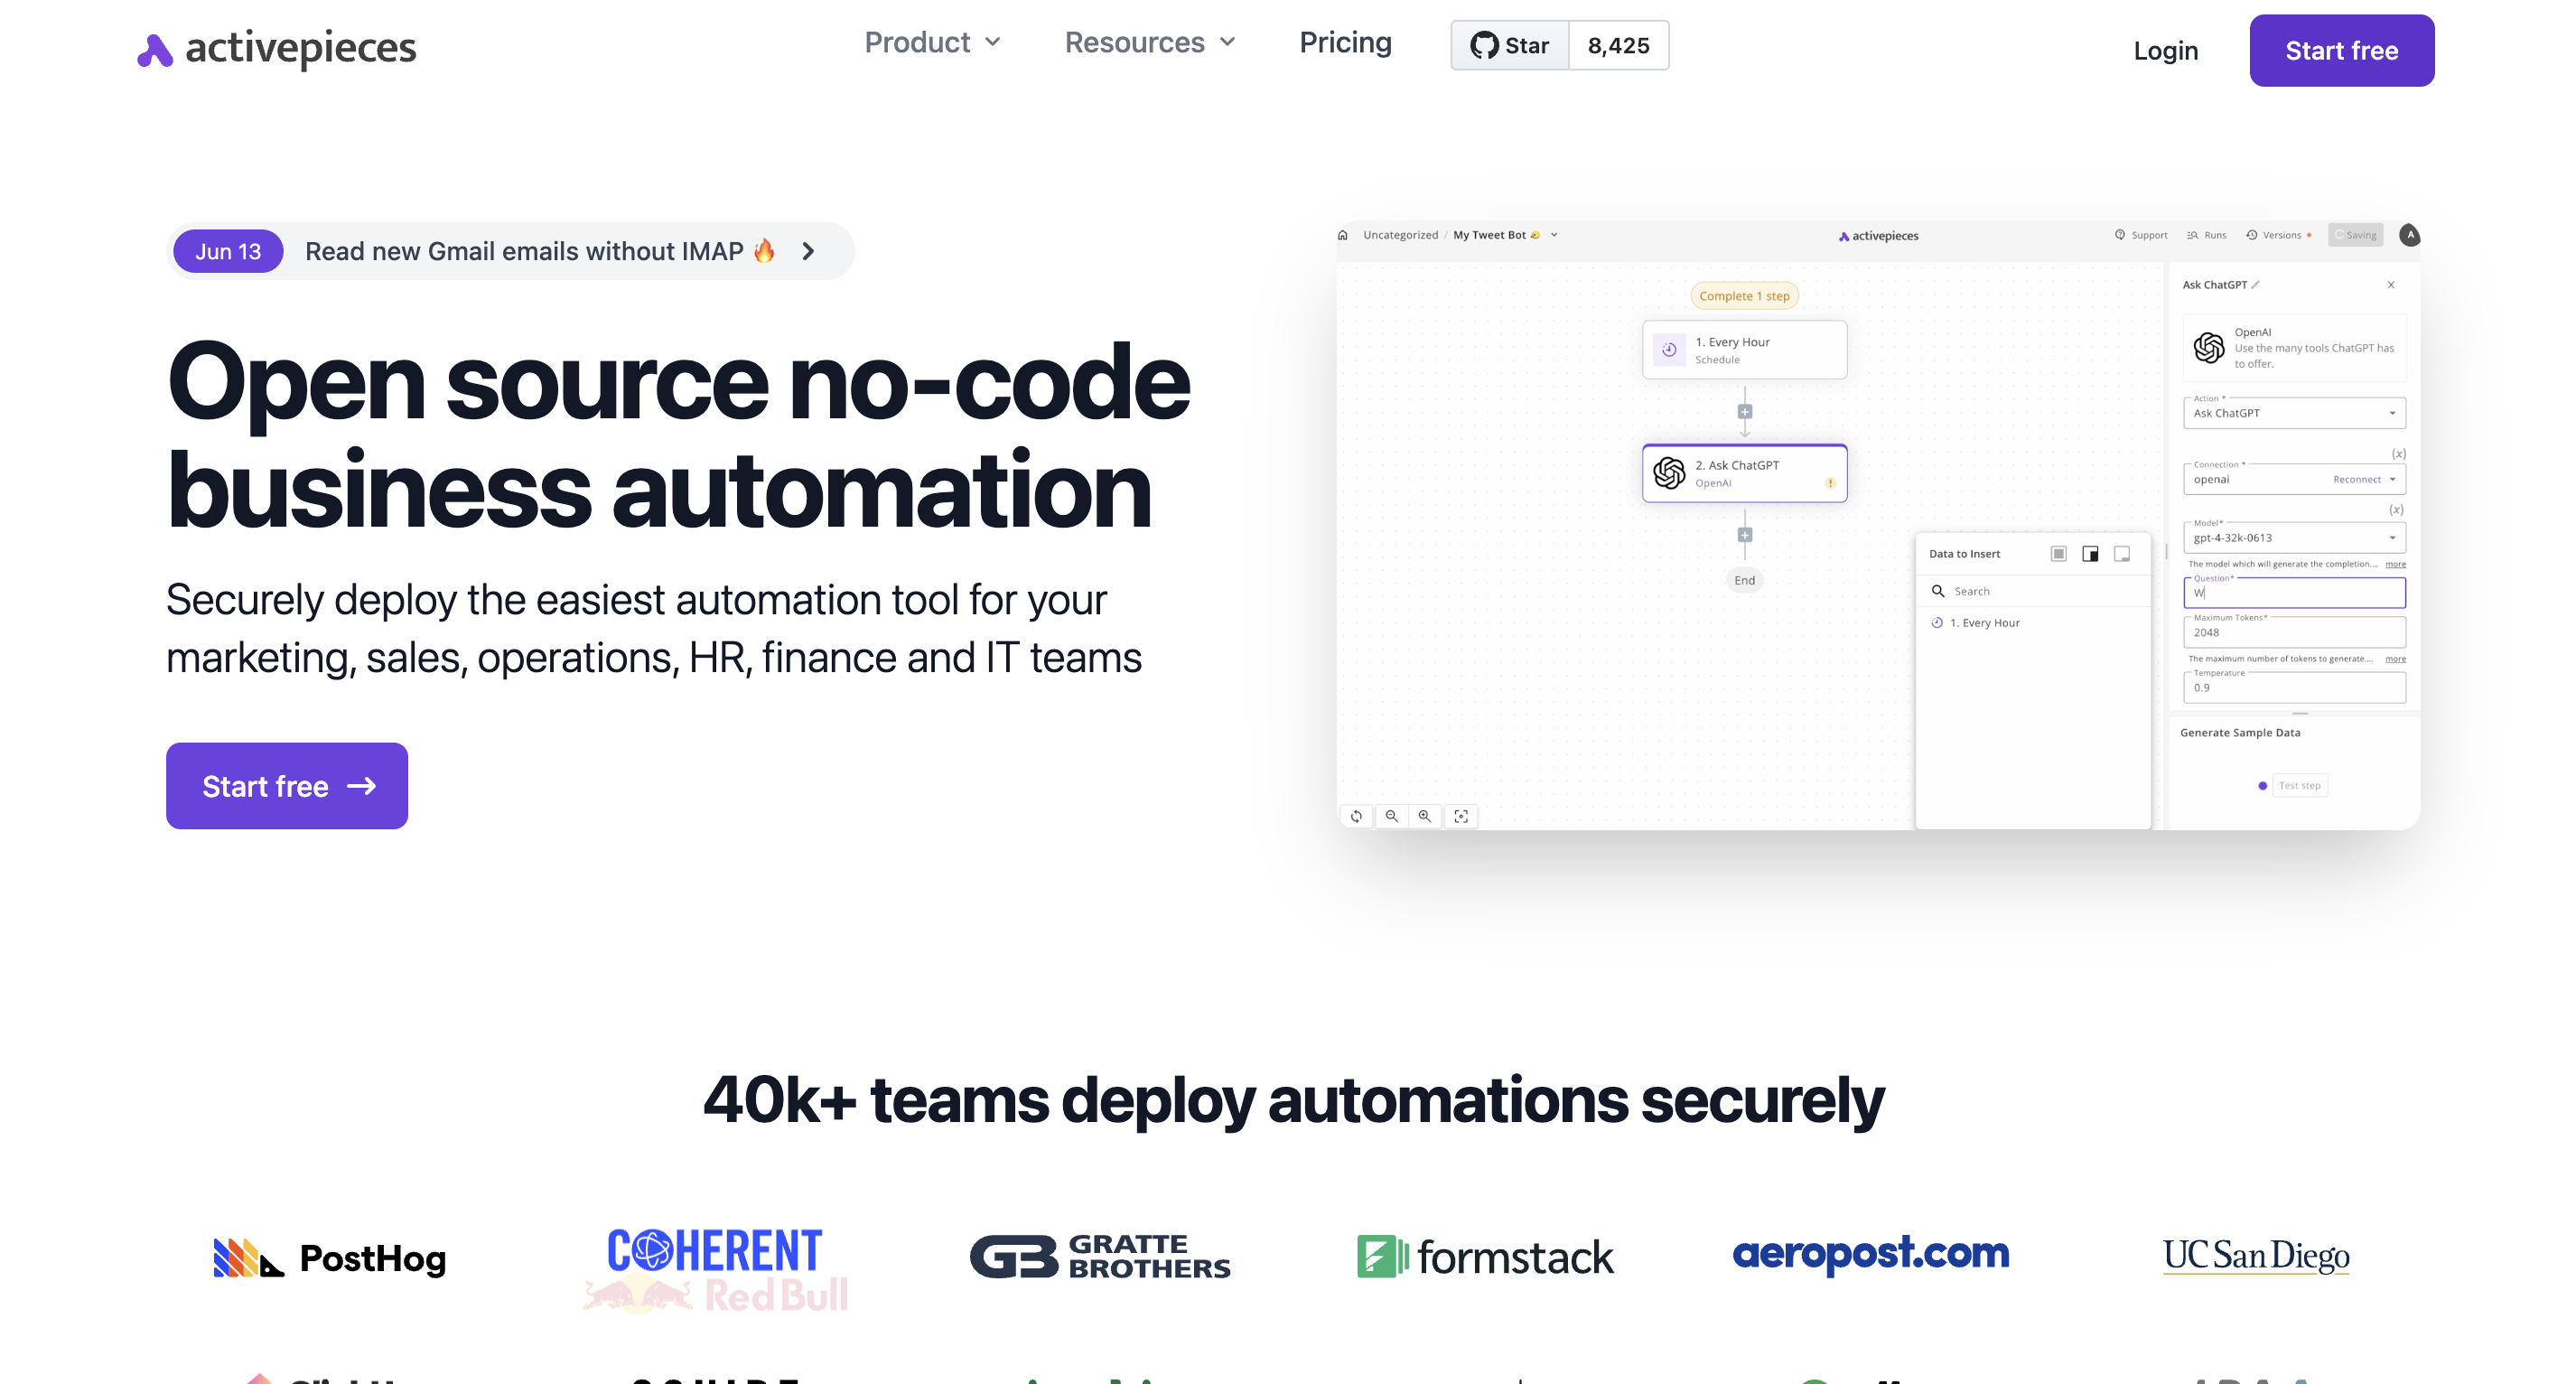
What is ActivePieces used for?
Activepieces is a user-friendly, open-source all-in-one automation tool, it is designed to streamline and automate your work across various applications.
It also allows the creation of custom automation "pieces" using TypeScript.
The platform supports a wide range of integrations, making it a resourceful tool for connecting different services and automating tasks.
If you want to learn more about Activepieces or read an external overview you should check our other articles:
Getting Started with Activepieces
Firstly, we have to explain the basic term and tools that we will use in order to understand how the platform works and create your first project.
Flows
Flow consists of two parts, triggers and actions.
- Trigger: The flow’s starting point determines its frequency of execution. There are various types of triggers available, such as Schedule Triggers, Webhook Triggers, or Event Triggers based on specific services
- Action: Actions come after the flow and control what occurs when the flow is activated, like running code or communicating with other services

Passing data
Any Activepieces flow is a vertical diagram that starts with a trigger step followed by any action steps.
Steps are connected vertically. Data flows from parent steps to the children. Children steps have access to the output data of the parent steps.
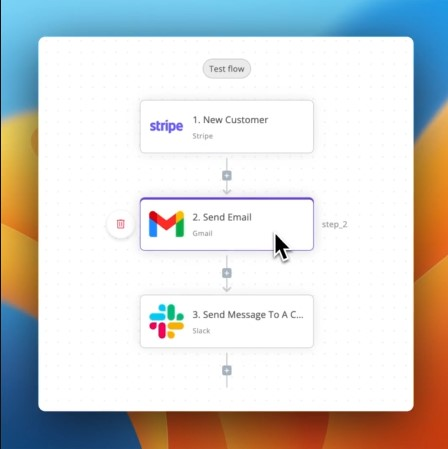
The tools mentioned earlier have 3 steps, they can access data as follows:
- Step 1: is the main data producer for the next steps. Data produced by Step 1 will be accessible in Steps 2 and 3. Some triggers don’t produce data though, like Schedules
- Step 2: can access data produced by Step 1. After execution, this step will also produce data for the next step(s)
- Step 3: can access data produced by Steps 1 and 2 as they’re its parent steps. This step can produce data but since it’s the last step in the flow, it can’t be used by other ones
To use data from a previous step in your current step, place your cursor in any input, and the Data to Insert panel will pop up.
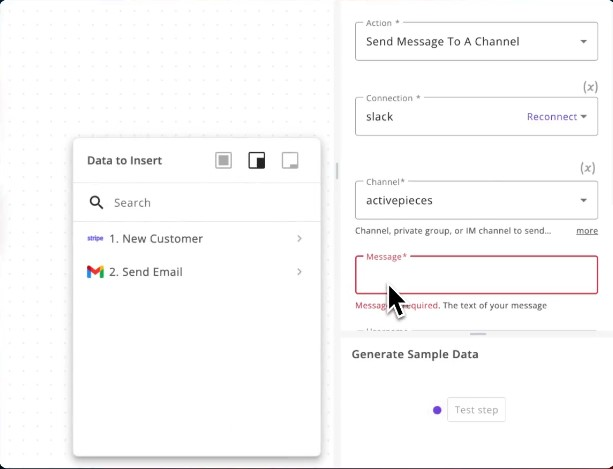
This panel shows the accessible steps and their data. You can expand the data items to view their content, and you can click the items to insert them in your current settings input.
If an item in this panel has a caret (χ) to the right, you can click on it to expand its child properties. You can select the parent item or its properties as you need.
When you insert data from this panel, it gets inserted at the cursor’s position in the input. This means you can combine static text and dynamic data in any field.
Testing Data
You have to test steps before accessing their data. This approach protects you from selecting the wrong data and breaking your flows after publishing them.
If a step is not tested and you try to access its data, you will see the following message:
“This step needs to be tested, to generate sample data”.
To fix this, go to the step and use the Generate Sample Data panel to test it. Steps use different approaches for testing. These are the common ones:
- Load Data: Some triggers will let you load data from your connected account without having to perform any action in that account
- Test Trigger: Some triggers will require you to head to your connected account and fire the trigger to generate sample data
- Send Data: Webhooks require you to send a sample request to the webhook URL to generate sample data
- Test Action: Action steps will let you run the action to generate sample data
Follow the instructions in the Generate Sample Data panel to know how your step should be tested. Some triggers will also let you use Mock Data, which will generate static sample data from the piece.
We recommend that you test the step instead of using mock data.
Building your first Activepieces project
We’ll create a custom flow by clicking on the new flow and selecting from scratch by using the features and terms explained above.
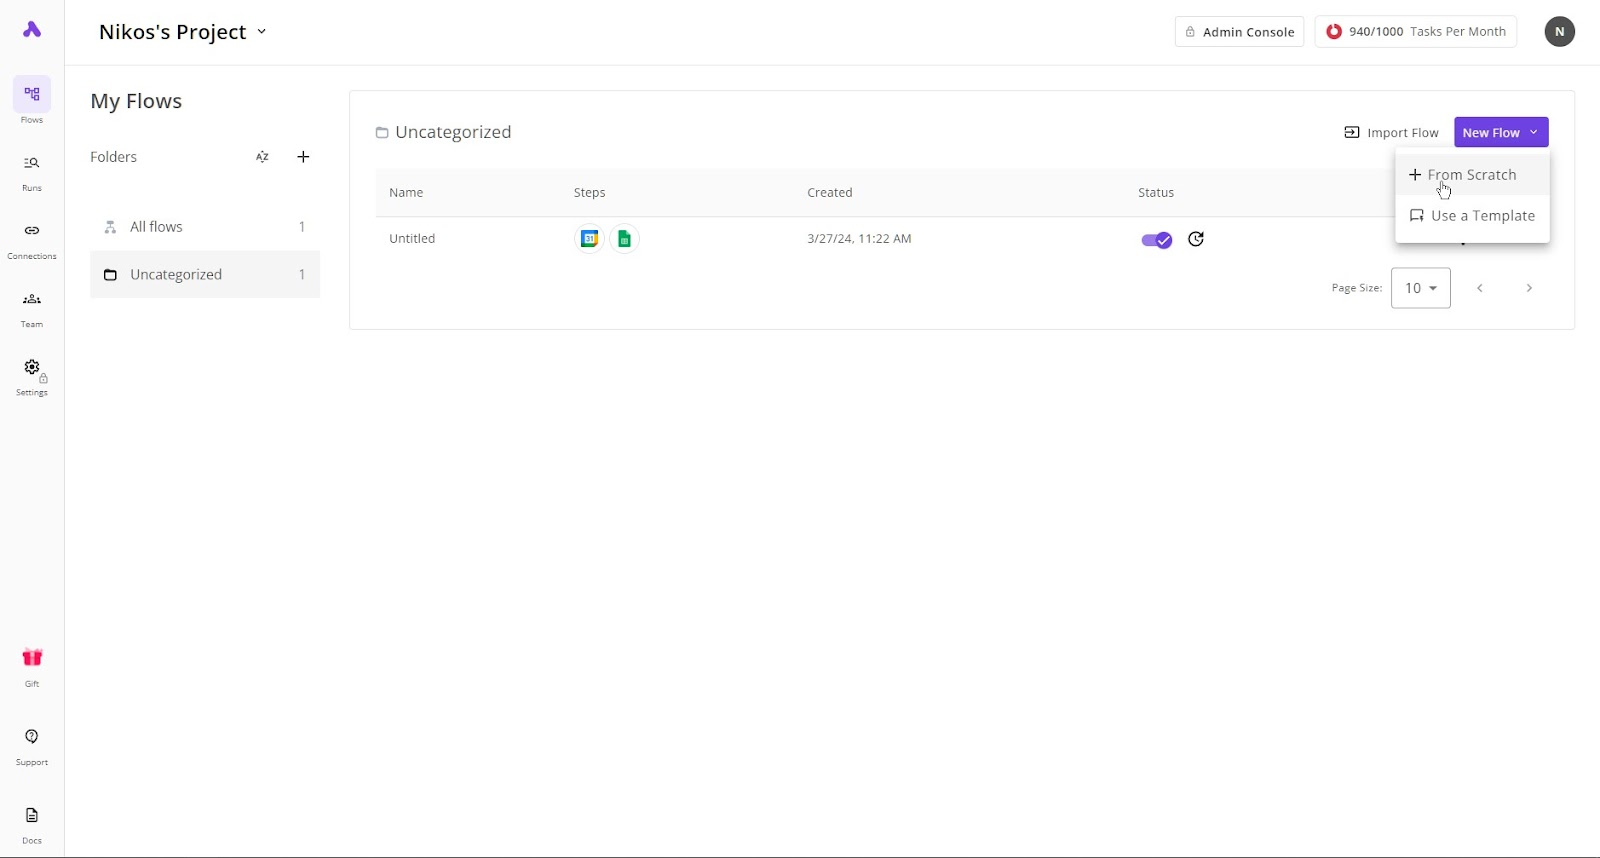
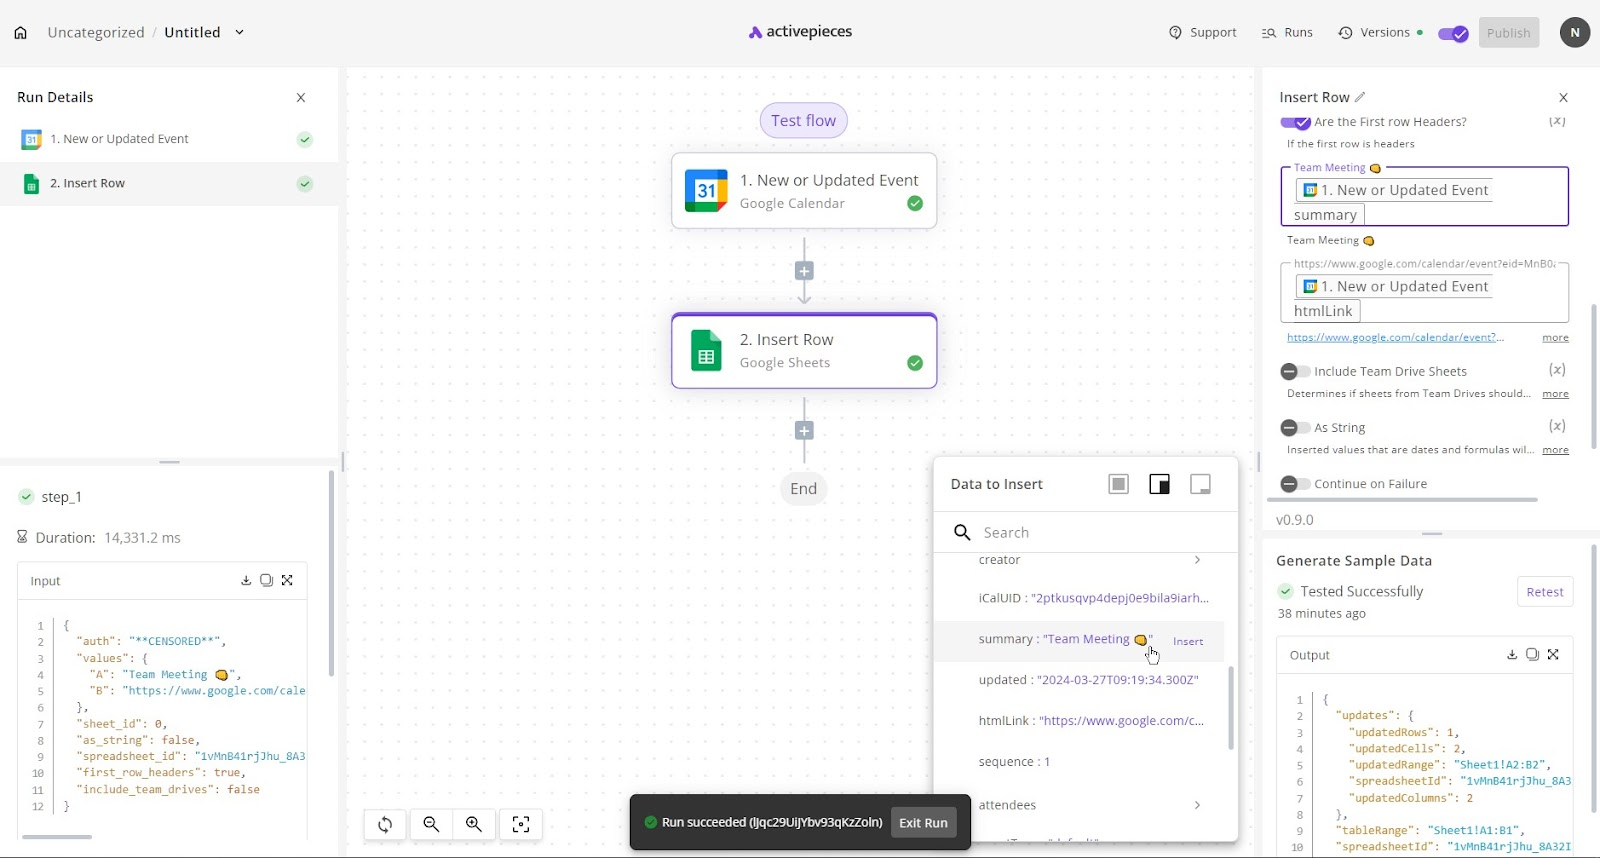
We want to create a Google sheet row with a new calendar event, let’s say a Google Meet invite.
- First, we will select Google Calendar from the select trigger. Then for the second step, we will select Google Sheets
- Connect your Google Calendar account and complete the drop-down menus. They are pretty self-explanatory
- Then connect your Google sheet and select the spreadsheet and sheet you want to work with. Keep in mind you should have already created a spreadsheet. If the first rows are headers, select that option for that information not to be overwritten
- In our case, we found the name of the event and the Google Meet URL and put them in two different rows
- Click on test flow to make sure it is working, and correct any errors that may appear
- You are ready to publish!

Publishing flows
By clicking on the purple publish button on the top right of your flow page, you can make your automation public, and if there are no errors it should be working.

Keep in mind that any changes you make won't be automatically published and you will need to do it manually.
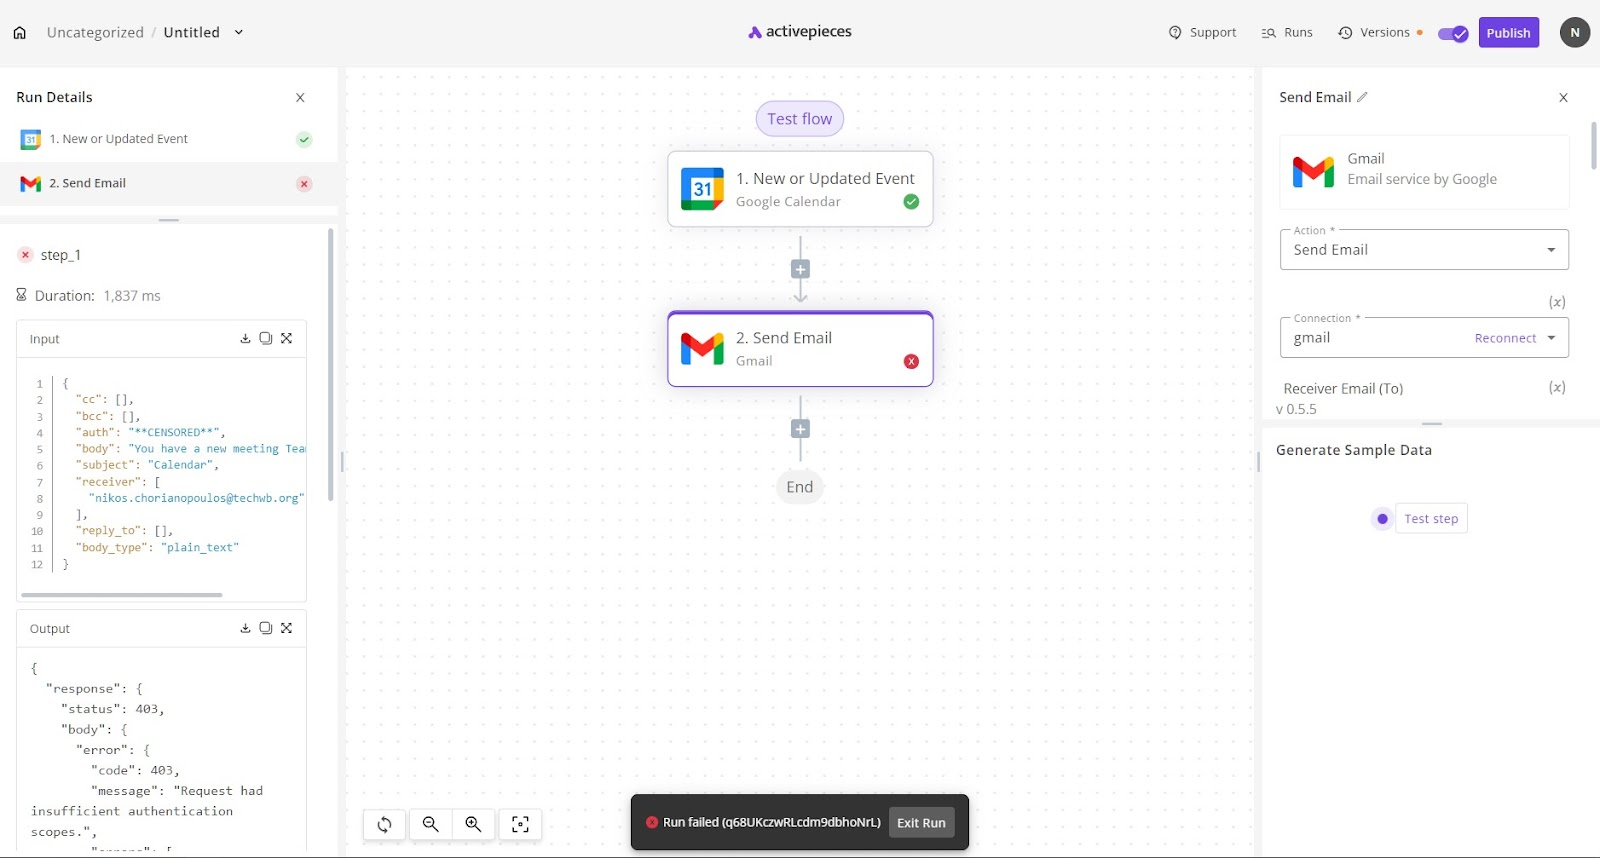
Debugging Runs
Ensure your business automations are running properly.
You can monitor each run that results from an enabled flow:
- Go to the Dashboard, click on Runs.
- Find the run that you’re looking for, and click on it.
- You will see the builder in a view-only mode, each step will show a green “tick” or a red “X” to indicate its execution status.
- Click on any of these steps, you will see the input and output in the Run Details panel.
Activepieces useful tips and tricks
Switching to Dynamic Values
Dropdowns and some other input types don’t let you select data from previous steps. If you’d like to bypass this and use data from previous steps instead, switch the input into a dynamic one using this button:
Accessing data by path
If you can’t find the data you’re looking for in the Data to Insert panel but you’d like to use it, you can write a JSON path instead.
Use the following syntax to write JSON paths:
{{step_slug.path.to.property}}
The step_slug can be found by moving your cursor over any of your flow steps, it will show to the right of the step.
This may be a little more advanced for some users without a familiarity with JSON paths and coding.
Other pages
- Runs: In the runs tab on your main Activepieces page, you can see all your flows, their status, when it started, and when it was finished
- Connections: In the connections tab, you can see all the different apps you have connected to your Activepieces account, their status, when the connection was first created, and when it was updated
From this page, you can make a new connection by clicking on the purple button with the same name on the top left or delete a connection by clicking on the red trash can icon.
- Team: On the team tab, you can see all the project’s members. You can see their email, their role, status, and when they were invited to the project
You can also invite more members by clicking on the purple “+invite “ button on the top right.
- Settings: On the settings tab, you can find a variety of settings for your project such as a custom domain for your platform or create custom emails for your users
- Support: By clicking on the support page you are taken to the Activepieces community page where you can see a vast variety of help about the platform
- Docs: On the docs tab, you can find all sorts of documentation regarding Activepieces and how everything works
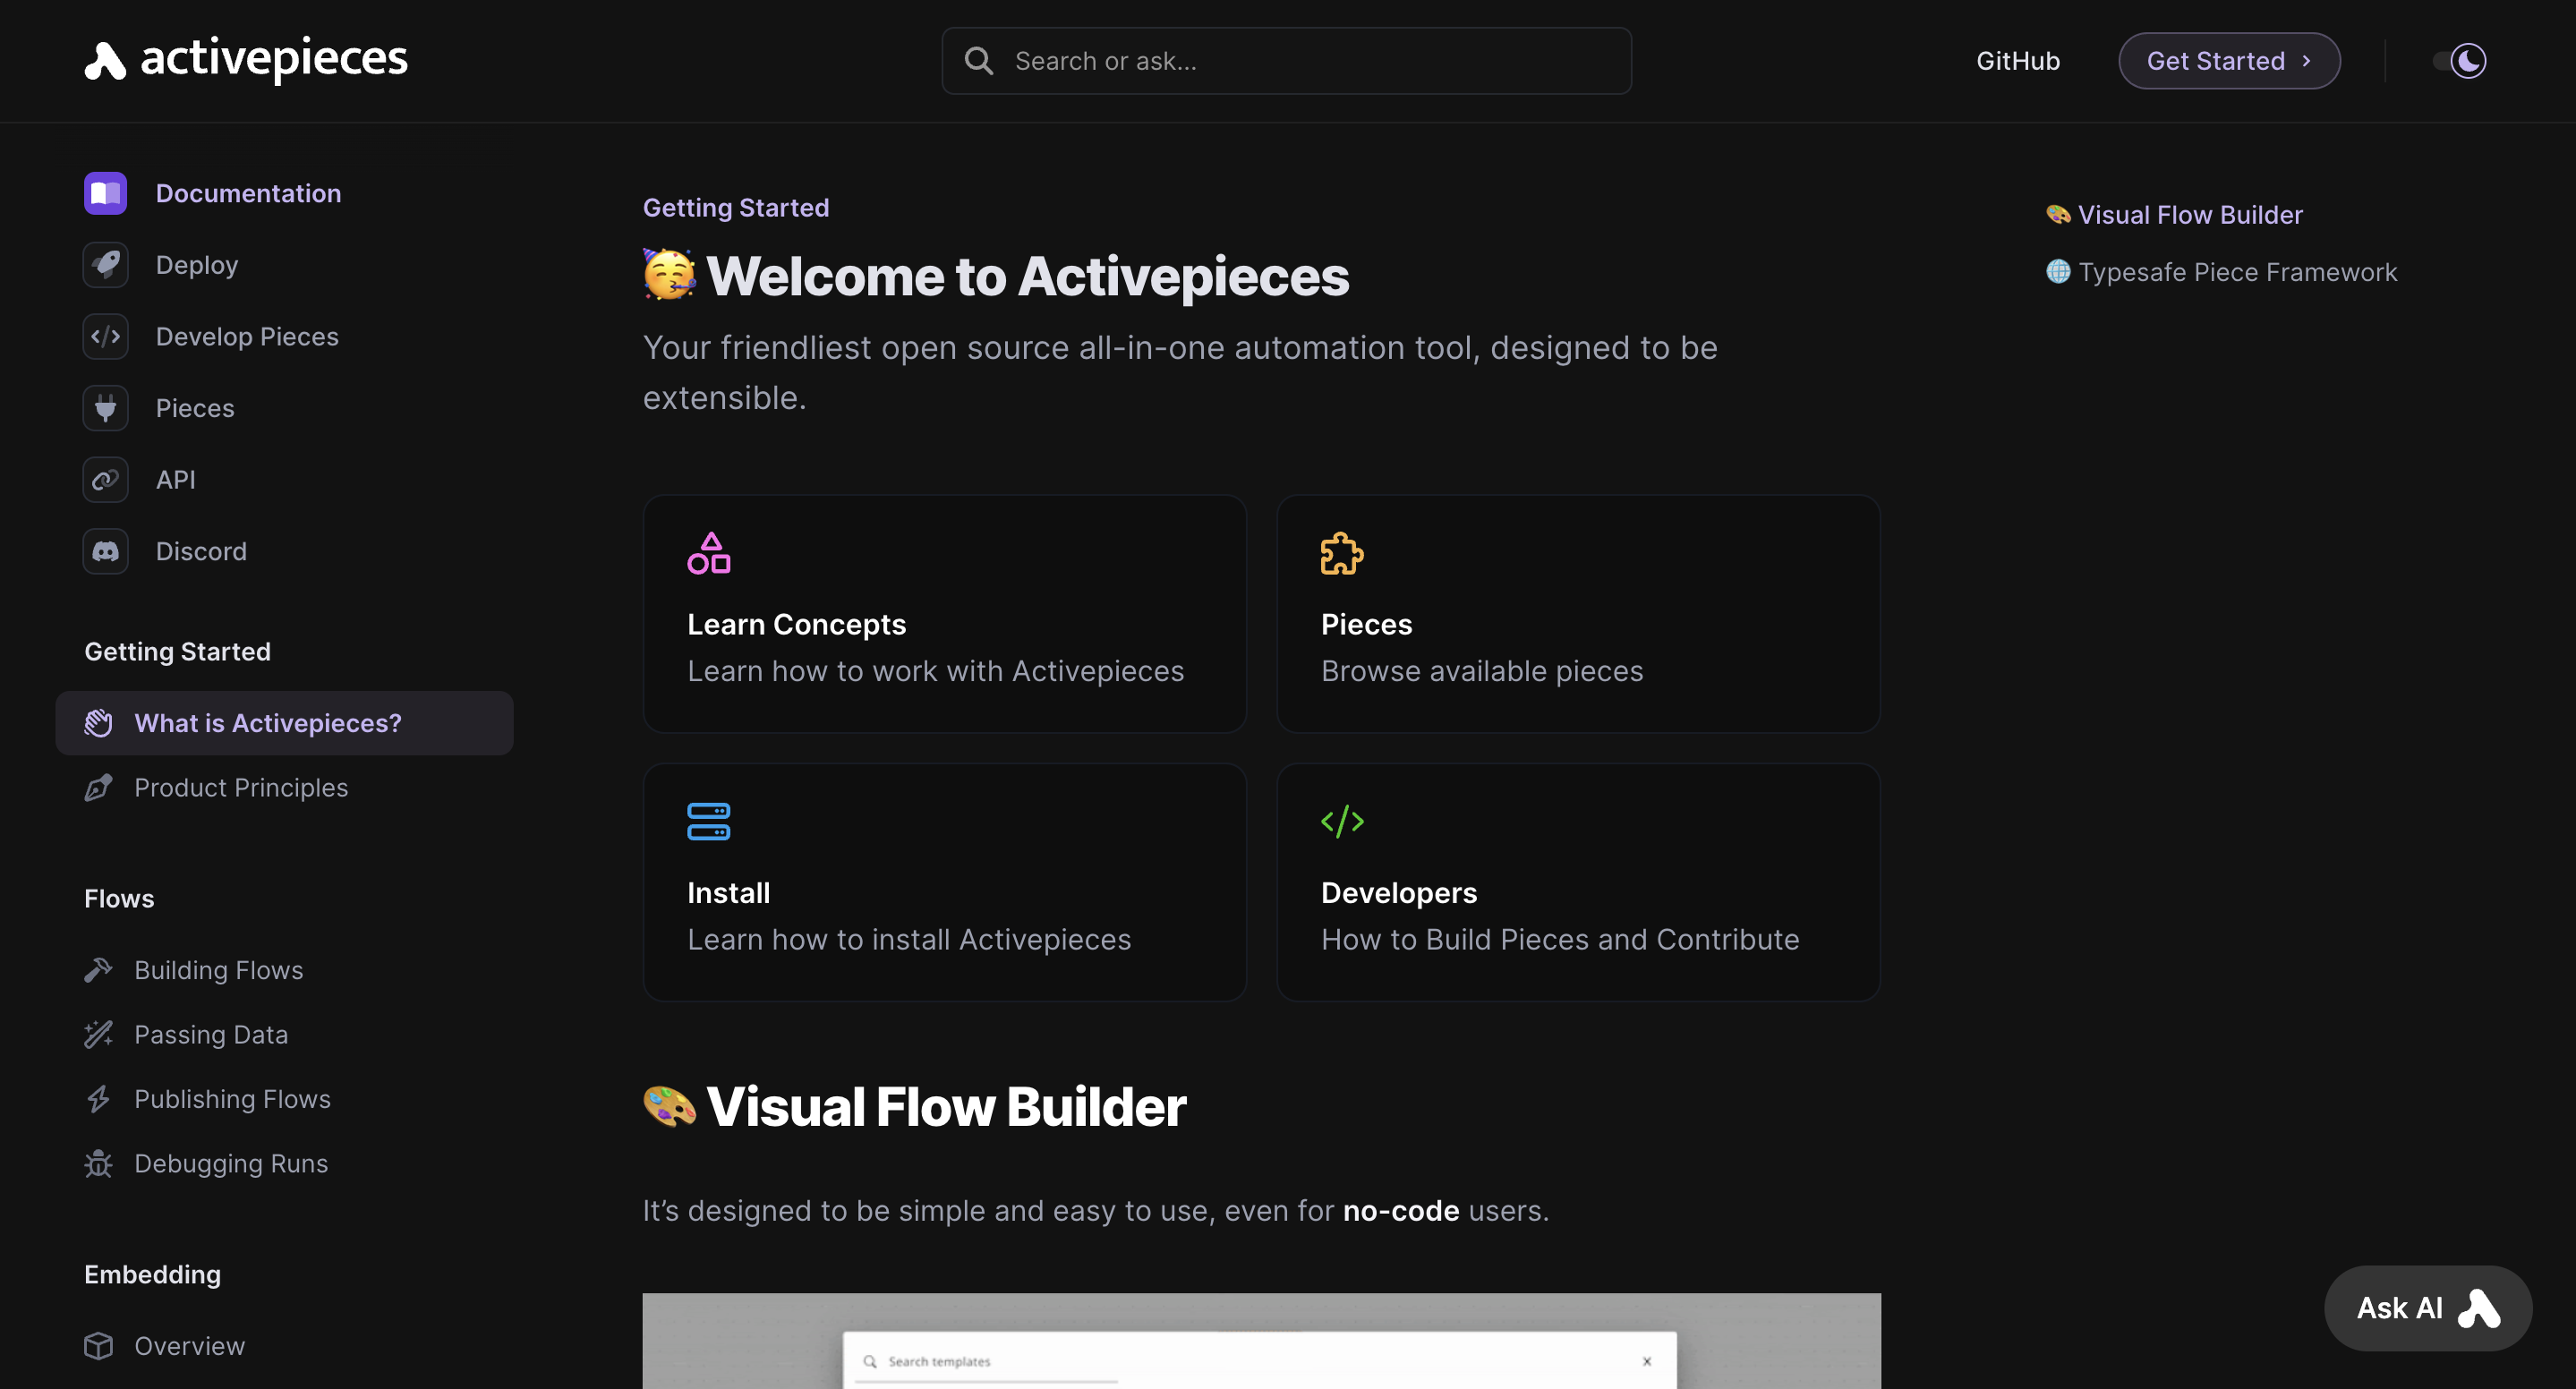
The docs are a great way of getting the main idea of the platform and the basic knowledge you need to get started.
Tools
Activepieces offers a lot of different tools to help you automate your work, calling them pieces. Some popular no-code tools are:
Conclusion
In conclusion Activepieces is a great tool for automating your business and making your life easier and simpler. Make sure you check out our other blog posts regarding Activepieces and many other no code tools. You can find more information about Activepieces on its Official Website and their Community, along with countless Tutorials.
If this article has piqued your interest, we recommend checking out our comprehensive overview of the Activepieces. You can also dive into our detailed instructions on how to learn to maximize the benefits of this platform.

