Introduction
Shopify is an e-commerce platform that allows you to create an online store without knowing how to code, using no-code. You can create an online store for your existing brand or an online business. Shopify is easy to use with a very user-friendly platform.
In this article, we will see how you can create your own Shopify e-commerce website and a demo example of a print-on-demand apparel store.
We will also talk about the different admin settings of the platform.
If you want to learn more about Shopify or read an external overview you should check our other articles about Shopify:
Getting Started with Shopify
Upon Creating a Shopify Account you are prompted to choose a subscription plan of your choosing or choose the trial that lasts for 4 days to get things started.
All available plans are listed for only 1€ for the first month as a signing feature.
There are different plans for all your needs starting from only 5€/month up to 2,300€/month. It is important to note that to publish your store to the public you need to choose a plan that fits your needs.

Building Your eshop with Shopify
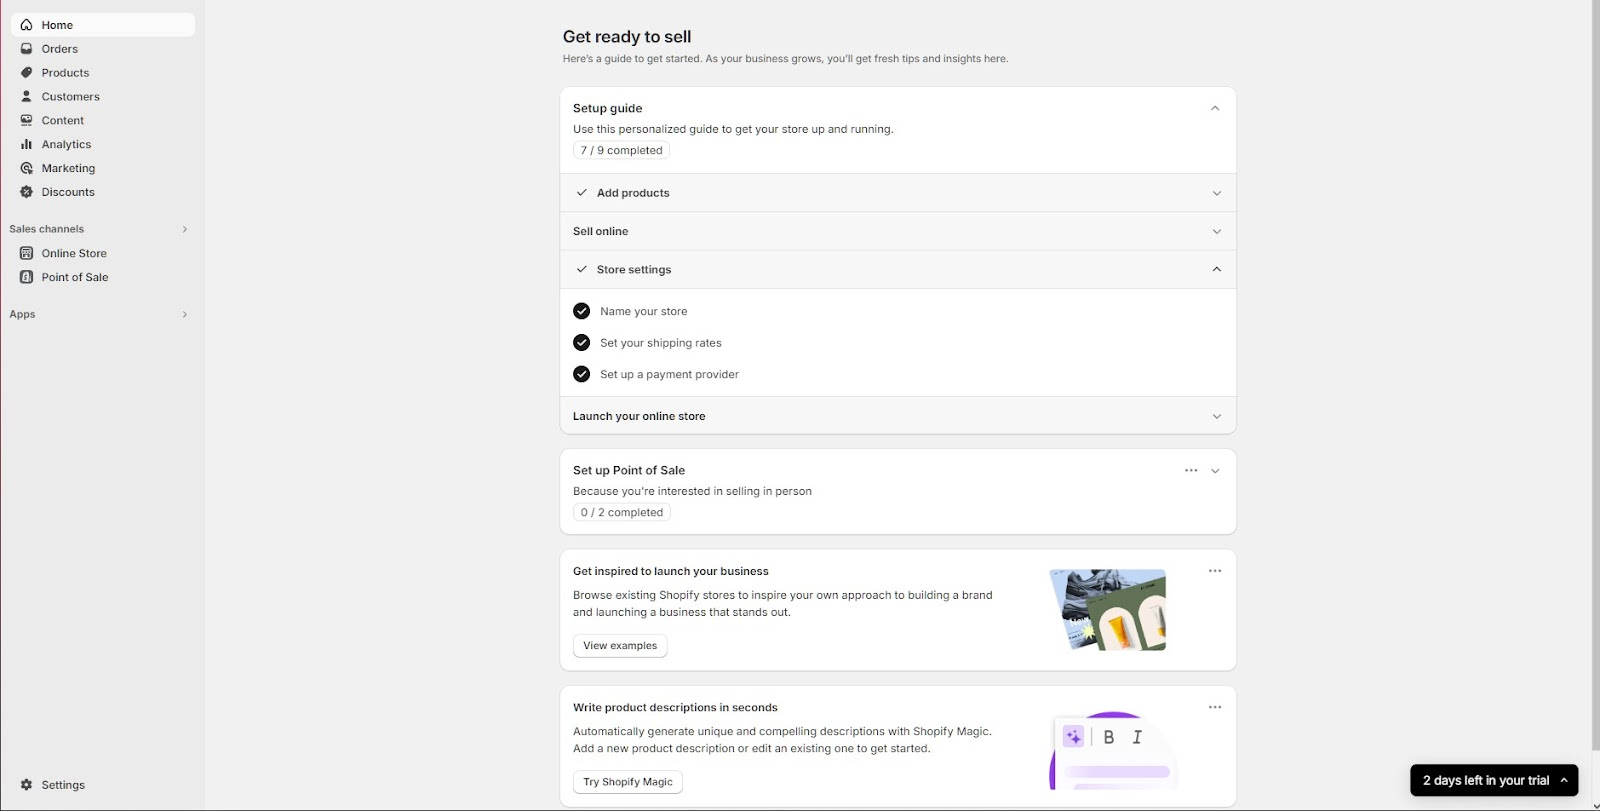
After you’ve created your account you are redirected to the home page where you can find a personalized guide to get your store up and running.
This 9-step guide helps you get your online store ready to go and make your first sale.
Creating Essential Pages
Products
Your first steps are to add your first product to your store and find a way to sell the product. For instance, a print-on-demand apparel store as seen in the “How to make a print-on-demand apparel store” below, or your products, managed by you.
Store Theme
Your next step is to customize your online store by choosing a theme, a logo, colors, and images to reflect your brand. There are tons of free themes you can choose from, that you can personalize to your needs, as well as paid themes.
Shopify offers a very hands-on customization tool that is easy to use and needs no expertise in coding or website building. More about shop customization in “Customize your online store” below.
Domain
Now, it’s time to pick a custom domain for your website and therefore a name for your brand. The domain is the initial website where people can find your store and the brand name is your identity.
You can buy a custom domain through Shopify’s setup guide or connect your store to an existing one.
Shipping
After naming your store and picking a domain, you have to set your shipping rates and pick a payment provider to start accepting payments.
Remember that you can edit your general shipping rates and zones at any time and offer free shipping if you choose to. Shopify offers a vast selection of tutorials to help you.
You can identify them by the blue book icon.
Payment method
Your last step is to choose the payment method you prefer from the preexisting ones. Choose the one that best fits your needs.
Launch your online store
After completing the setup guide you’re ready to publish your store and start selling. It is recommended you play around with the settings, customize your account and store it in your way to make it the way you like.
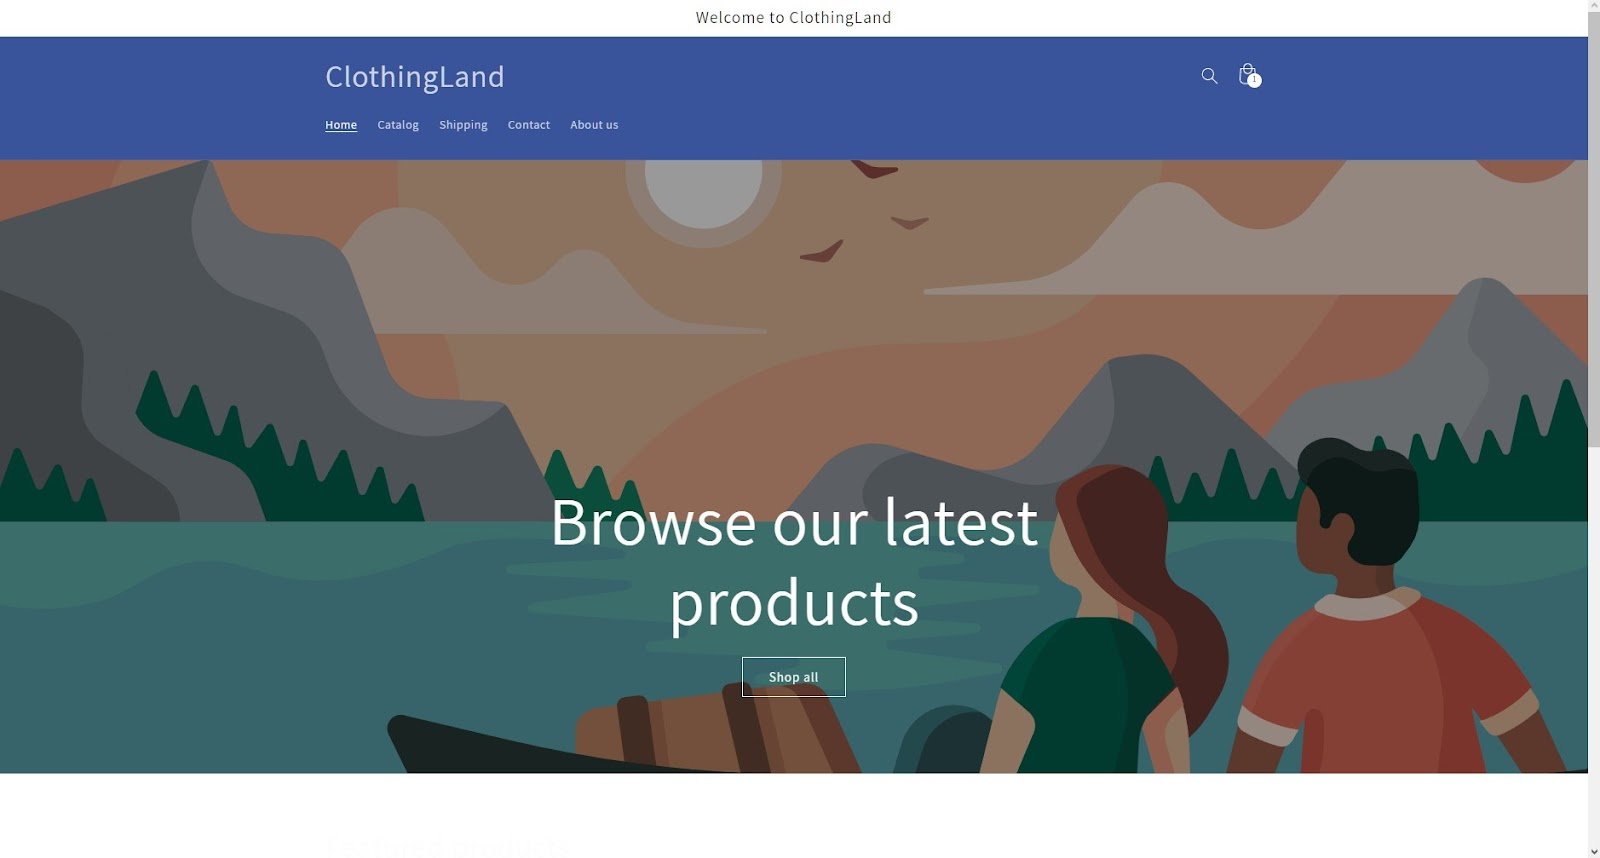
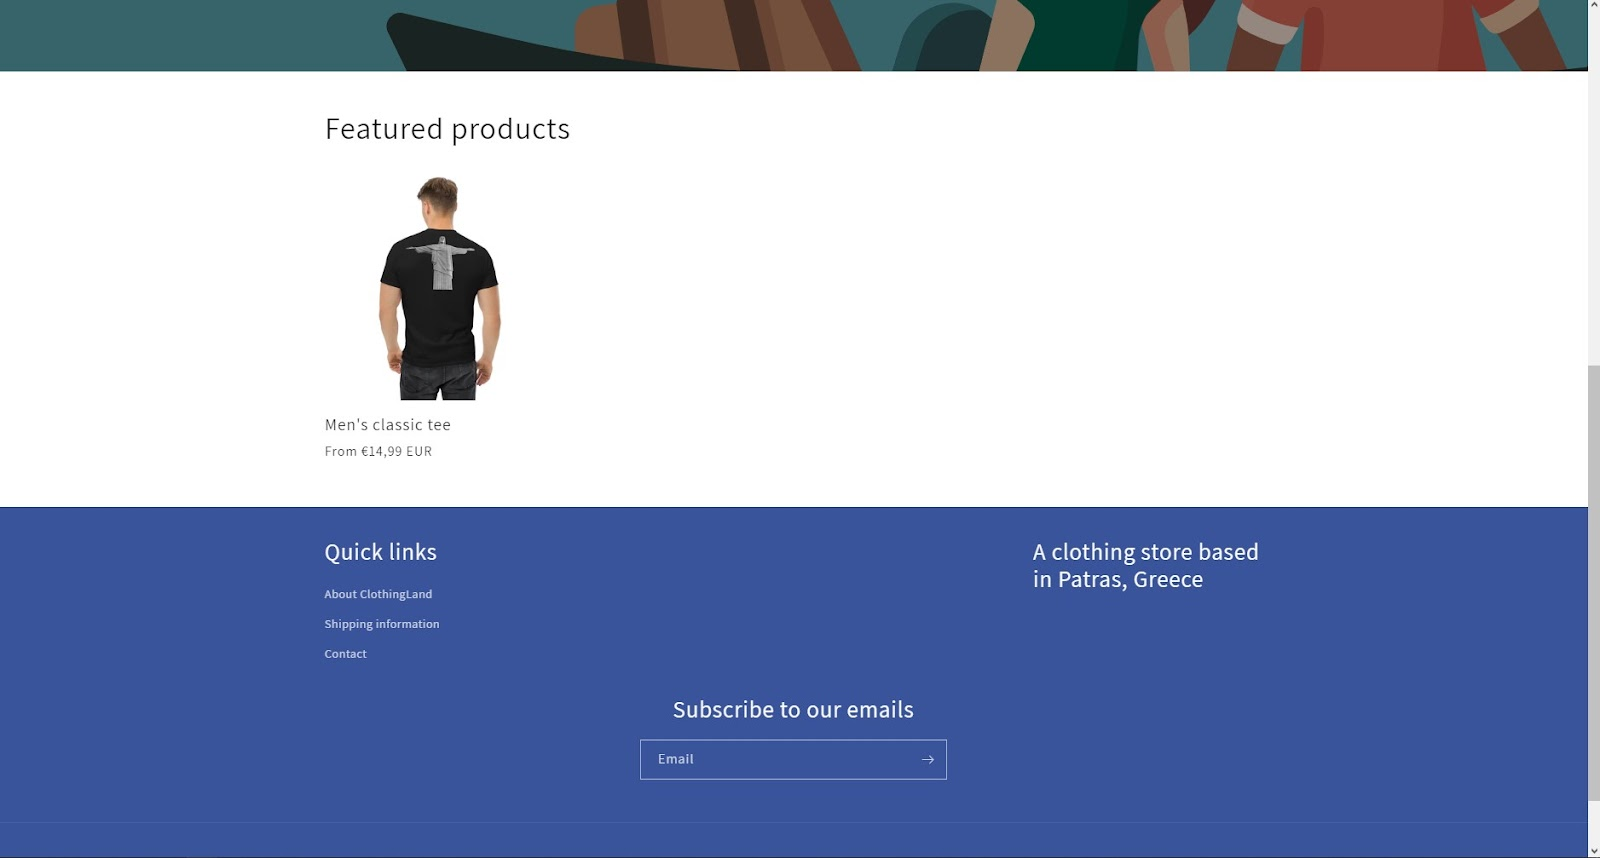
A finished store could look like this.
Making Your Website Shine
Customize your online store
By navigating to the Online store tab on the left of the home screen you can access different parts of your website such as:
- Themes
- Blog Posts
- Page
- Navigation
- Preferences
Themes
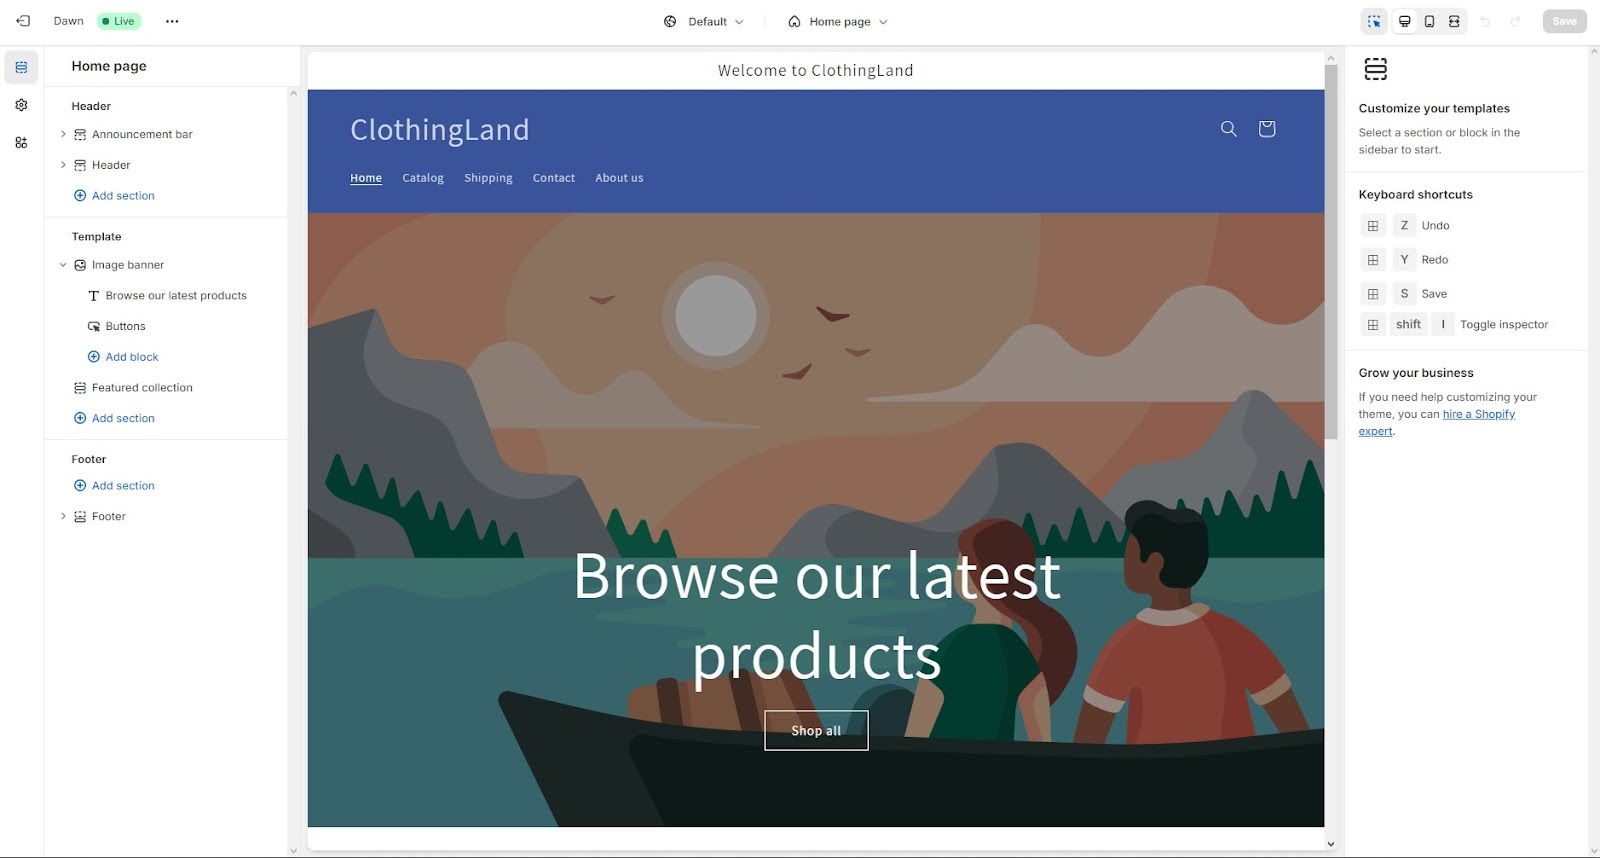
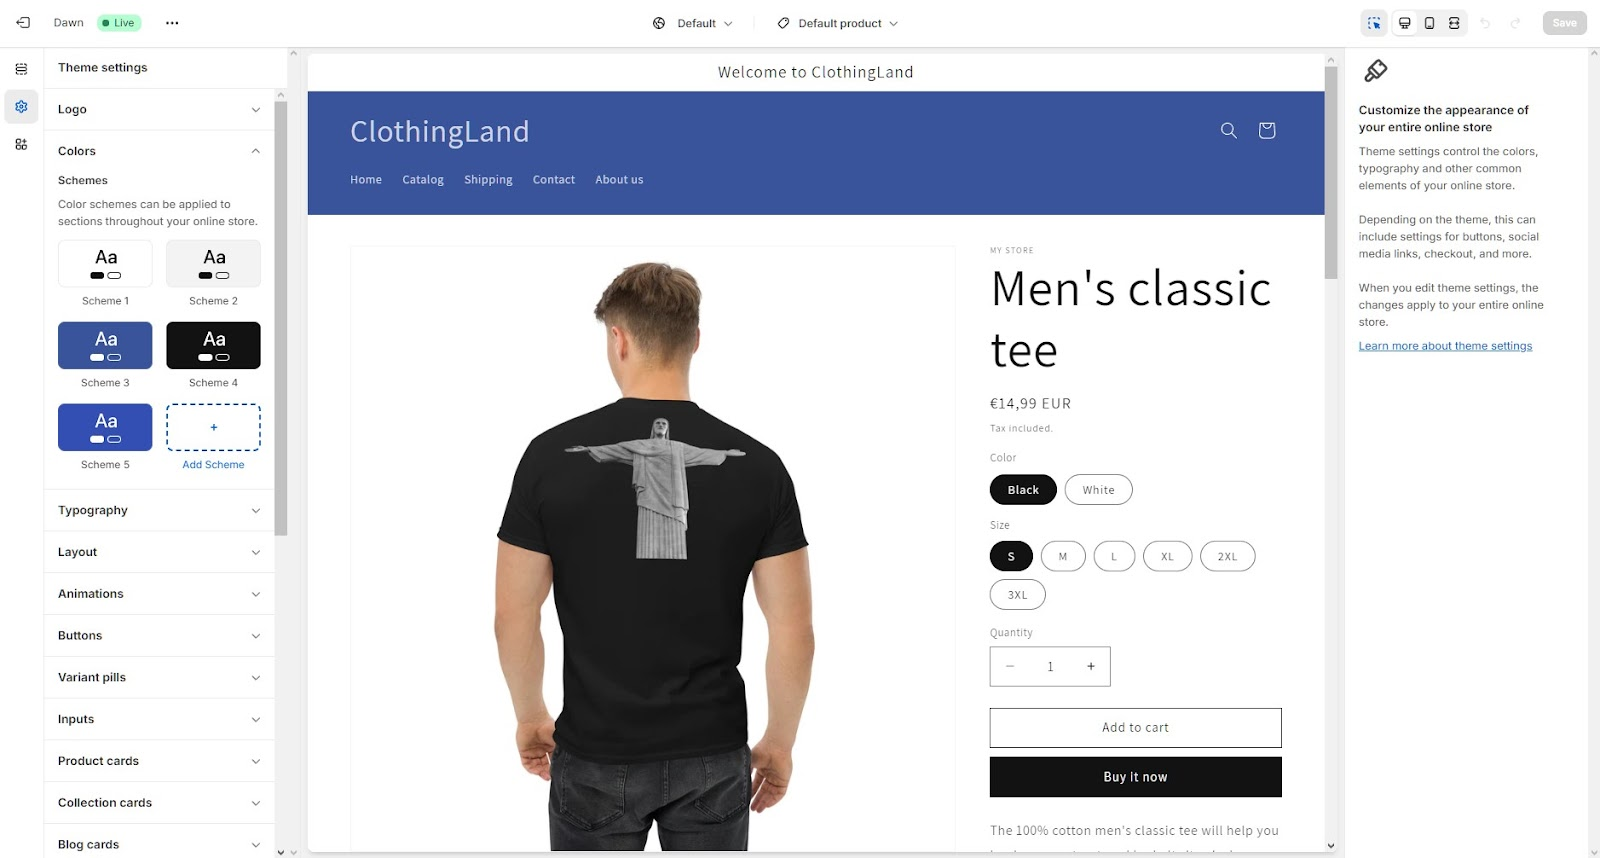
The themes tab is the main area where you can customize the looks of your website as much as you like. Choosing from a variety of themes and templates to start from and then digging deeper into the personalization of your site to your liking. By choosing one of the templates from the Shopify Theme store, Shopify creates the basic site for you, allowing you to focus on selling your products.
When customizing a theme you have the option to add Headers, Footers, Announcement bars, Images as well as embed apps into your website. You can add your logo, change the colors, the typography, the layout, animations, buttons, blog cards, search behavior, and much more all through the easy design tool provided inside Shopify. You have full control of the way your website looks and feels.
Blog Posts
Blog posts are a great way to build a community around your products and your brand. You can create blog posts to include in your website with a simple click. Write your post and insert it into your site from the theme customization menu as simple as that.
Pages
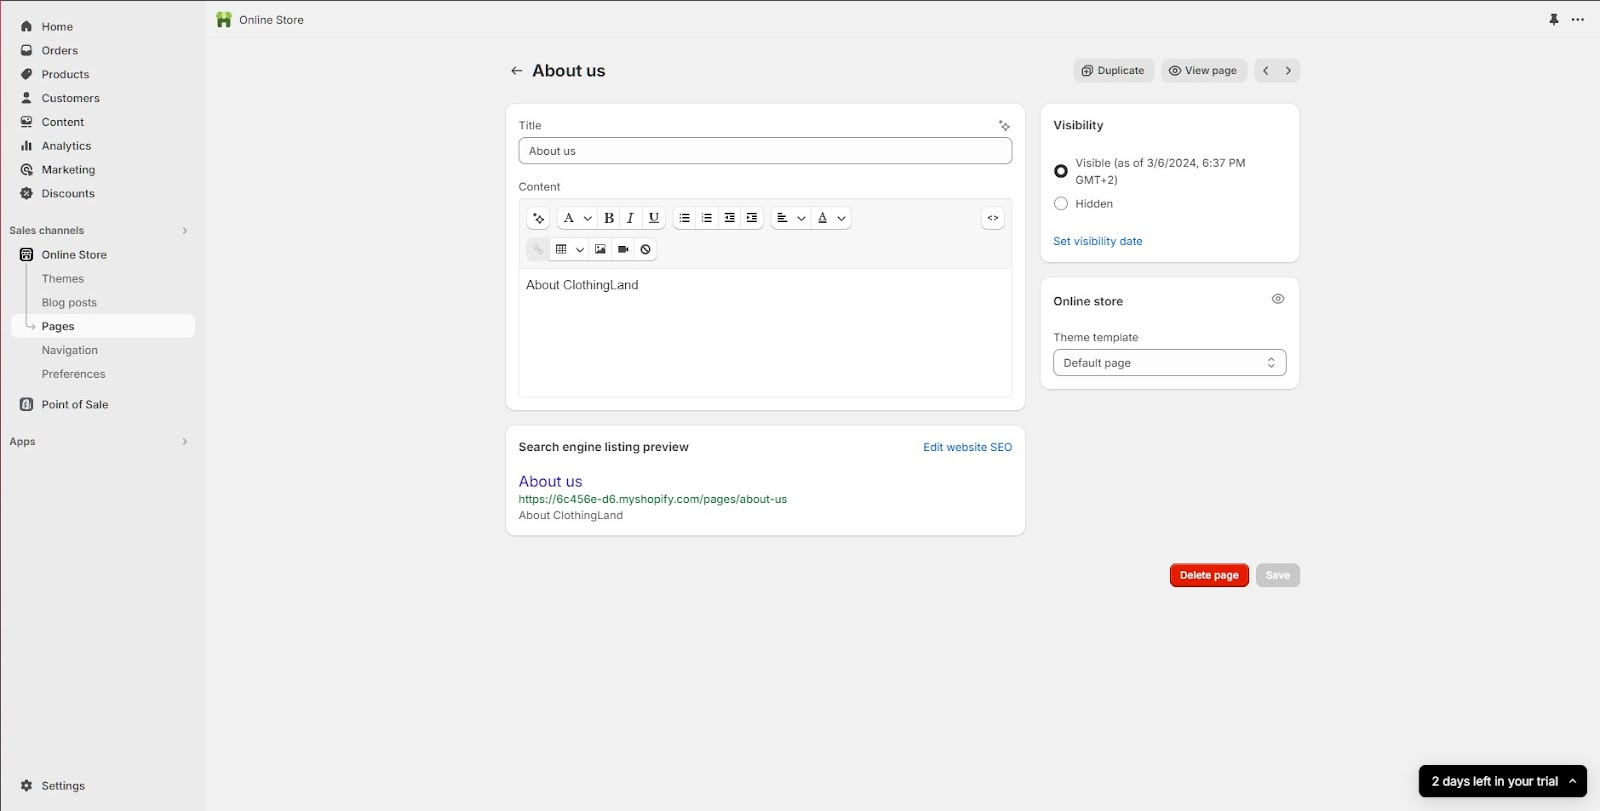
Pages contain information that rarely changes or that customers will reference often, like an "About Us" page or a "Contact Us" page. You can add an "About Us" page to your online store to tell the story of your business, and help your customers connect to your brand. When you write your "About Us" page, you should include information about your business, products, or customers that will motivate your customers. Consider including the following:
- What you sell - anything that makes your products unique
- Why you sell it - your company mission or values
- Who you are - your company, your founder, or your producers
- Who you're selling to - your approach to customer service or customer satisfaction
- What makes your business stand out - specific expertise, customer testimonials, or additional services

Navigation
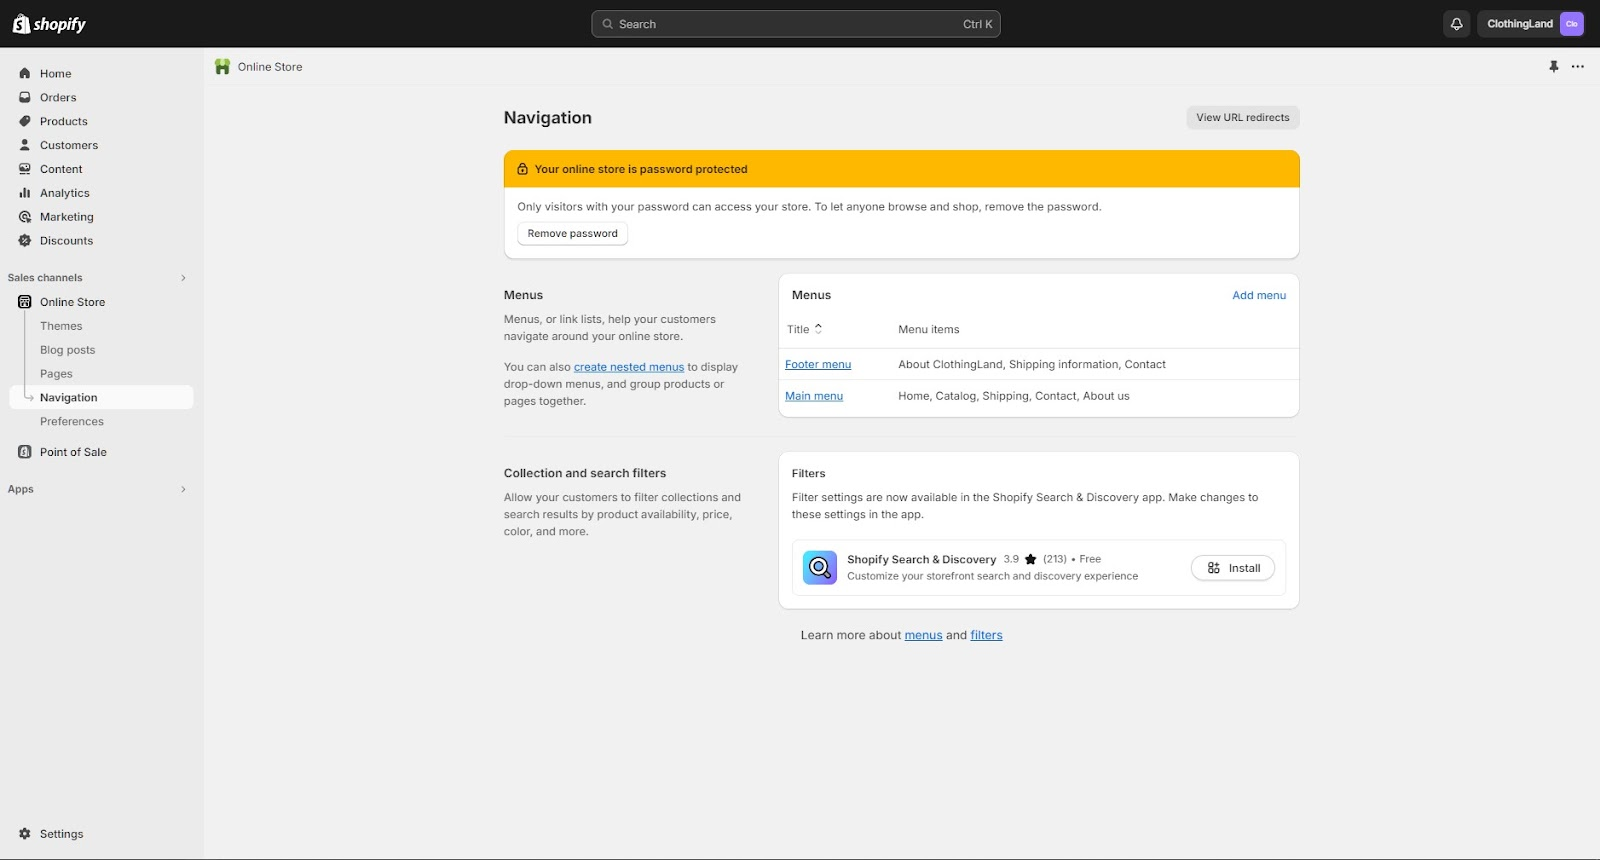
In the navigation tab, you can manage the menus and filters of your website. Menus, or link lists, help your customers navigate around your online store. You can also create nested menus to display drop-down menus, and group products or pages together. Filters allow your customers to filter collections and search results by product availability, price, color, and more.
From here you can add your pages to the Header of your page or any other menu you have created. The page will be automatically added to your site’s menu when you choose it from the navigation tab, there might be a small delay until it appears on the published site for a minute or two.
Preferences
On the preferences tab, you can
- Define how your store shows up on search engines through the title and meta description
- Set a custom image to be shown when someone shares a link to your website
- Connect with Google Analytics to track the visitors to your store and generate reports that will help you with your marketing
- Connect Facebook pixel
- Protect your website with a password until it’s ready for the public to view
- Protect your store from spam and abuse by enabling Google reCAPTCHA. This may require some customers to complete a reCAPTCHA task

Publishing and Going Live
Shipping and delivery
Before you take your first order, you need to decide what shipping methods you want to use, and then set up your store's shipping so that your customers can choose a delivery method at checkout. The delivery methods that you choose depend on what applies to your business and what kind of physical goods you sell. The three main methods are shipping, local delivery, and local pickup. Your business can use any of these methods to deliver your products.
Shipping can be one of the more complex parts of a business to set up and manage. It can also be one of the biggest costs that you have per order, and it can be difficult to know how much of that cost to pass on to your customers.
After you understand how shipping works in Shopify, you can configure your shipping settings, such as shipping rates, shipping zones, and shipping profiles.
Shopify: Print-on-Demand Apparel Store with Printful
Choose a Print-on-Demand App:
- Install a print-on-demand app from the Shopify App Store. We’re going to use Printful
- Connect your chosen print-on-demand app to your Shopify store. Follow the app's instructions for integration
Design Your Apparel:
- Create or upload your designs using design software like Adobe Photoshop or Illustrator, or find a free one online
- Ensure your designs meet the print-on-demand app's specifications for size, format, and resolution
- Alternatively, many print-on-demand apps offer design tools and mockup generators to help you create designs directly within their platforms like Printful does
Designing a simple t-shirt using Printful:
By pressing Add Product on the main screen, you can choose from a variety of existing products:
- T-shirts
- Sweatshirts
- Trousers, etc
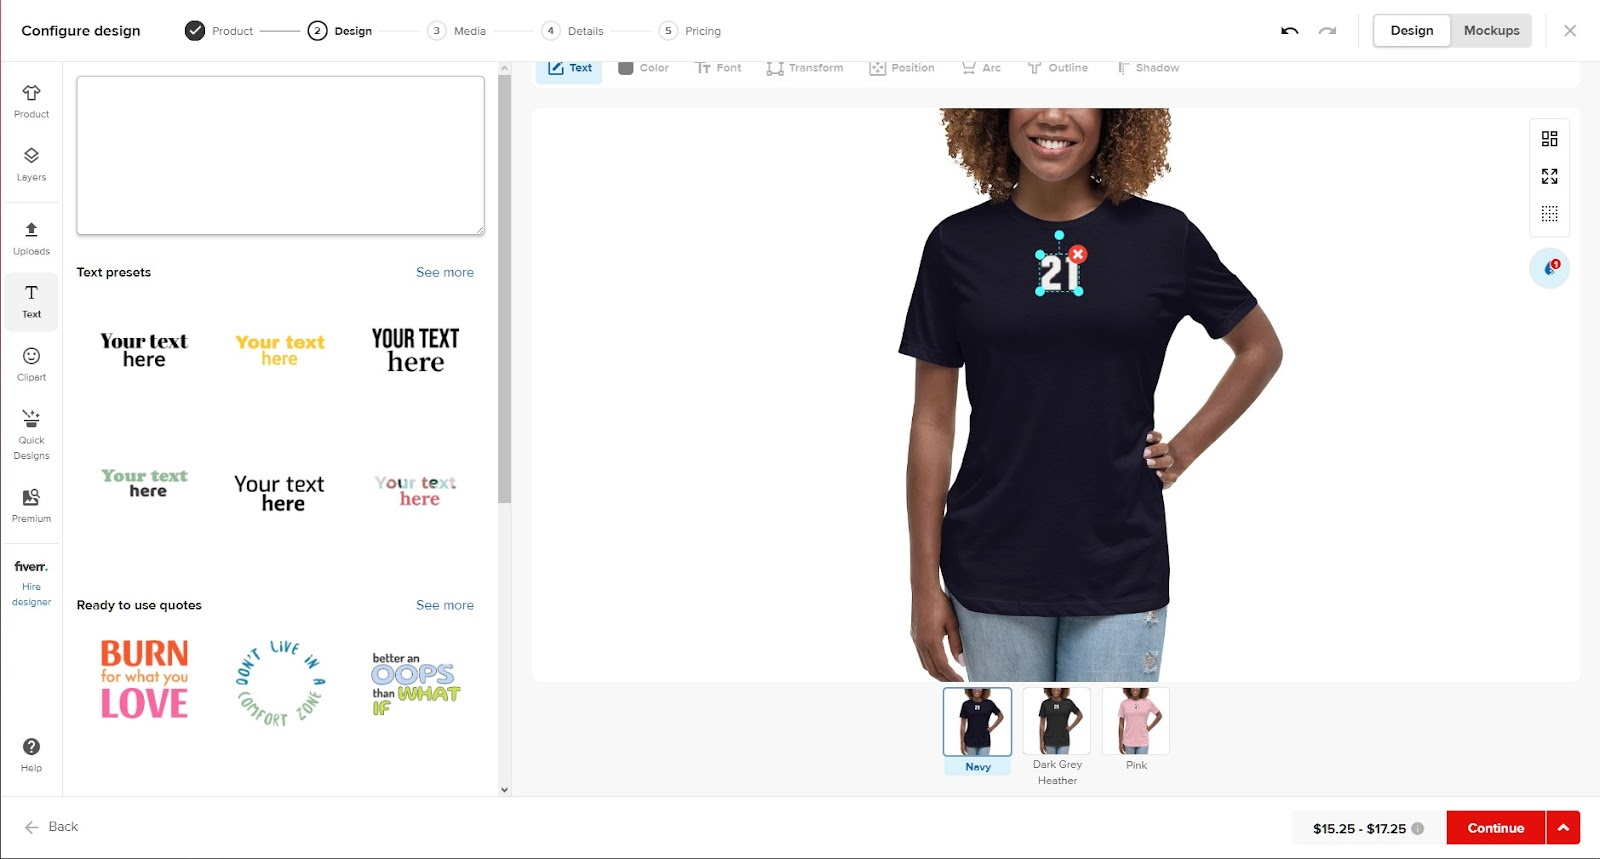
When you have chosen a product you like, you are redirected to a design configurator program built into Printful that is easy to use and understand.
You can either upload your design or choose from a variety of pre-made ones inside the print design tool.
After creating the product you want, you are going to make a mockup for presenting the product at your store. You can do this by following the instructions inside Printful’s design tool.

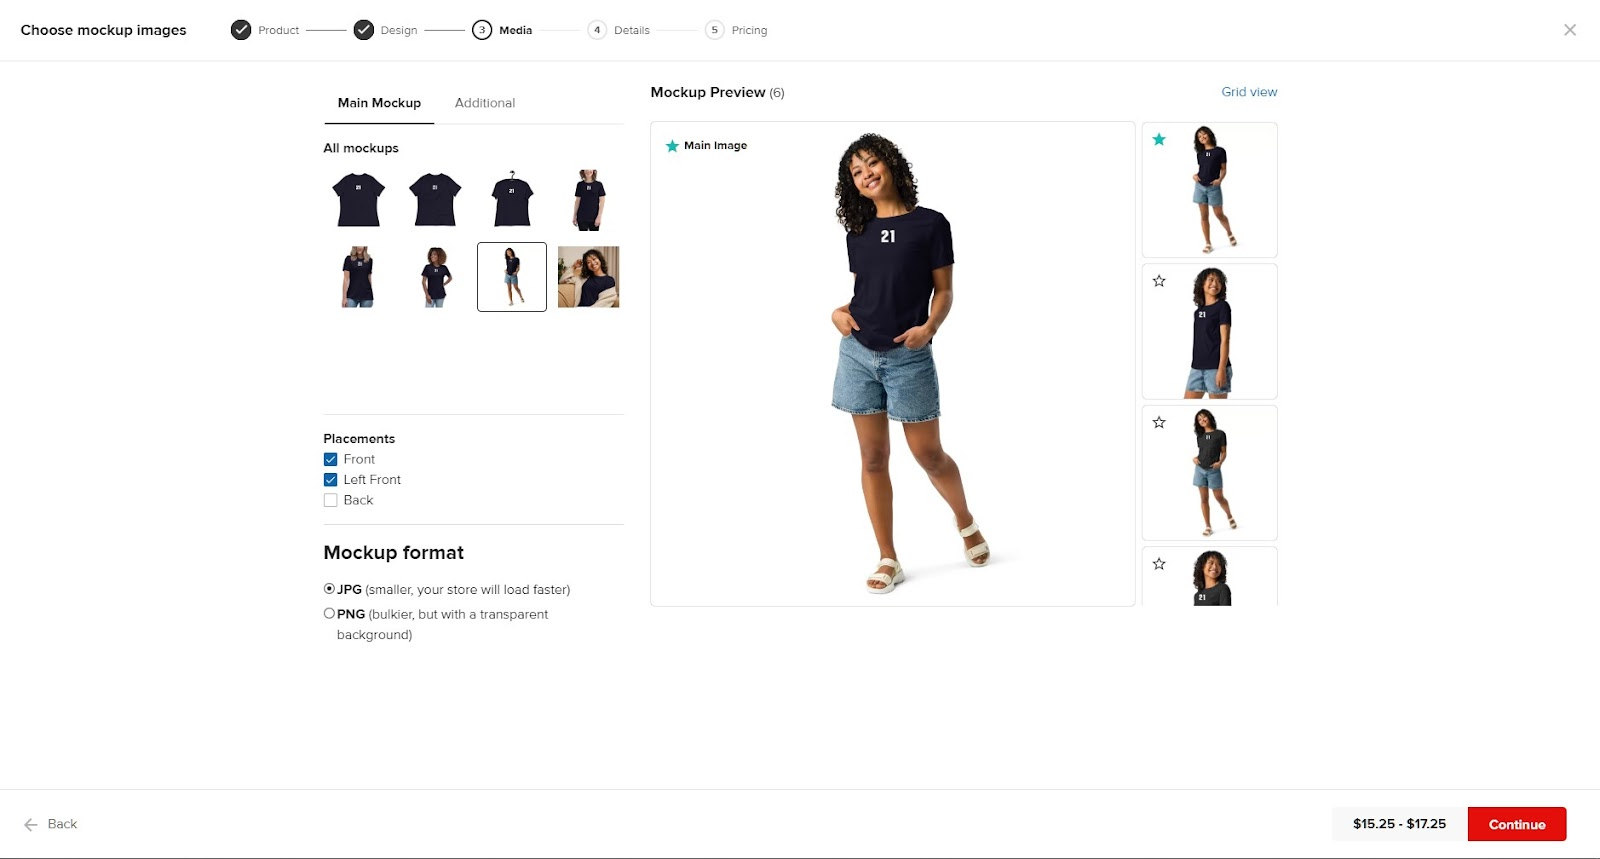
Then you are asked to provide details about your product (i.e. size chart, fabric, etc.) and choose a retail price.
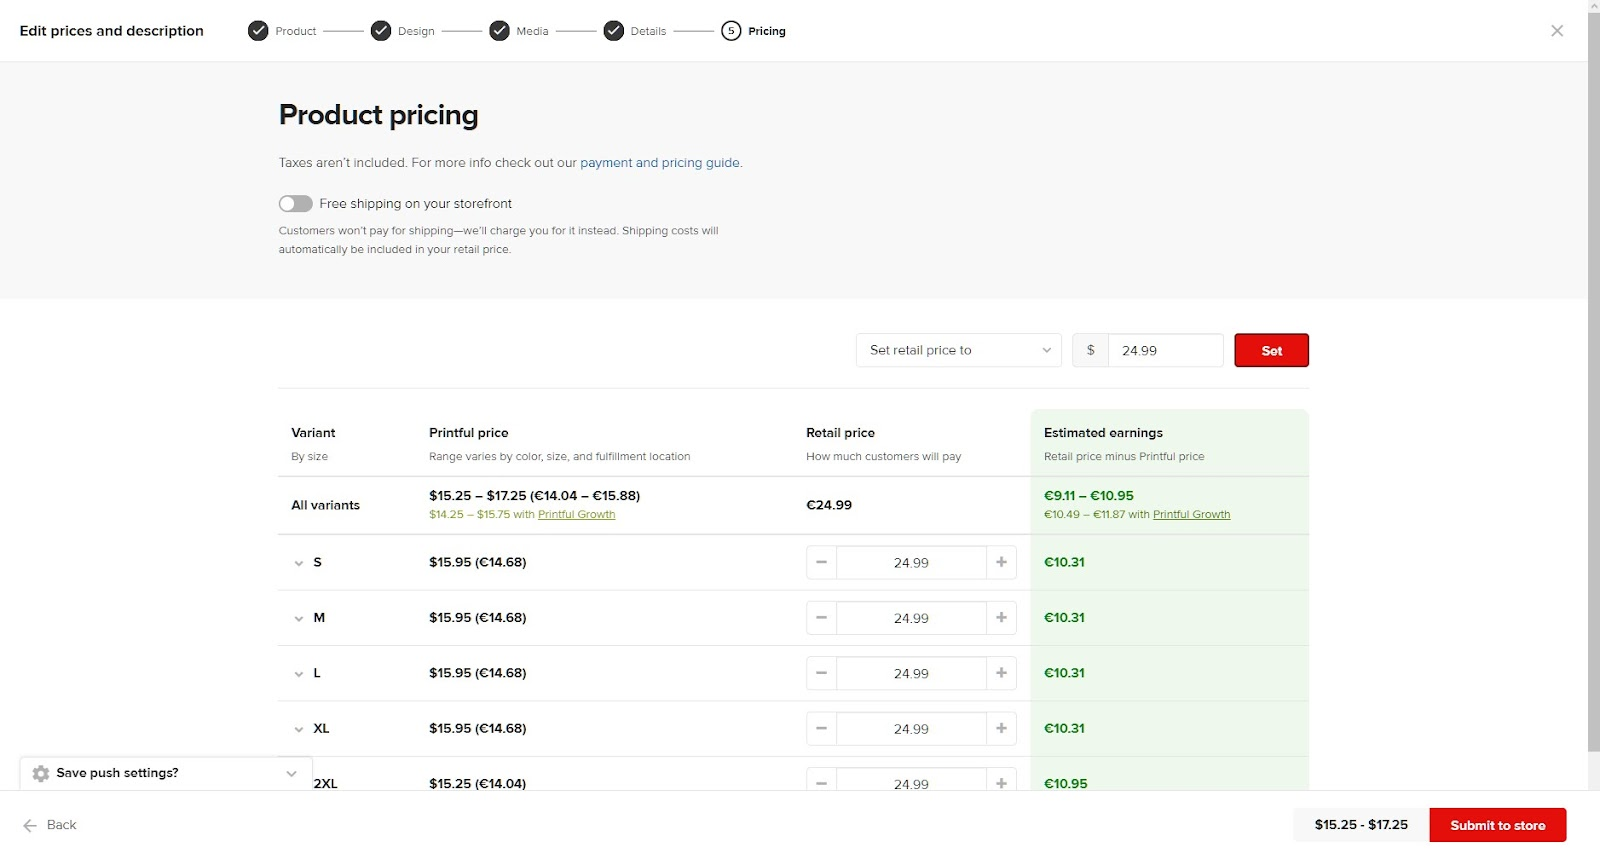
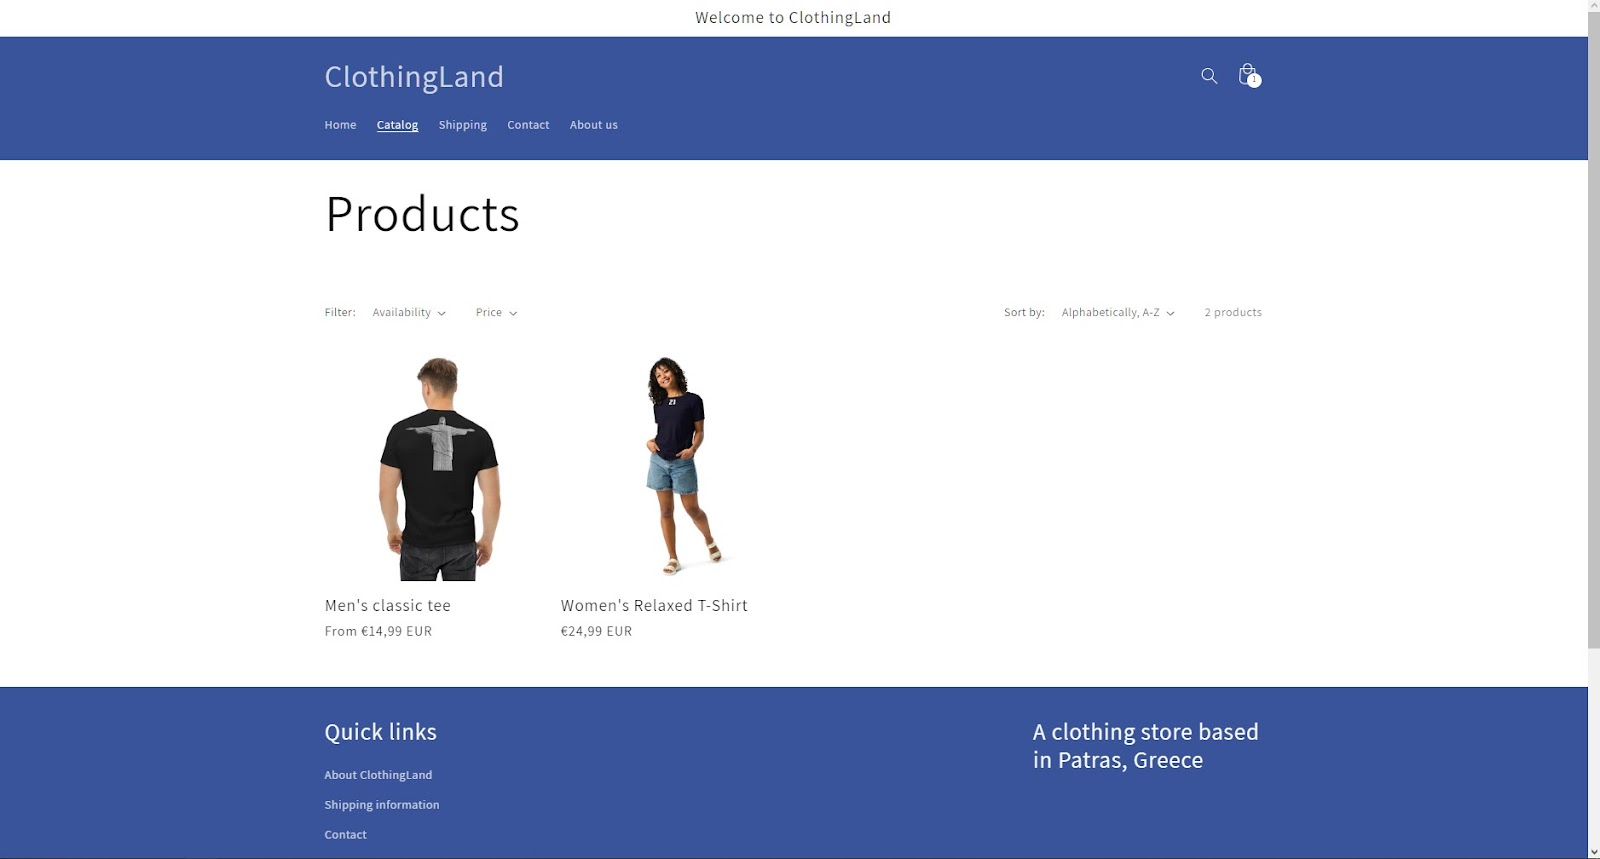
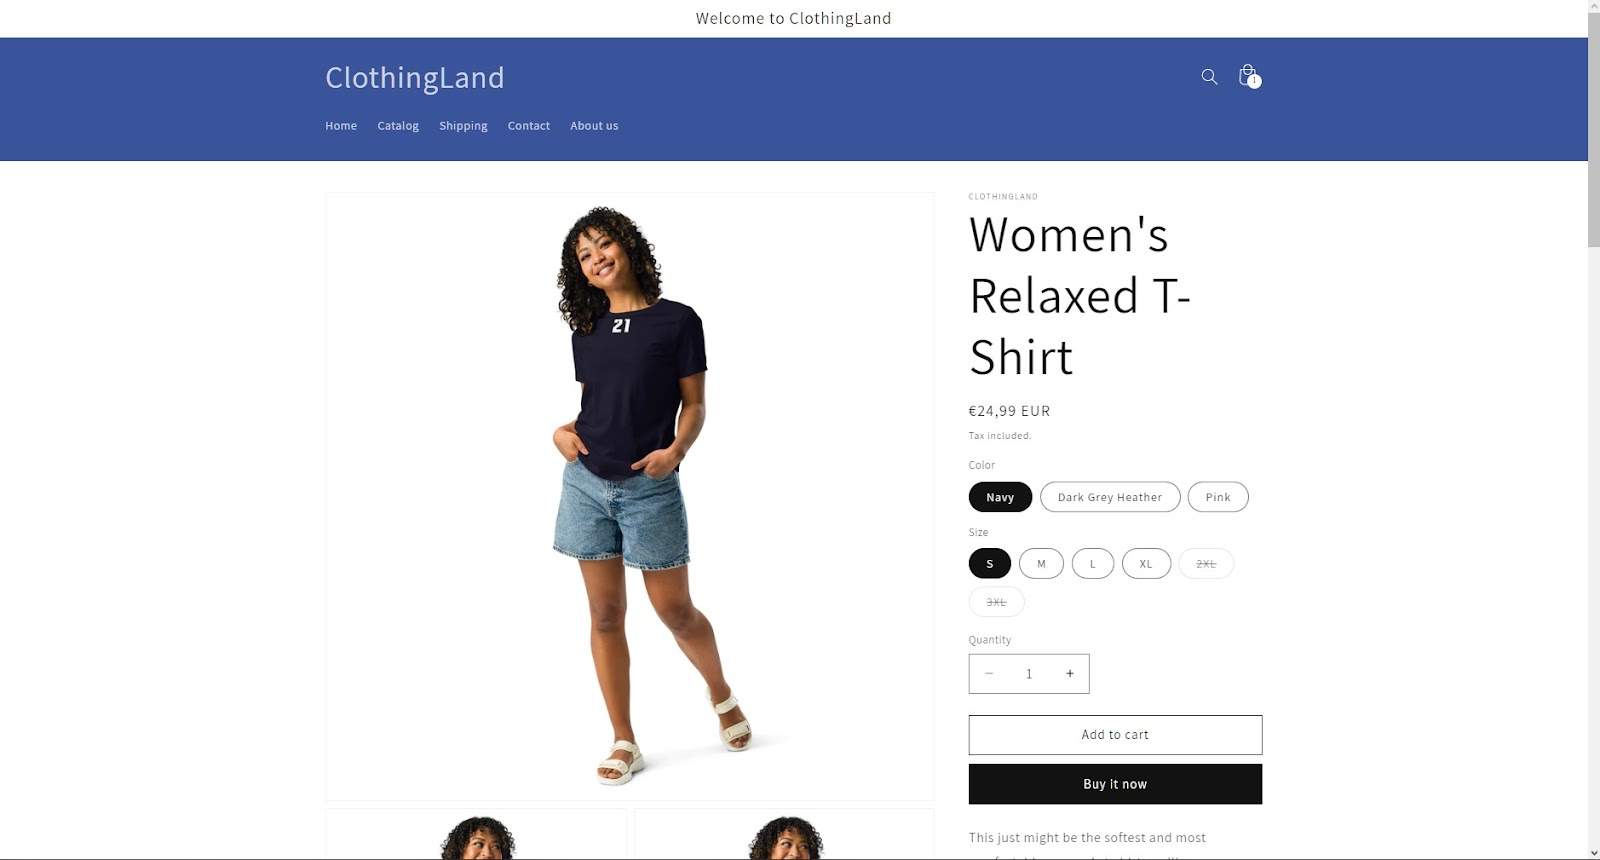
After you are done creating your product, press submit to the store. Your product will automatically be added to your Shopify products page and your Shopify store, as seen in the pictures below.
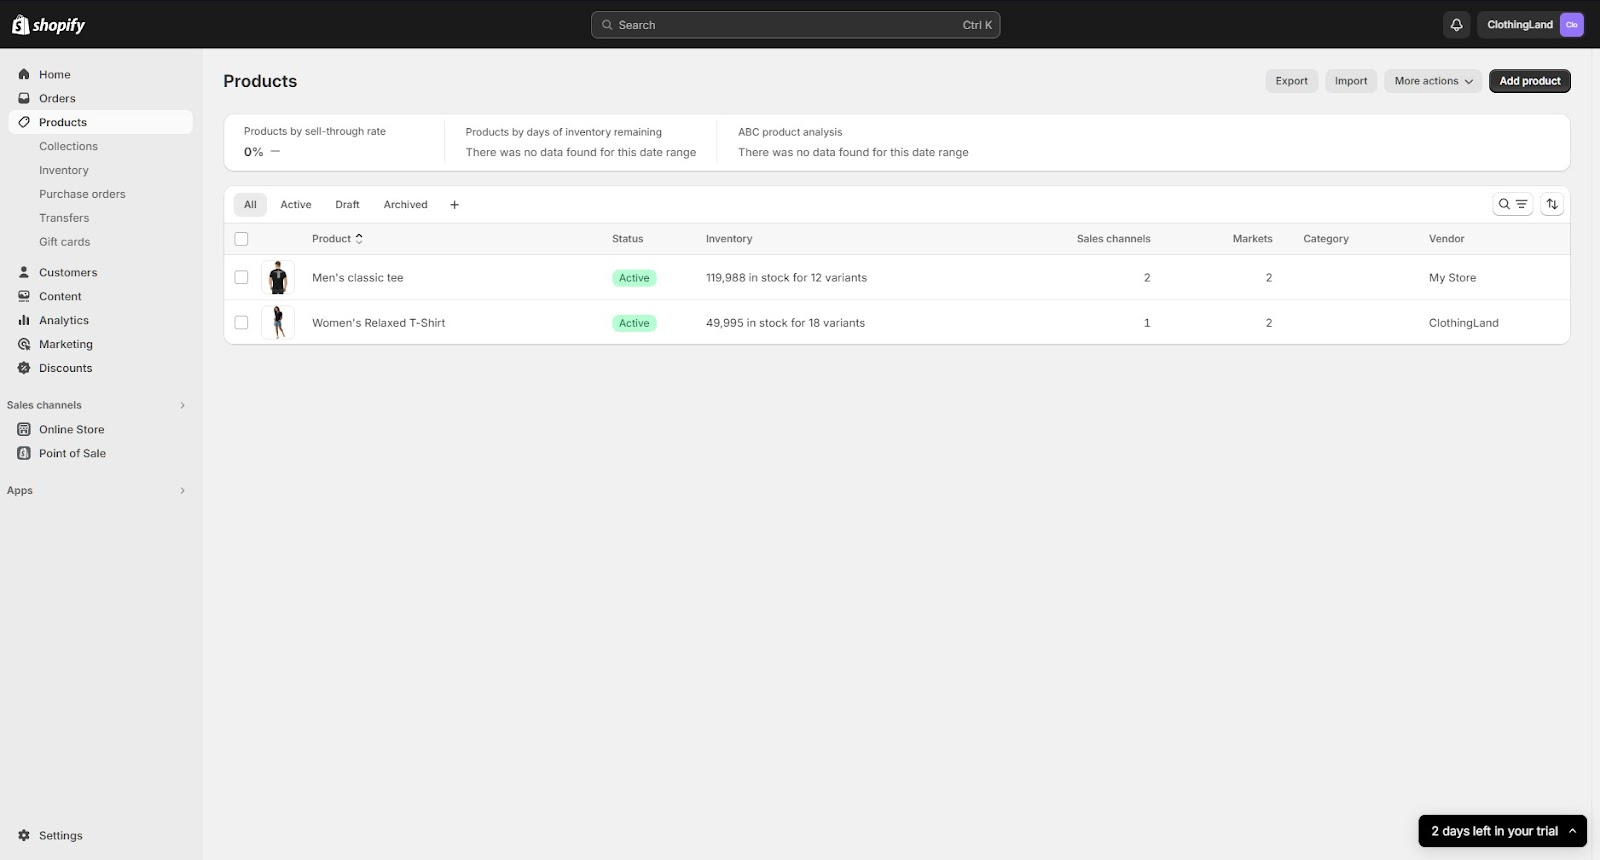
That’s it, you have created your first product on Shopify using Printful!
Beyond the Basics
Different settings
On the bottom left of your home screen, you can find the settings menu where you can change and manage your store and the user experience. Some settings are:
- Billing
- Users
- Payments
- Checkout
- Customers
- Shipping and delivery
- Notifications
- Customer Privacy
- Policies
If this article has piqued your interest, we recommend checking out our comprehensive overview of Shopify. You can also dive into our detailed instructions on how to learn to maximize the benefits of this platform.

