Webflow 101: A Guide for beginners to Building Stunning Websites
Intro
Webflow is a popular no-code web development and hosting platform that allows you to create beautiful and functional sites without any coding knowledge. Its user-friendly drag-and-drop interface enables you to design websites visually, while clean code is automatically generated.
This makes Webflow an excellent choice for anyone looking to build websites of varying complexity quickly and efficiently.

Begin your Webflow journey with our essential resources:
Getting Started with Webflow
To start building a new site, simply click the “New Site” button on your dashboard. All your projects will be displayed in the “All sites” section on the left panel, where you can manage and organize them into folders, or sort them as needed.

The “Tutorials” section offers an interactive step-by-step guide for building basic layouts and suggests additional tutorials and guides from Webflow University.
Building Your Website with Webflow
Once you click the “New Site” button, a new project will be created and the Designer will open. Before you start building, you need to choose whether you want to start from a blank page, a template, or follow a tutorial.

If you want to start from a template, you can browse through the selection and choose the one that best fits your needs and preferences.
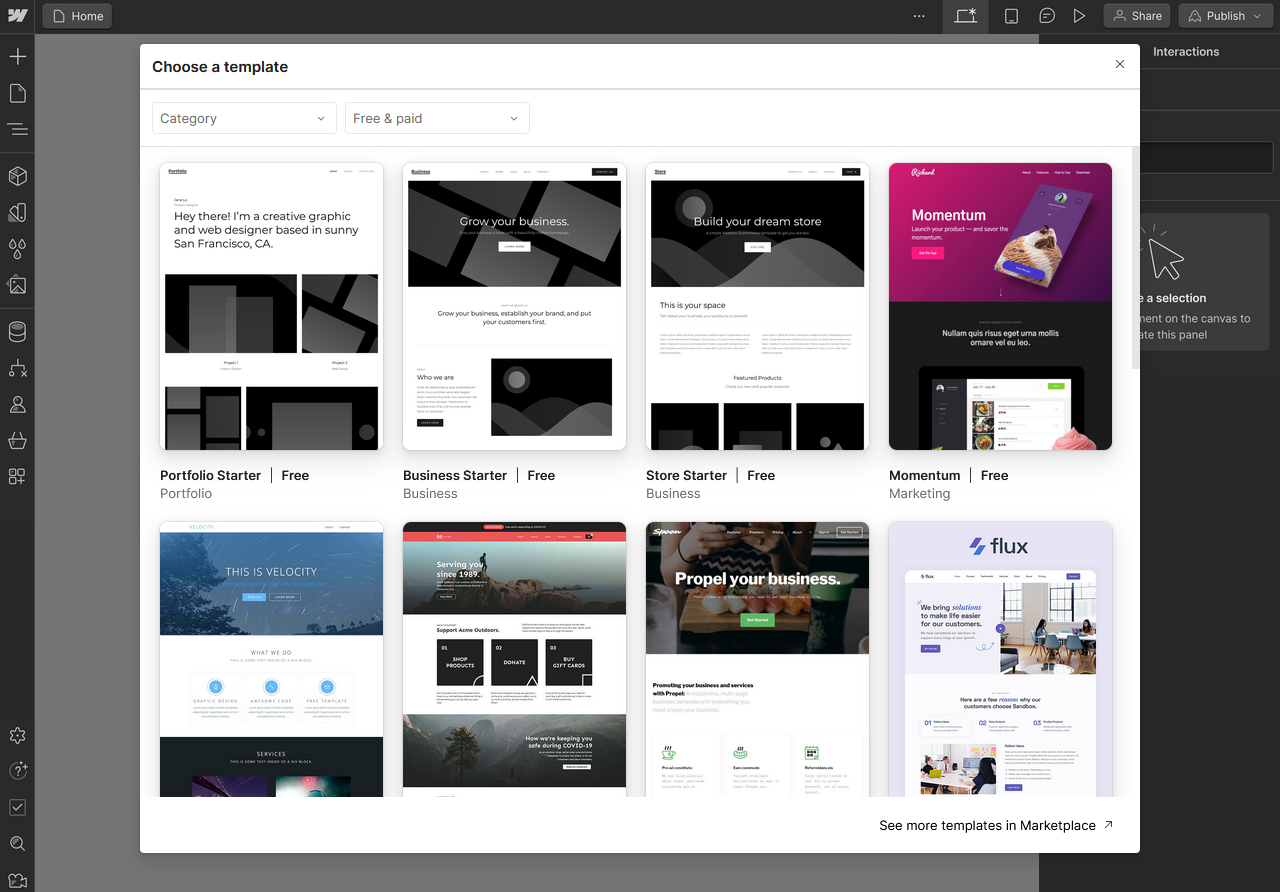
- If you start with the tutorial, the guide will help you create a basic layout by following the steps.
- If you click the “Blank Page” option, you can start building a custom site from scratch.
After making your choice, you can name your website and start developing it.
Before adding elements to the blank page, let’s first talk about the Designer’s interface.
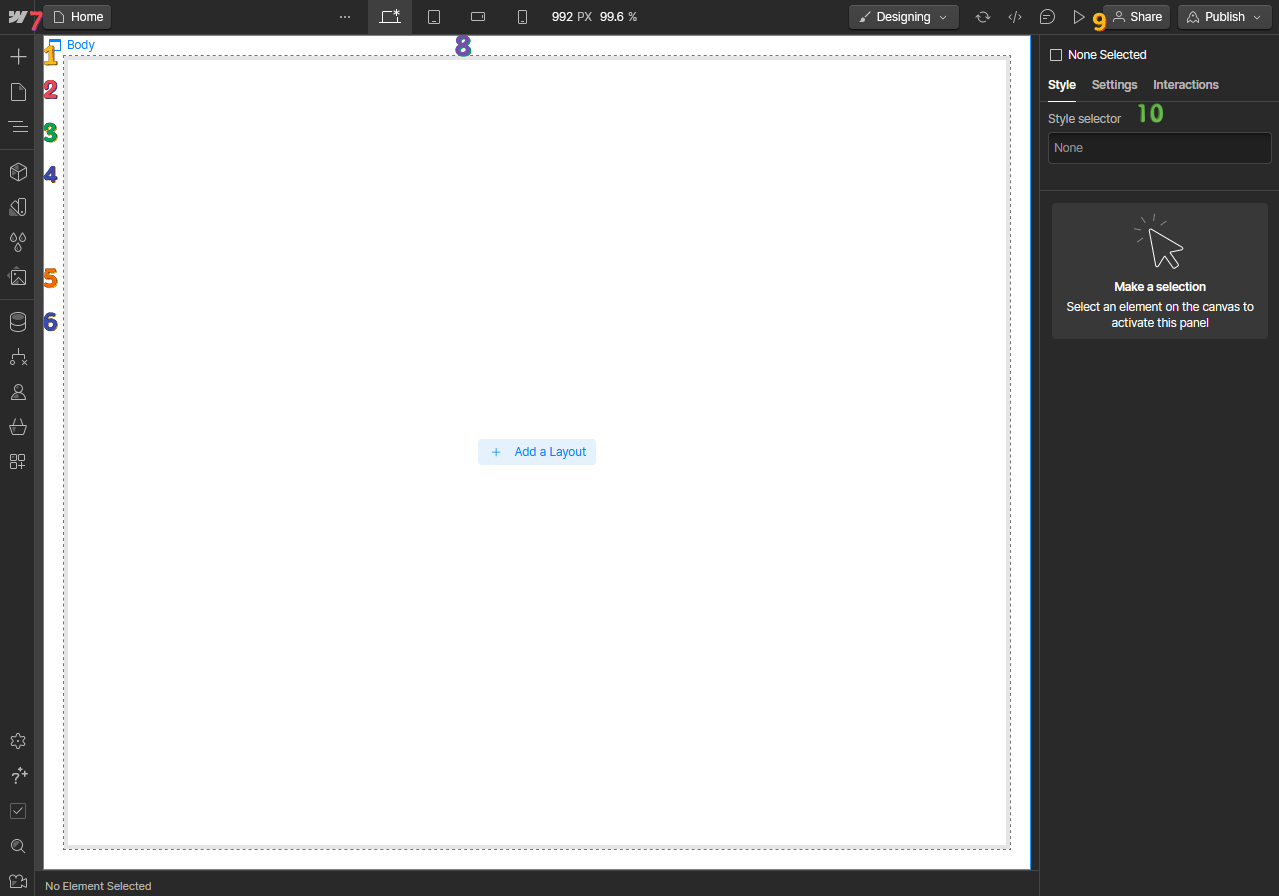
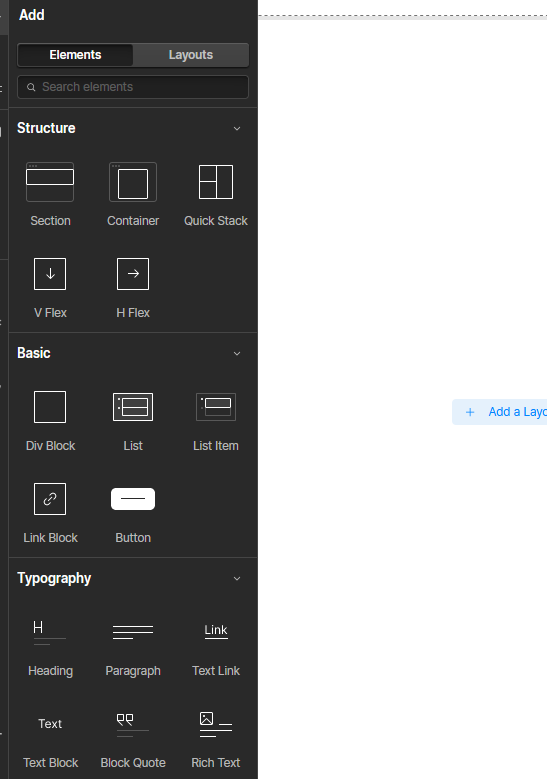
1. Add Elements (“+” icon): By clicking the plus icon you can add elements from a large selection, such as:
- Structural elements like sections and containers
- Basic elements like div blocks and link blocks
- Typography elements like headings and paragraphs
- Media like images and animations
- CMS elements
- Forms
- Advanced elements like Code embeds, navigation bars, sliders, etc.
You can drag-and-drop any elements you wish into your page.
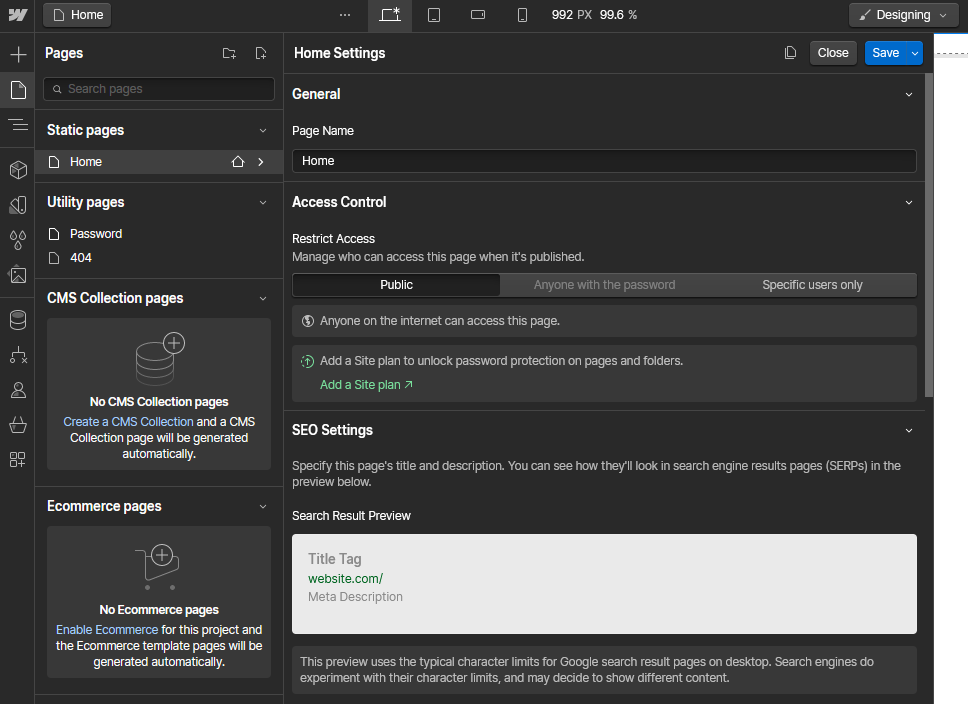
2. Pages: Here you can view all your site’s pages and their categories. You can add, edit, duplicate, and delete pages.
If you want to add a new page, you can simply click on the “Create New Page” icon on the right, name the page, and create it. Additionally, you can organize the pages into custom folders by clicking the “Create New Folder” icon on the left, naming it, and dropping any pages you wish into it.
3. Navigator: In the navigator, you can view your page’s structure and navigate through it. The page’s structure can be arranged not only from the Designer’s canvas but also from the navigator, where you can add, delete, and rearrange elements.

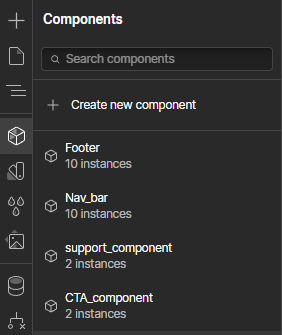
4. Components: Previously known as Symbols, Components are custom groups of elements like text blocks and images that form a single, reusable unit. Create a component once and add its instances to any page for a consistent and scalable layout across your project. For example, a custom navigation bar can be created and used throughout the entire site.
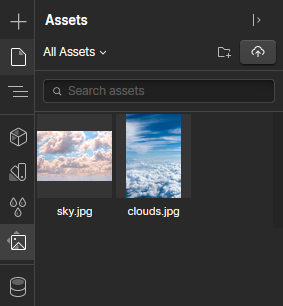
5. Assets: Here, you can view all your project’s assets, such as images and icons. You can add and delete assets as needed.
6. CMS (Content Management System): Even though it’s a more advanced feature, it’s beneficial to learn about it from the start of your Webflow journey. In the CMS, you can store dynamic content in collections and manage it accordingly. It’s like a database for your website.
7. Menu : By clicking on the Webflow icon, you can access a dropdown menu where you can go to the site settings, undo/redo edits, learn about keyboard shortcuts, and more.
8. Breakpoints: Webflow provides four different breakpoint tabs, each allowing you to edit your page’s elements to achieve a fully responsive site.
9. Publishing, Sharing, and Additional functions: In this group of icons and buttons, you can:
- Export Code
- View comments
- Preview your site
- Share your project’s read-only link or invite collaborators
- Publish your site in the webflow.io domain or a custom domain
10. Style Selector, Settings, and Interactions Panel: In the right sidebar, there are the Style Selector, Settings, and Interactions tabs.
For each element you add to your page, you should give it a CSS class name in the Style Selector, that specifies its styling or use. Once you name it, you can add styling to the specific class and thus to the element or multiple elements at the same time by using the same class name.
The styling could involve typography, spacing, background colors, layout, position, and effects. You can also rename, remove, and delete a class name.

In the Settings tab, you can modify the settings of an element. Each element has specific settings, depending on its nature. For example, a heading and a button have different settings.
The settings do not function in the same way classes do. Therefore, changing the settings of one button that shares the same class with another, won’t affect the other.
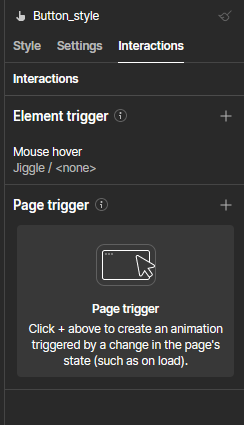
In the Interactions tab, you can integrate transitions and animations into your page’s elements, such as movement or fade in/out effects, which occur after a specific trigger (mouse hover, click, etc).
Creating Essential Pages in Webflow
Something important that will help any beginner understand how to build pages is the Box concept or the Box Model. Simply explained, website pages are composed of boxes ( for example, div blocks) that contain other boxes (blocks) and elements within them. By placing the right elements in the desired position and order and styling them, you can create a website.
In the NoCode4All Home page example below, the page is constructed with boxes or blocks.
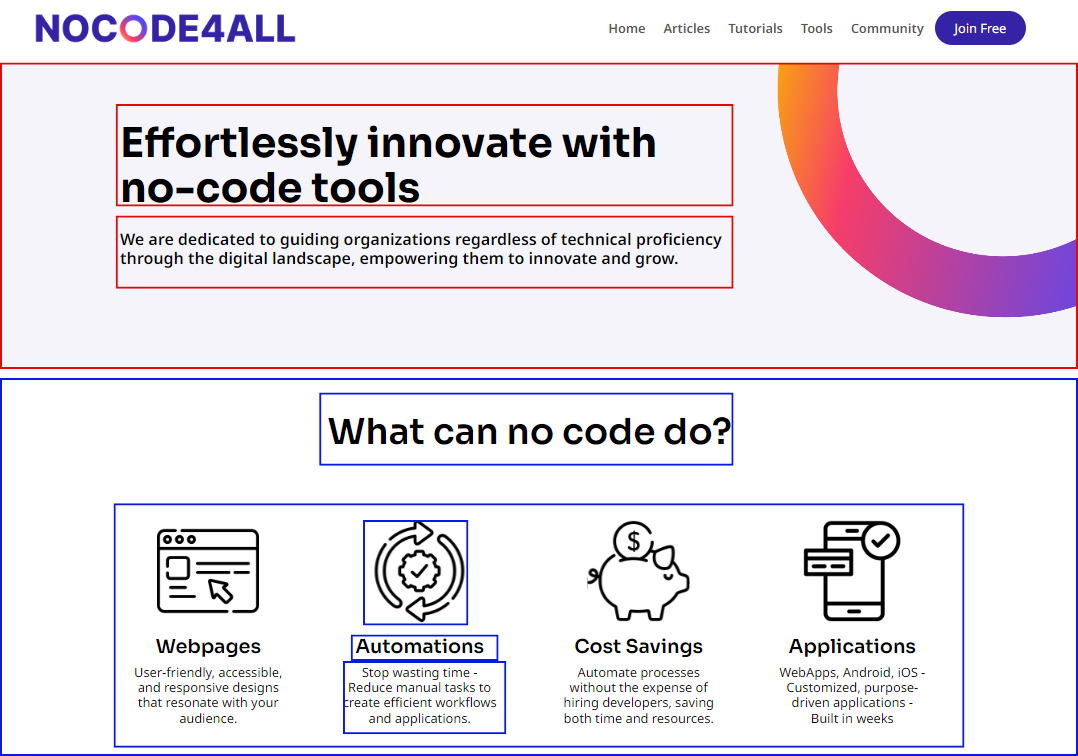
There are two sections: the red one, which contains the heading, and the blue one, which contains information. Both of these sections are created using blocks and nesting elements such as headings, images, text blocks, etc., inside them.
Simply adding elements, styling them, and positioning them according to your design plan isn't sufficient to ensure the scalability of your website. The structure of each page should strive for maximum consistency.
As for the essential pages for a website, you should always ensure your site has a Home page, Terms Of Use and Privacy Policy pages, Contact Page, and About Page.
Depending on the use case of the website, you can include a Services page, Products page, Blog page, etc. Some other pages that can elevate your website are Testimonial pages and FAQ pages. And let’s not forget the 404 page or “Page Not Found”.
Making Your Website Shine with Webflow
A widely used basic feature, though advanced for a beginner, is the Collection List element, which has three levels of wrappers, as shown in the example of Collection List’s structure, from a personal project, below.
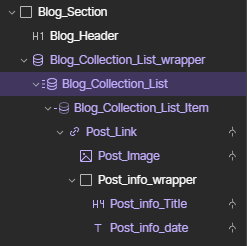
Add a collection list to your site to dynamically display content from your CMS collections. Choose the CMS collection source, then style one item, and those changes will apply to all items in the list.
Another crucial aspect of your website is SEO (Search Engine Optimization), which involves optimizing your site to improve its visibility in search results. This can be achieved by optimizing content and structure to attract more traffic.
A great example of SEO settings in Webflow is in the Headings. By defining headings as H1 or H2, etc., search engines can identify the most important headings on a webpage and understand the structure of the content.
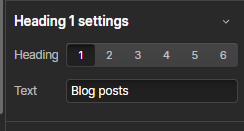
Another example involves tags for elements like Div Blocks and Sections. You can specify whether an element is a Section, Nav Bar, Footer, etc., helping search engines better understand your website's structure and content.
Publishing and Going Live
During development or when your site is ready, you can publish it on a free webflow.io domain (also known as a staging domain) or on a custom domain, a feature available with specific Site and Workspace plans.
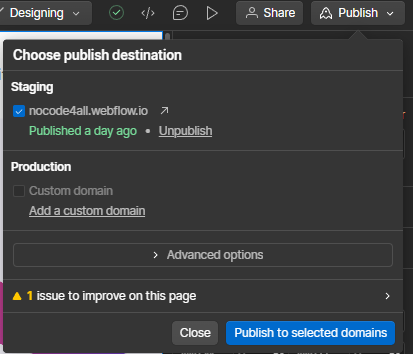
To change the staging domain URL, go to Site Settings > Publishing > Staging and enter your desired URL.
For publishing on a custom domain, go to Site Settings > Publishing > Production, where you can add your custom domain, by following the provided instructions.
Whenever you make edits to your already published site, be sure to republish it by clicking the “Publish to selected domains” button afterwards.
Beyond the Basics
After mastering the basics, Webflow offers a wide range of advanced features and functionalities that you can experiment with to enhance your websites.
Interactions are an excellent way to make your site more engaging. You can add movement and effects to elements such as buttons, images, and even entire blocks, creating a site that feels "alive".
These interactions can be triggered by actions like mouse hovers or scrolling. Within the interactions, you can create timed animations where specific elements interact and transition according to your preferences. Numerous online tutorials are available to help you learn about this impressive feature.
You can also add Lottie animations anywhere on your page and create interactions with them. Lottie animations can be found online, along with step-by-step tutorials on how to utilize them. Personally, I have used Lottie animations from Lottieflow.
Additionally, Webflow supports various integrations with a variety of third-party apps and tools, offering additional functionalities for your website. These integrations include tools for:
- E-commerce
- Email Marketing
- Social Media
- SEO
- Content Management, etc.
You can learn more about the plugins and third-party apps that Webflow supports in the Webflow Integration resources , Webflow University or the Webflow community.
Keep learning and exploring with our:
Conclusion
Webflow provides a robust visual web development platform, allowing users to create stunning, professional websites without needing to write code. Its extensive array of features and integrations can significantly enhance and elevate your website.
The platform's thorough documentation and extensive library of online tutorials make it accessible and user-friendly for both beginners and experienced designers. Webflow stands out as a powerful tool capable of revolutionizing web development.

