
This guide explains how to create a pop-up window like a pop-up form that appears when a user clicks a button. This feature is useful for displaying additional information or to include an edit form without navigating away from the current screen.
Let’s be more specific about our goal.
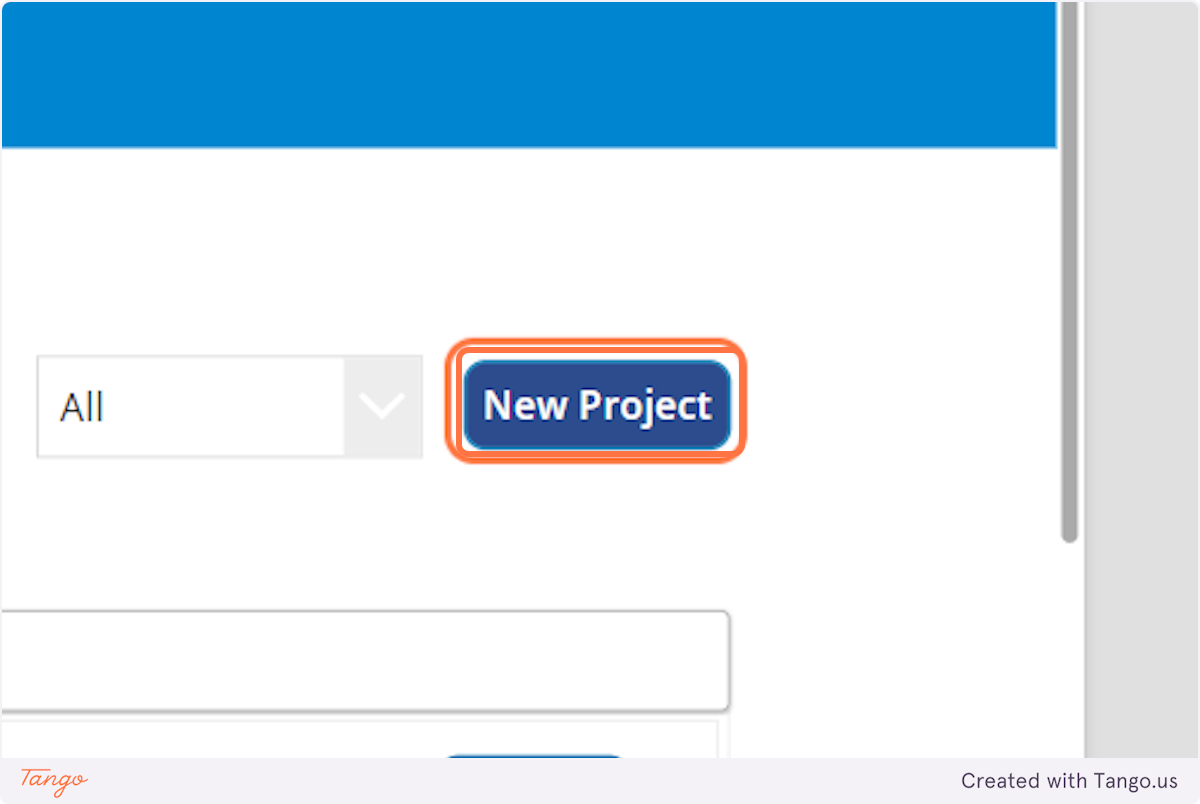
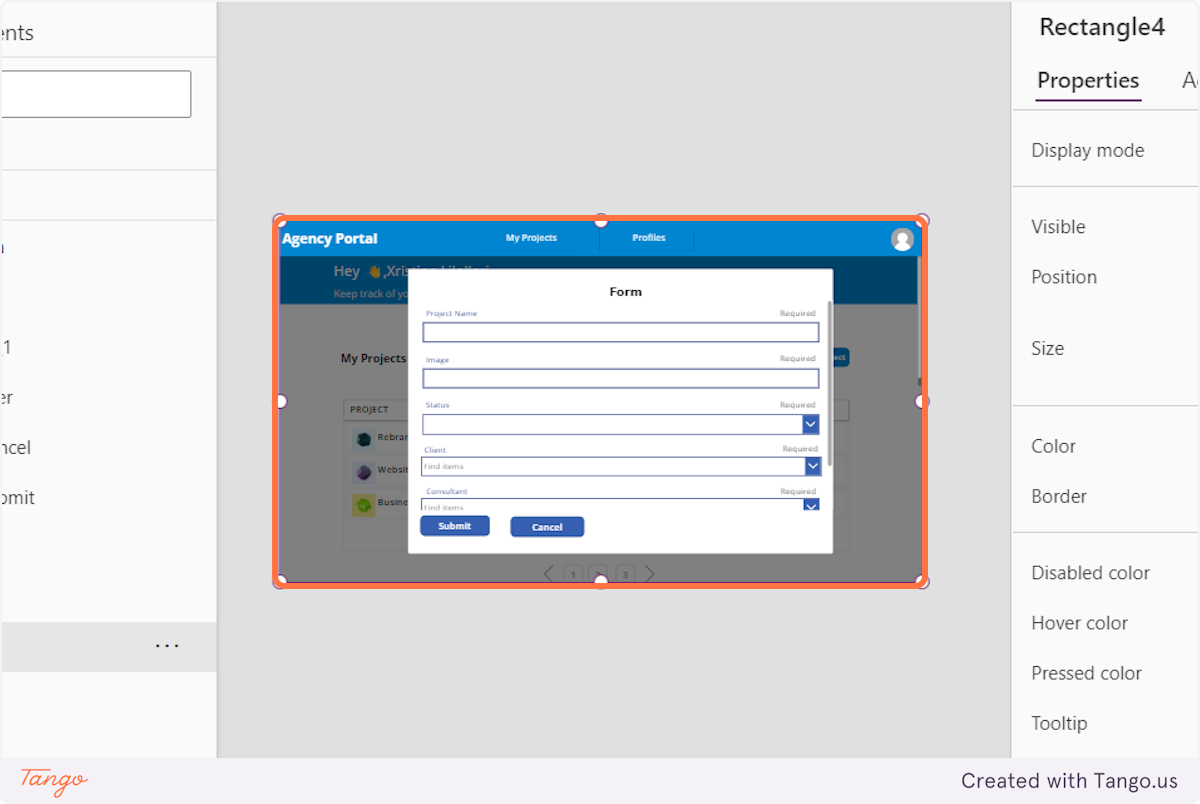
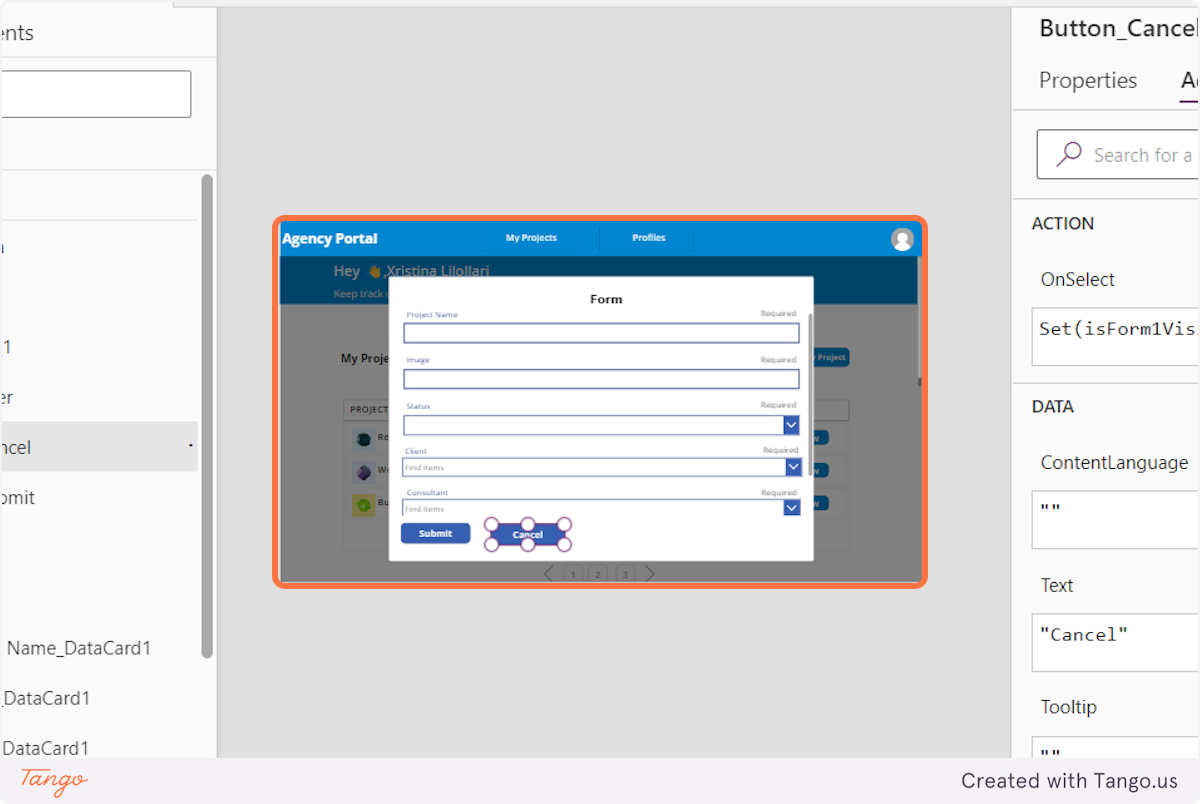
Here’s an example of what we want:
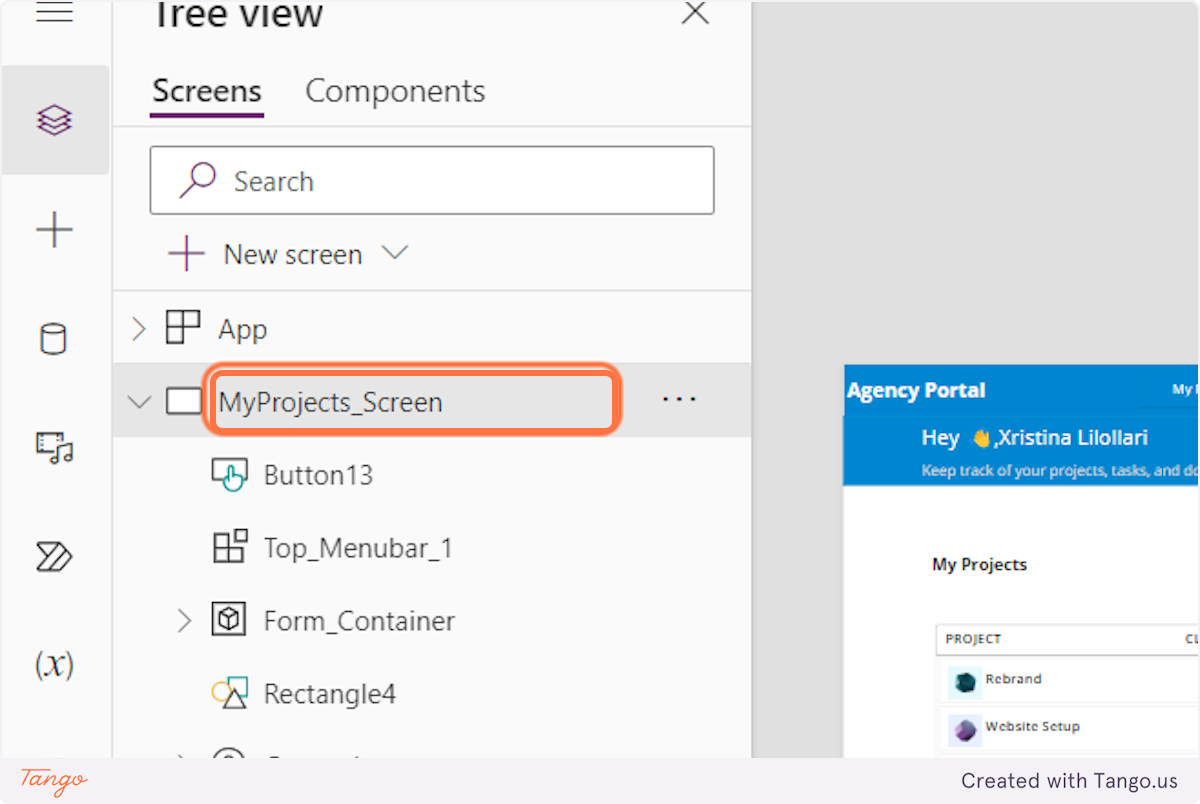
1. Click on the button New Project
2. Here becomes visible the Form
As you can see, when the pop-up appears, the background color turns light gray. That's an additional tip to make this functionality look better!
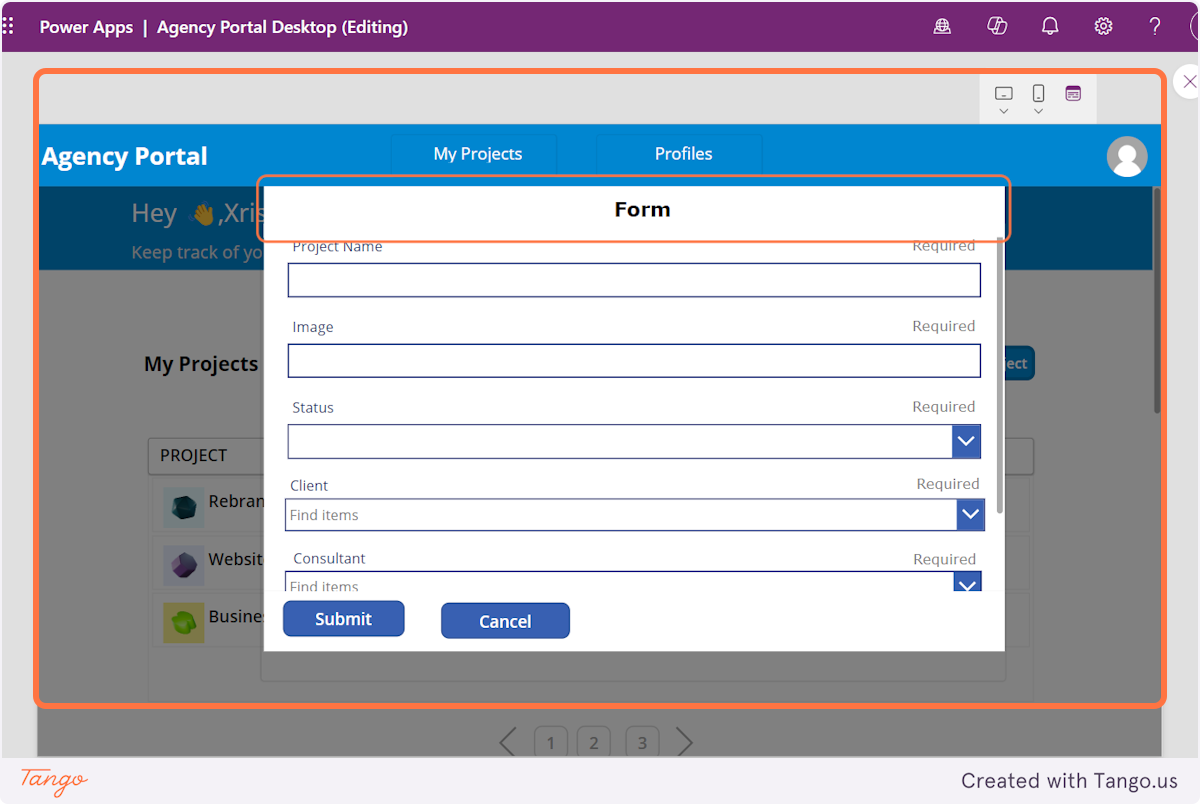
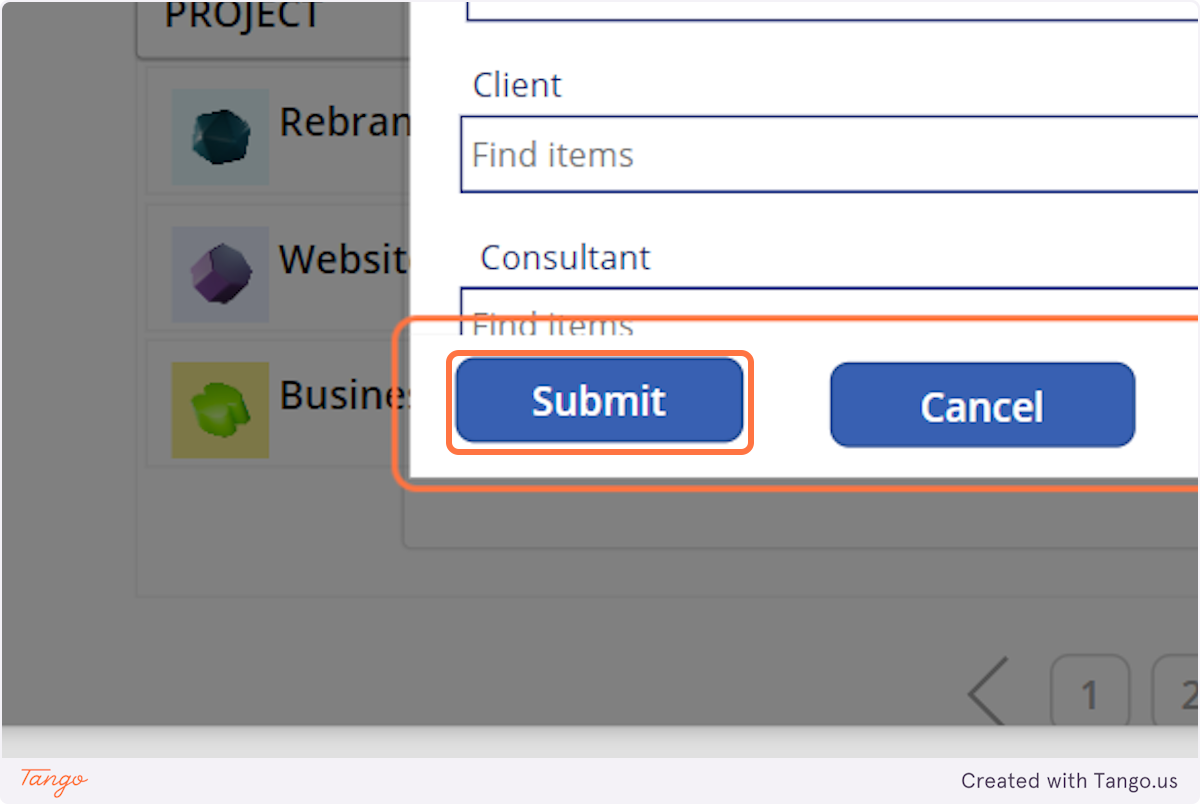
3. You have the opportunity to fill in the fields and click on the Submit button to create a new project
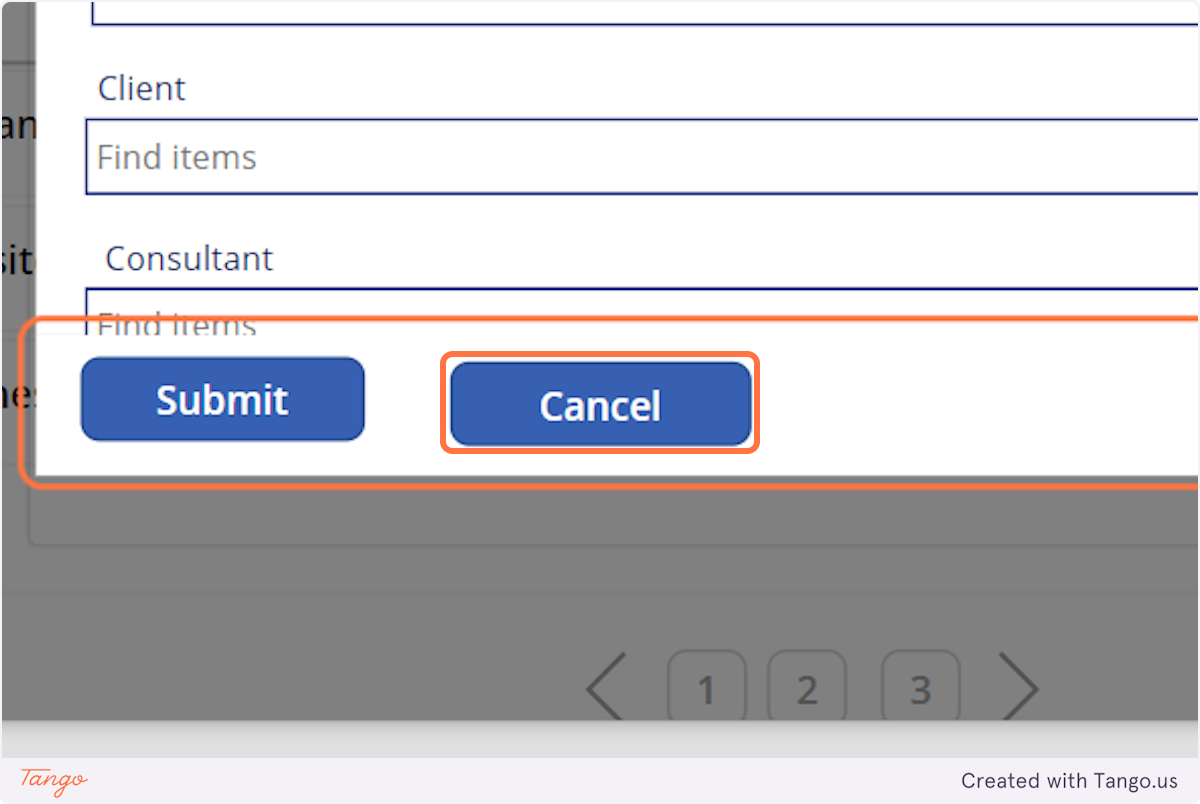
4. Otherwise, click on Cancel to close the pop-up form
Let’s dive into it and explain how we can achieve this functionality.
Step by step guide
Step 1
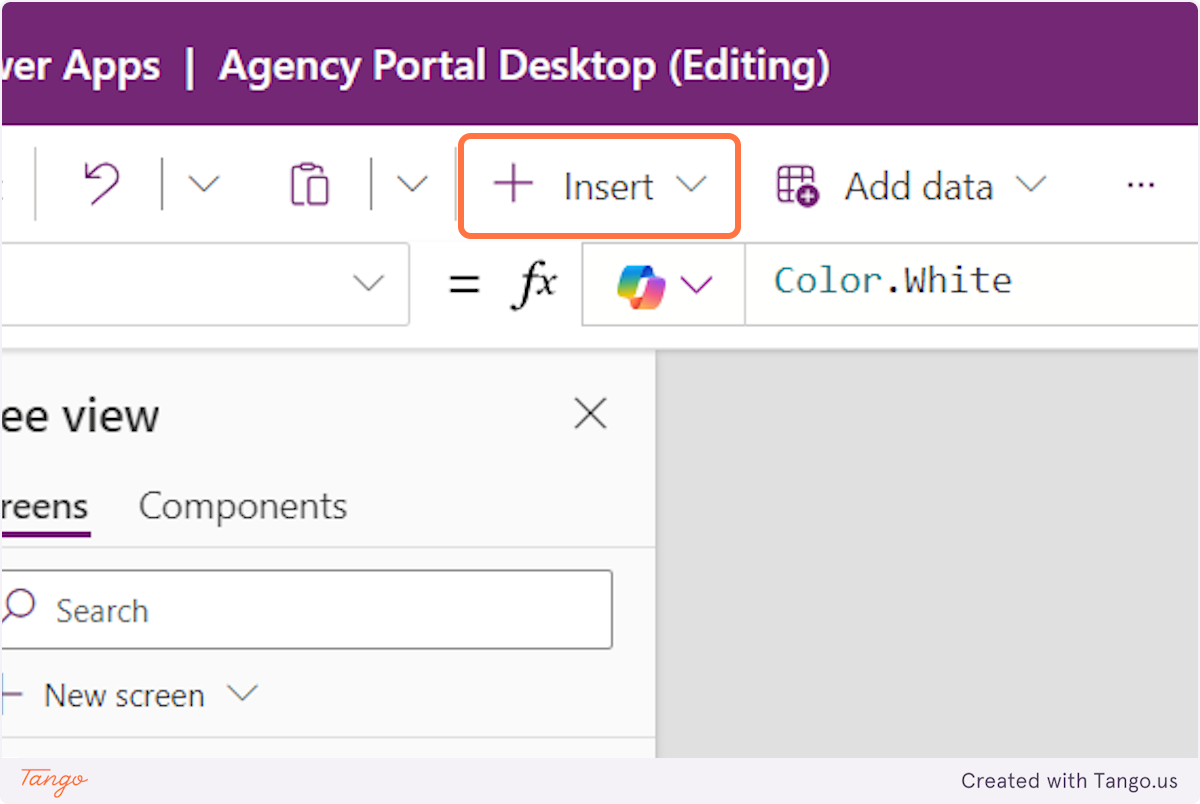
Add a button to the screen you want to create the pop-up.
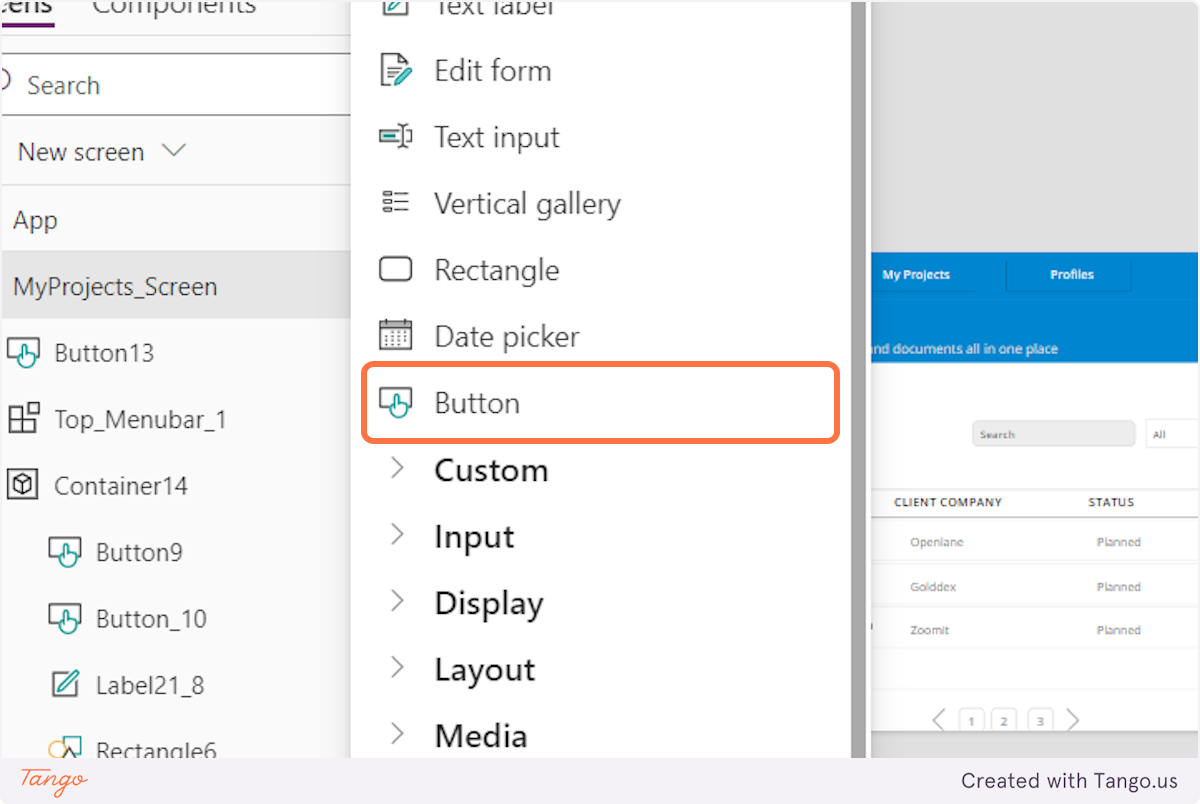
i) Click on Insert
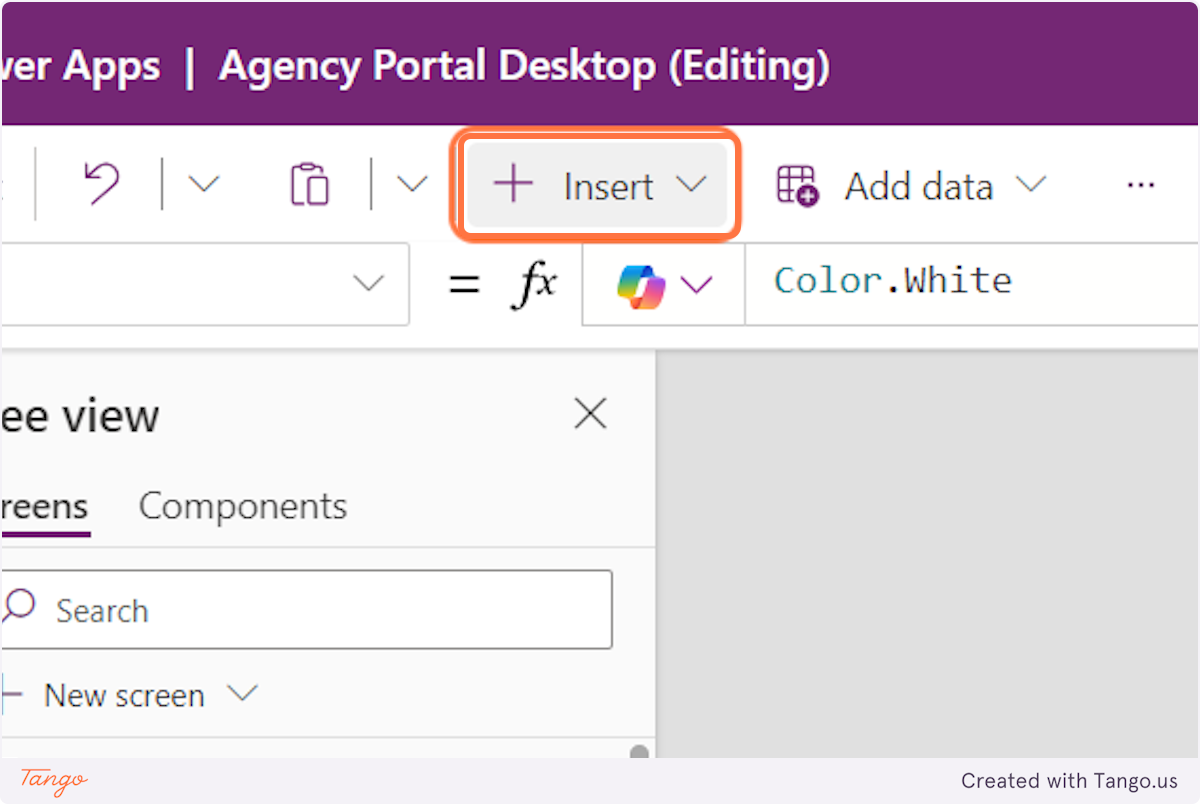
ii) Click on Button
iii) Position the button where you want it to appear on the screen
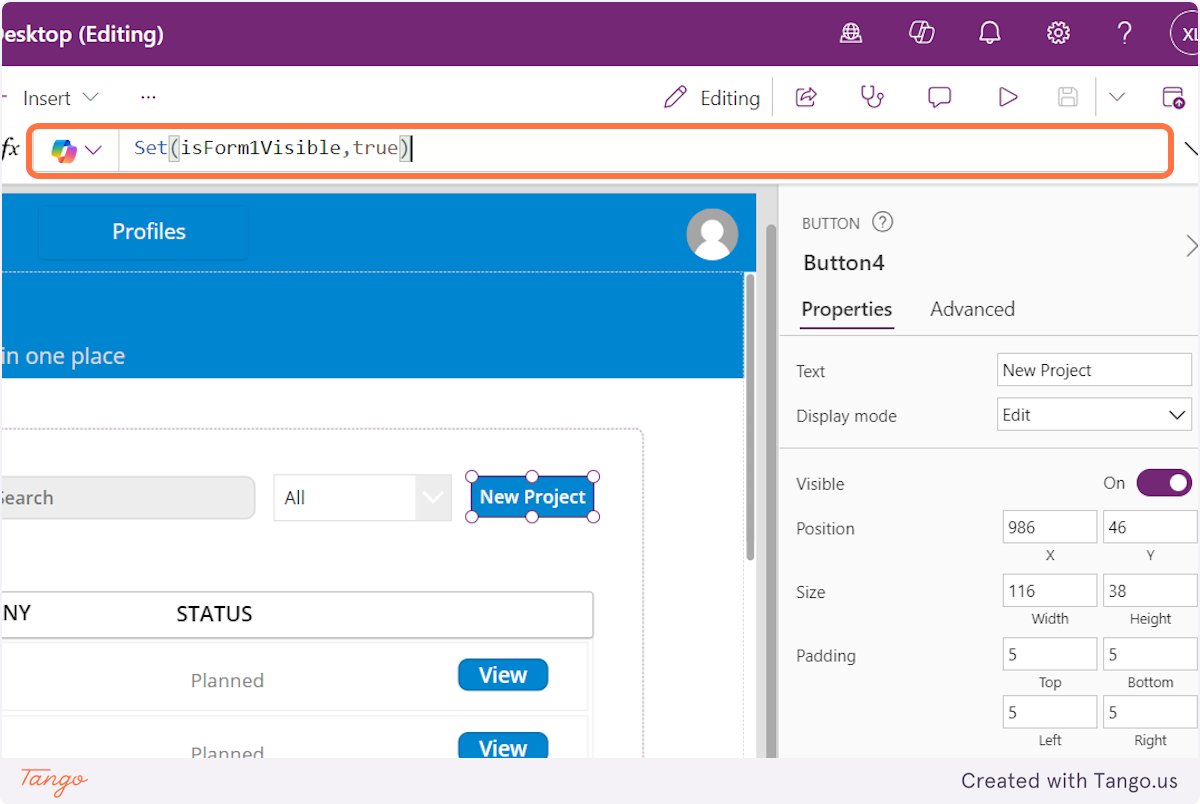
Set its properties as you prefer, change the size, and the color, and choose a text to call your button. For this example it’s 'New Project'.
Step 2
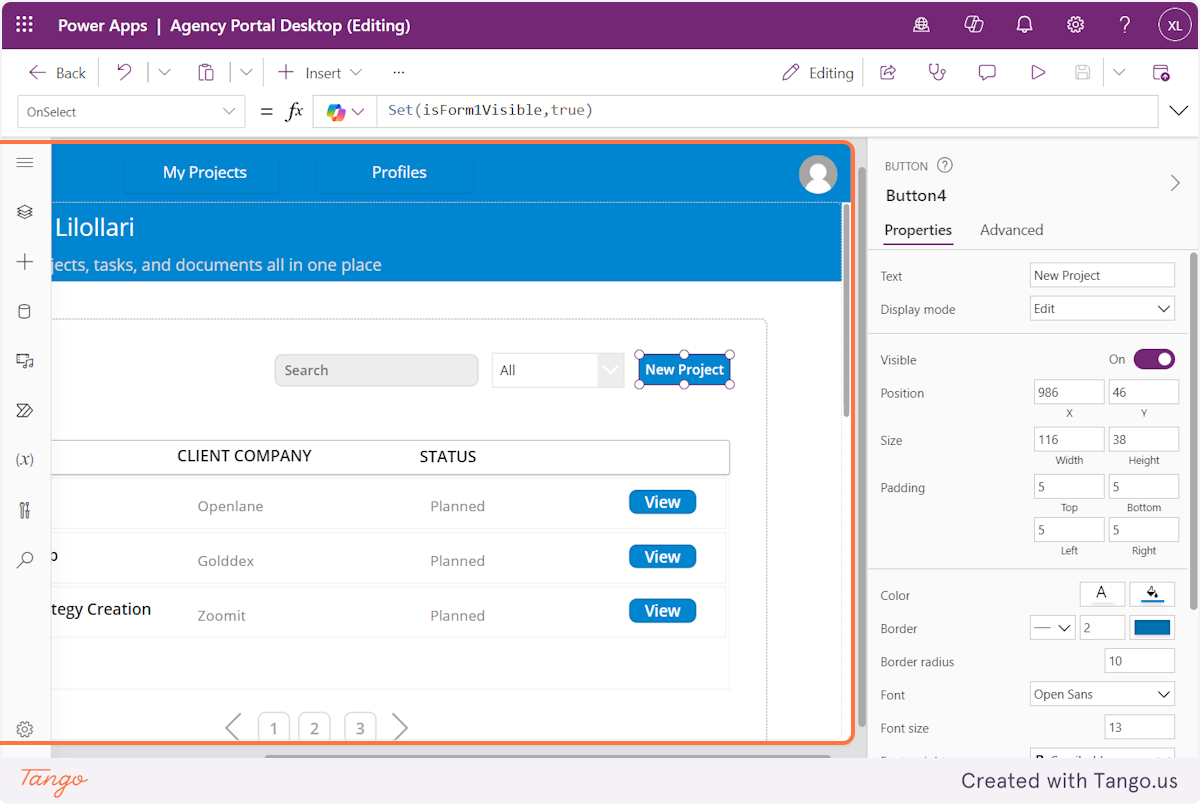
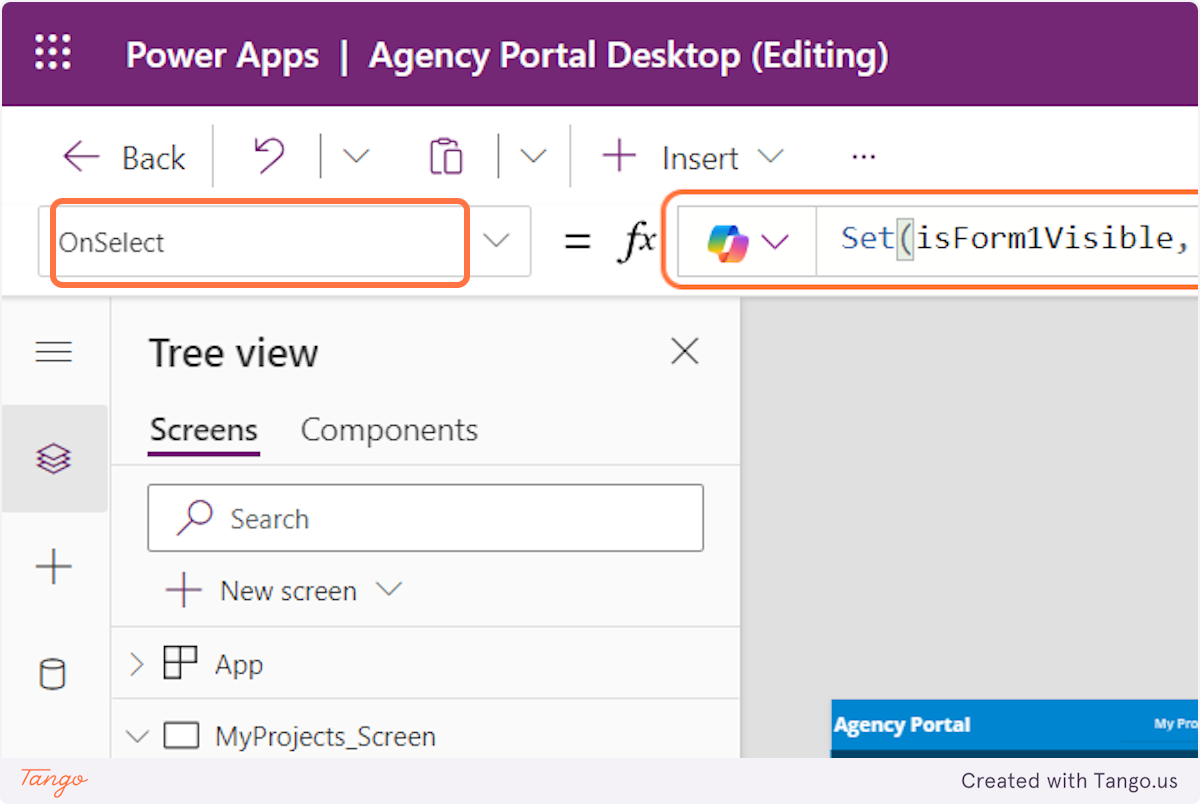
Define the button’s action.
To make the form visible wherever the button is clicked, we have to set the OnSelect property of the button, the formula:
‘Set(isForm1Visible, true)’
‘isForm1Visible’ is a variable we created to control the visibility of the pop-up
* if you want to create more than 1 pop-up form in your app you have to use different variables to control the visibility. For example isForm1Visible, isForm2Visible, isForm3Visible etc.
i) Click on Property dropdown and go to the OnSelect
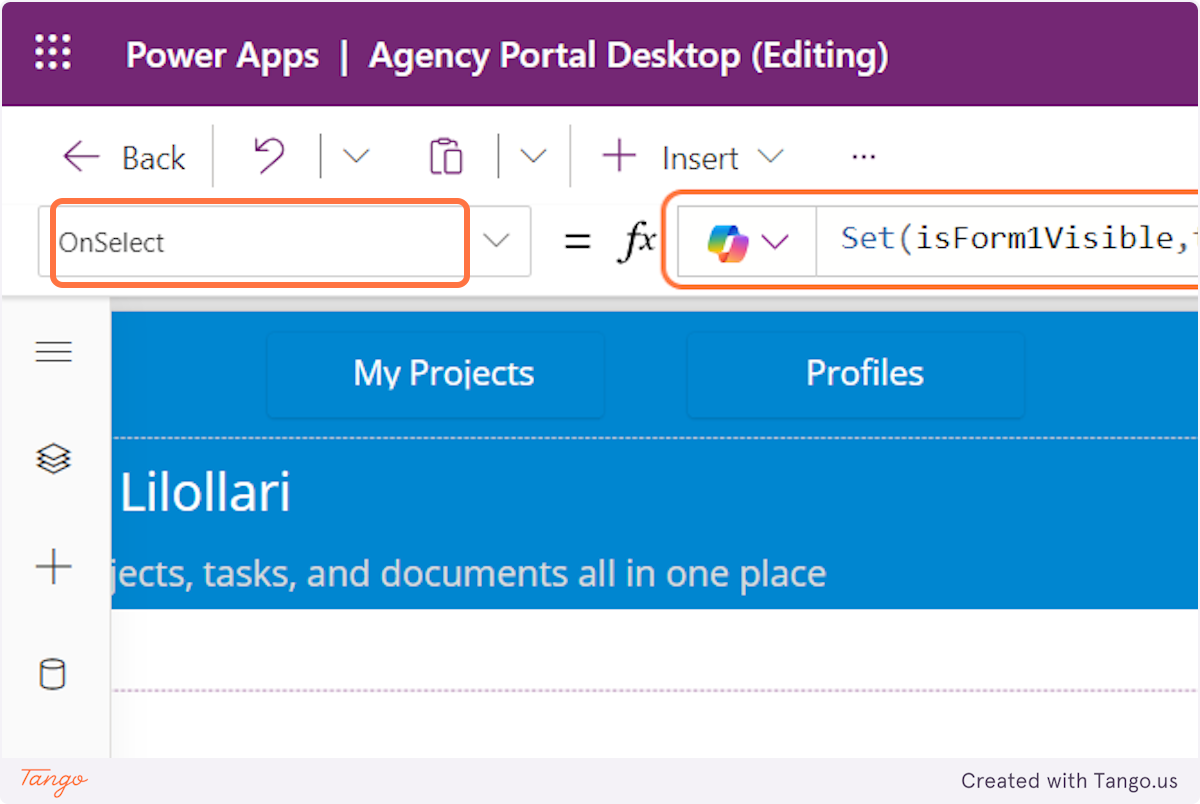
ii) Define the formula: Set(isForm1Visible, true)
Step 3
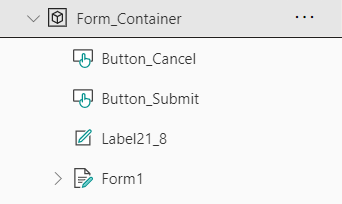
Add a container that will include the Label ‘Form’ at the top, the fields of the form, and 2 buttons for submit and cancel at the bottom.
Like this:
i) Click on Insert

ii) Click on Container

iii) Place the container in the middle of the screen
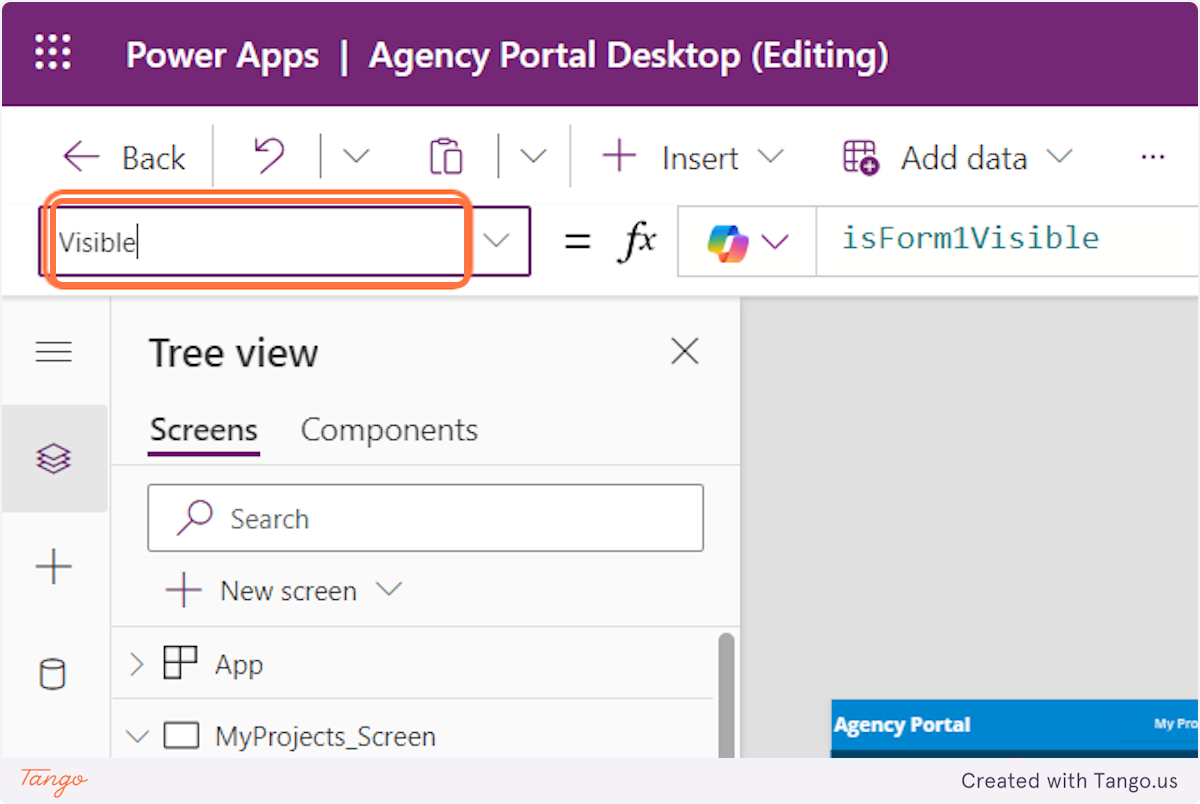
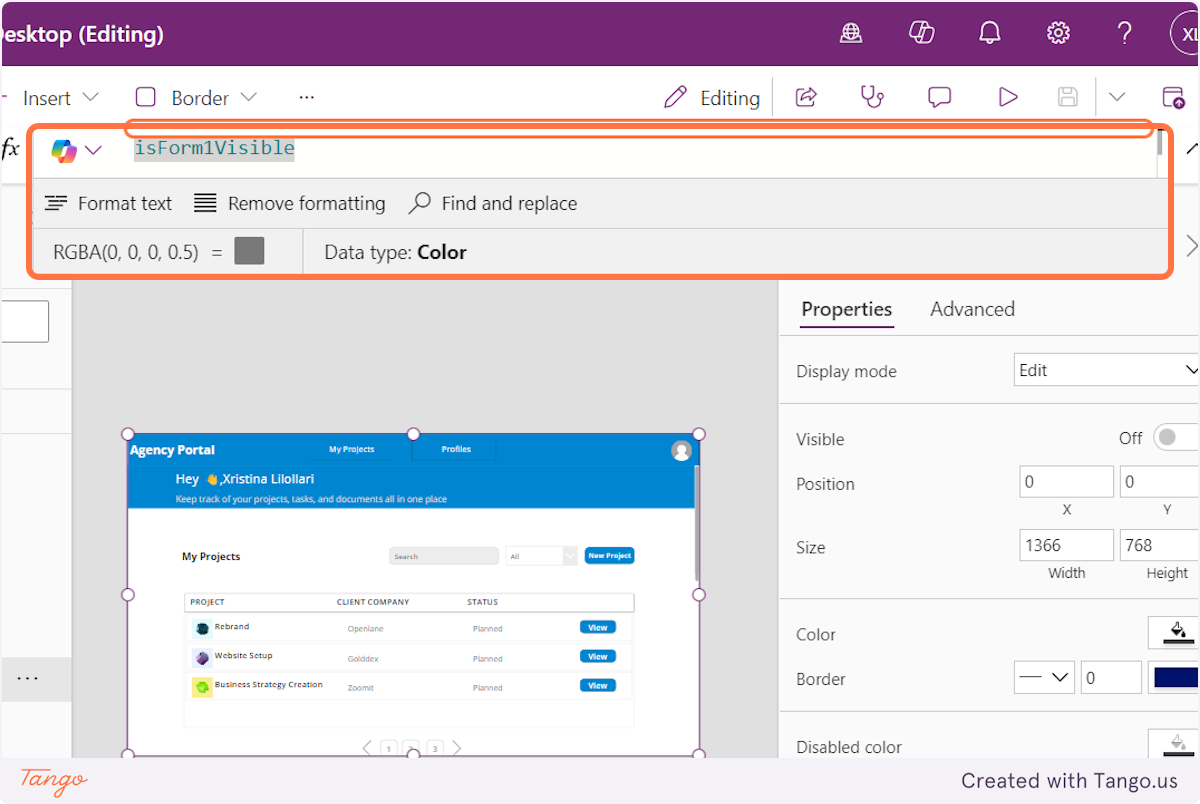
Control Container’s visibility
iv) Click on Form_Container
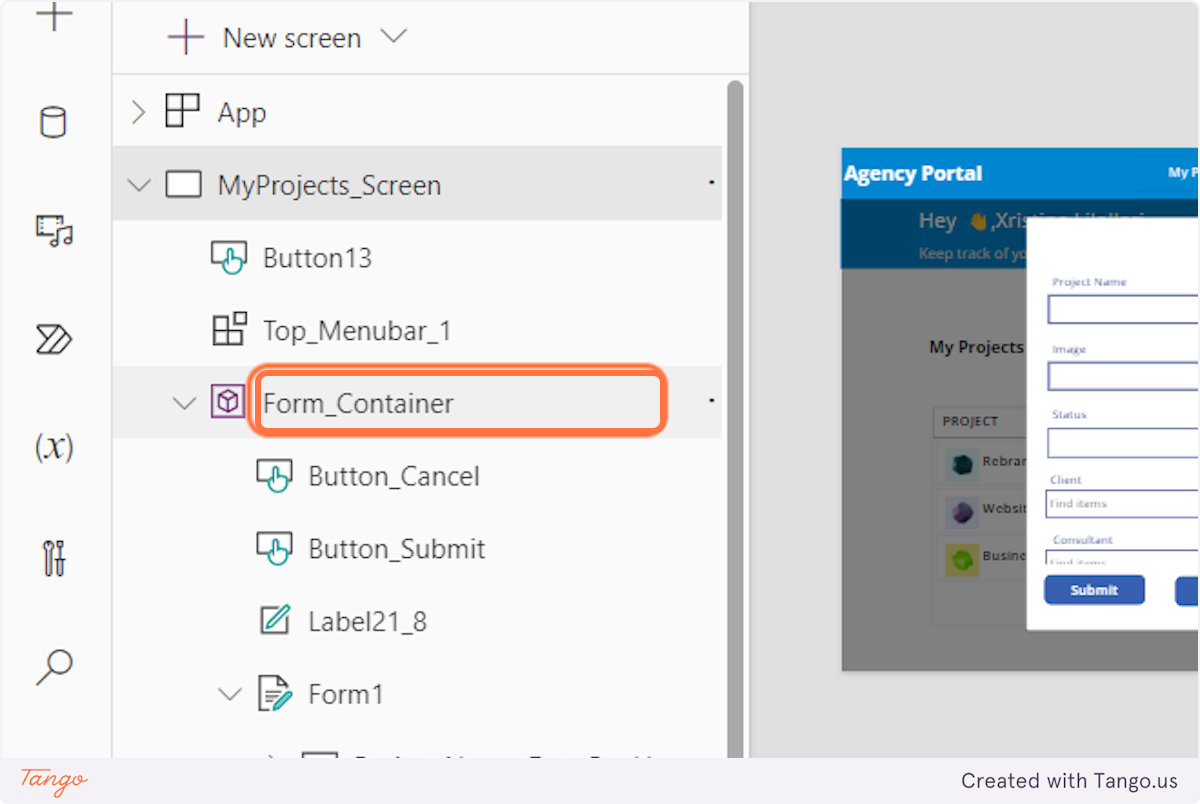
v) Click on Visible Property and set the variable ‘isForm1Visible’
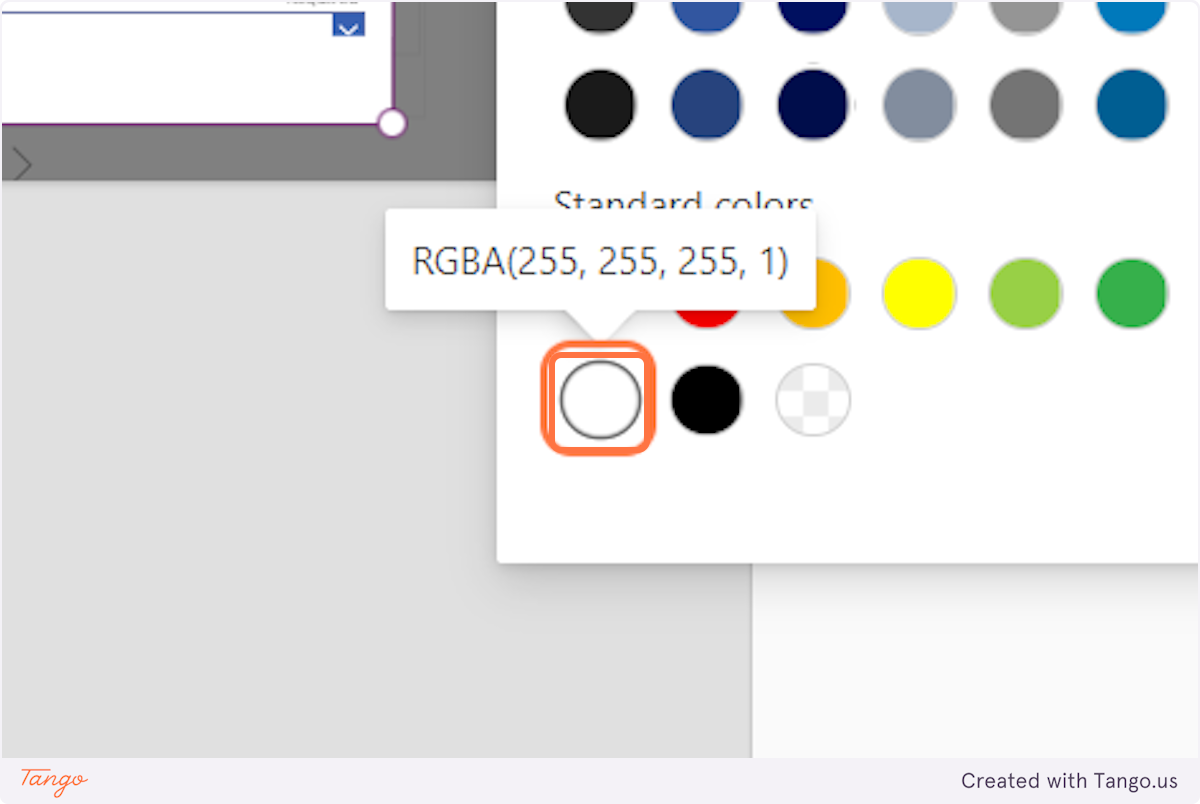
iv) Click on Fill Visual background color.
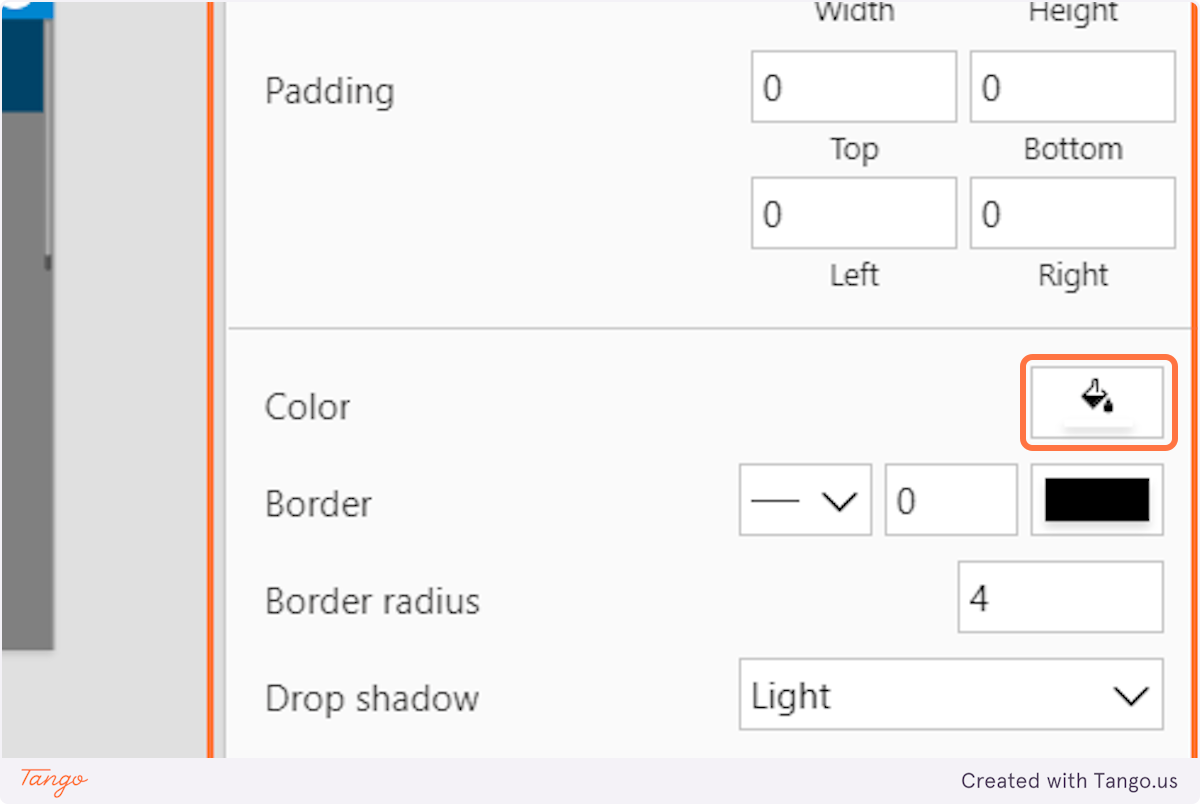
v) Click on the white color
Step 4
Add a label at the top and 2 buttons at the bottom of the container.
i) Click on Form_Container

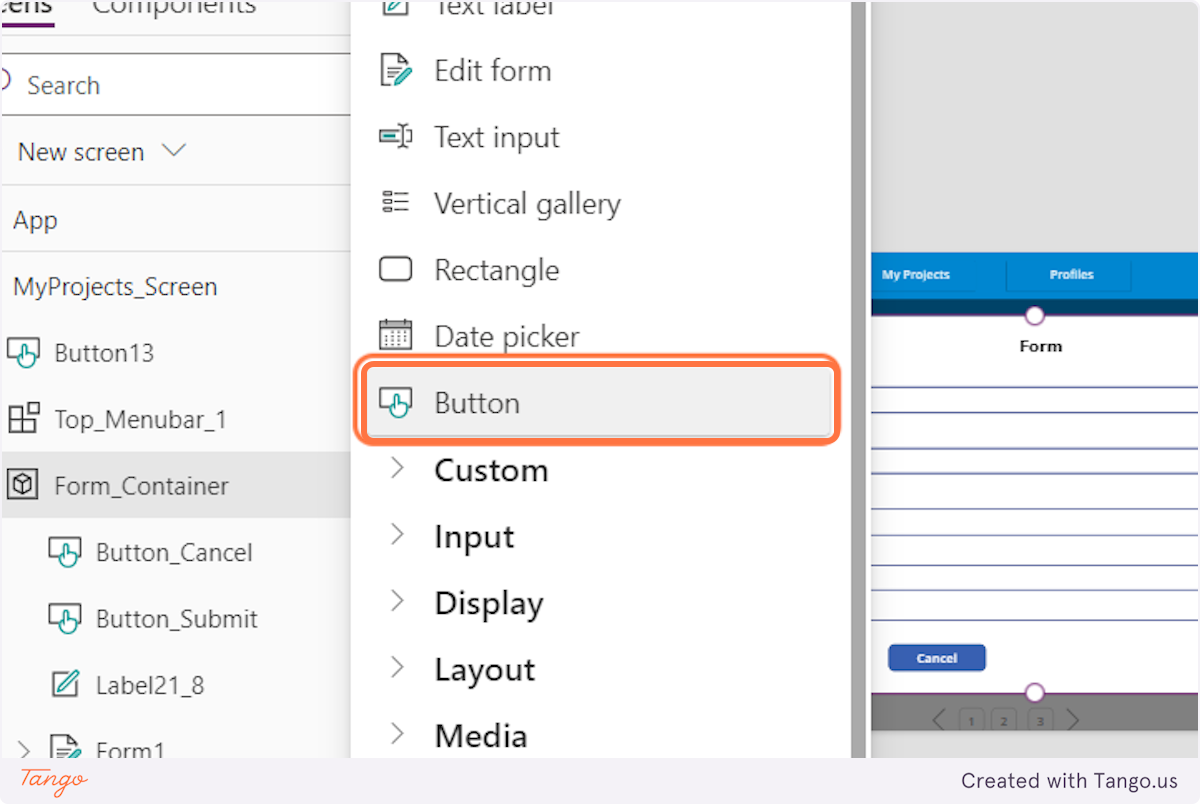
ii) Click on Insert

iii) Click on Button
iv) Place the button at the bottom of the container and adjust the size, the color, and the display name.
Do the same for the Submit button as you see
v) Click on Insert
vi) Click on Text label

Step 5
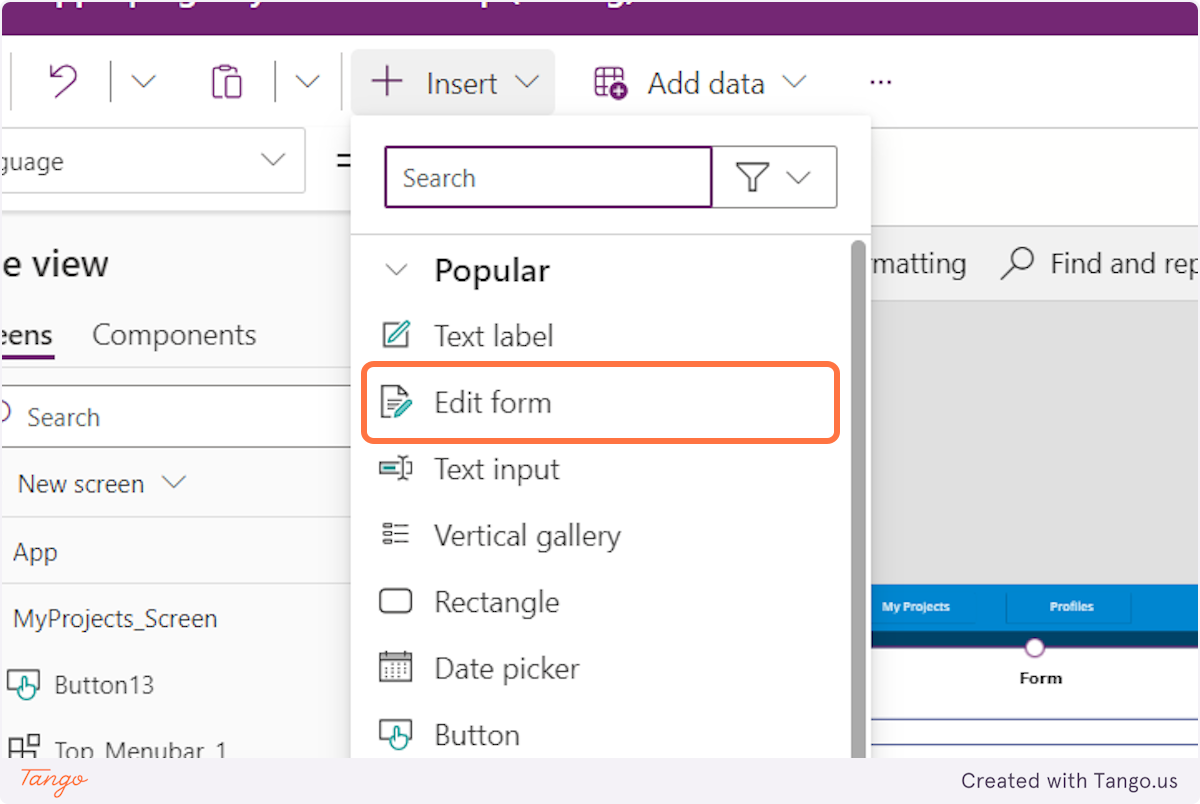
Add the edit form inside the container.
i) Click on Insert
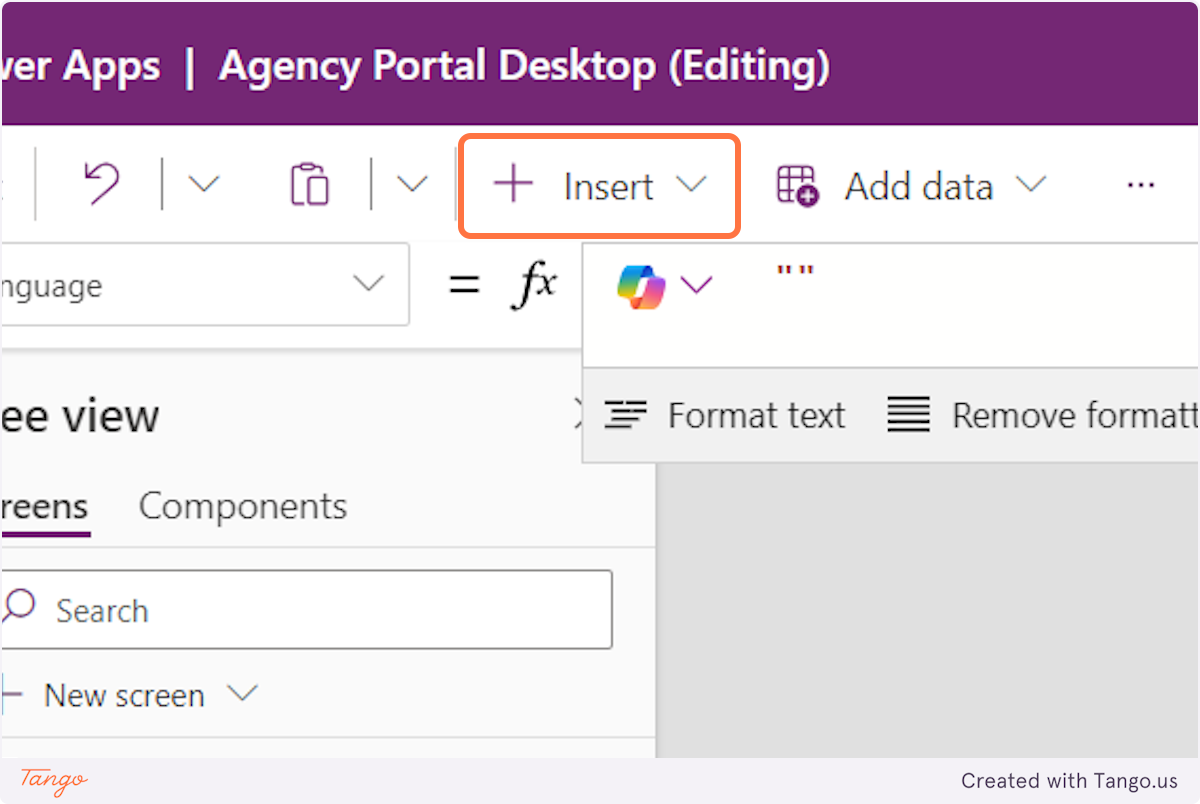
ii) Click on Edit form
iii) Click on a Database you want to connect your form

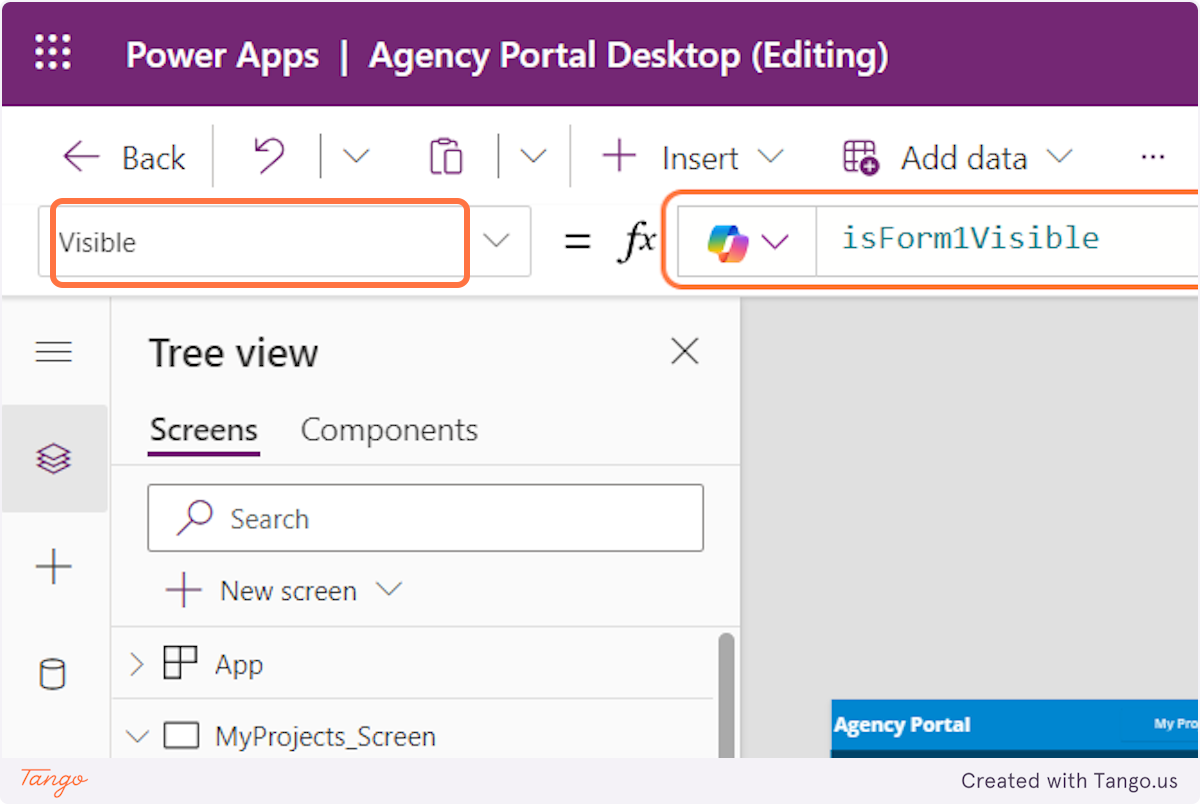
Control form’s visibility
iv) Click on Form1

v) Click on Visible Property and set the variable isForm1Visible
Step 6
Make the preferable changes to the fields of the form.
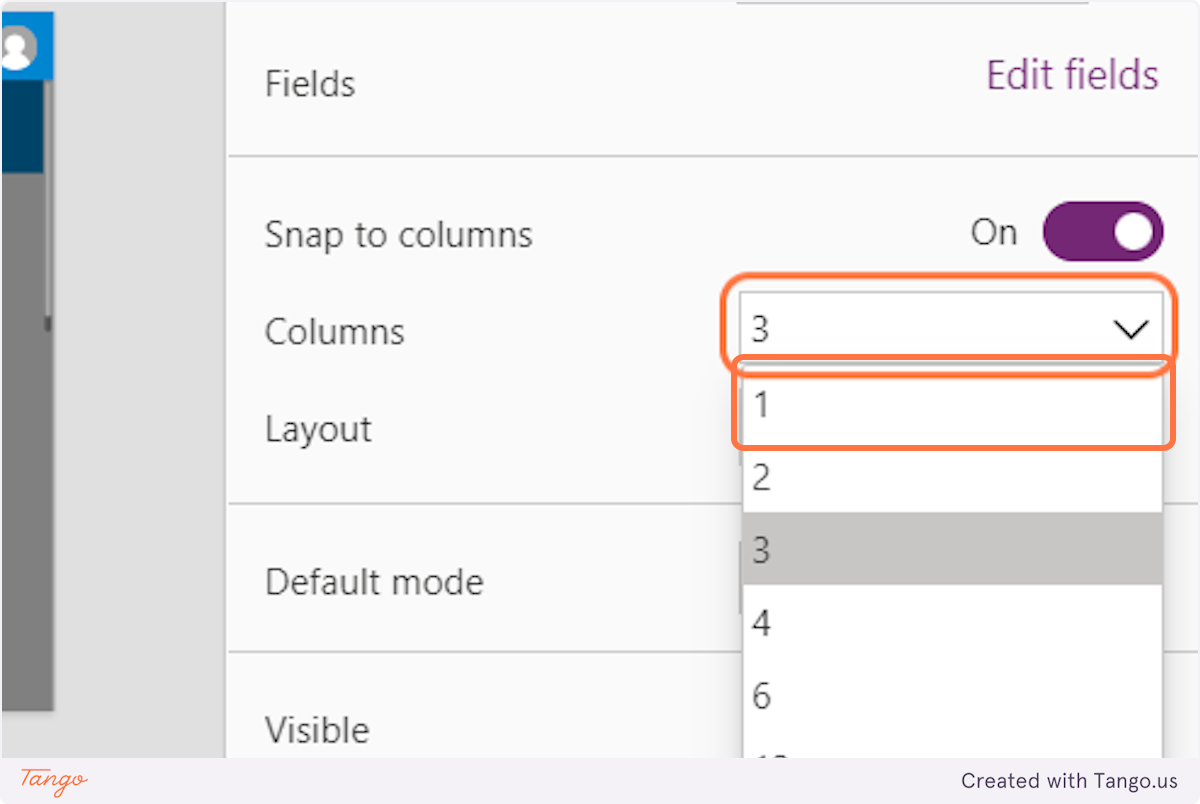
i) Click on the dropdown of Columns Property to change the way that fields appear
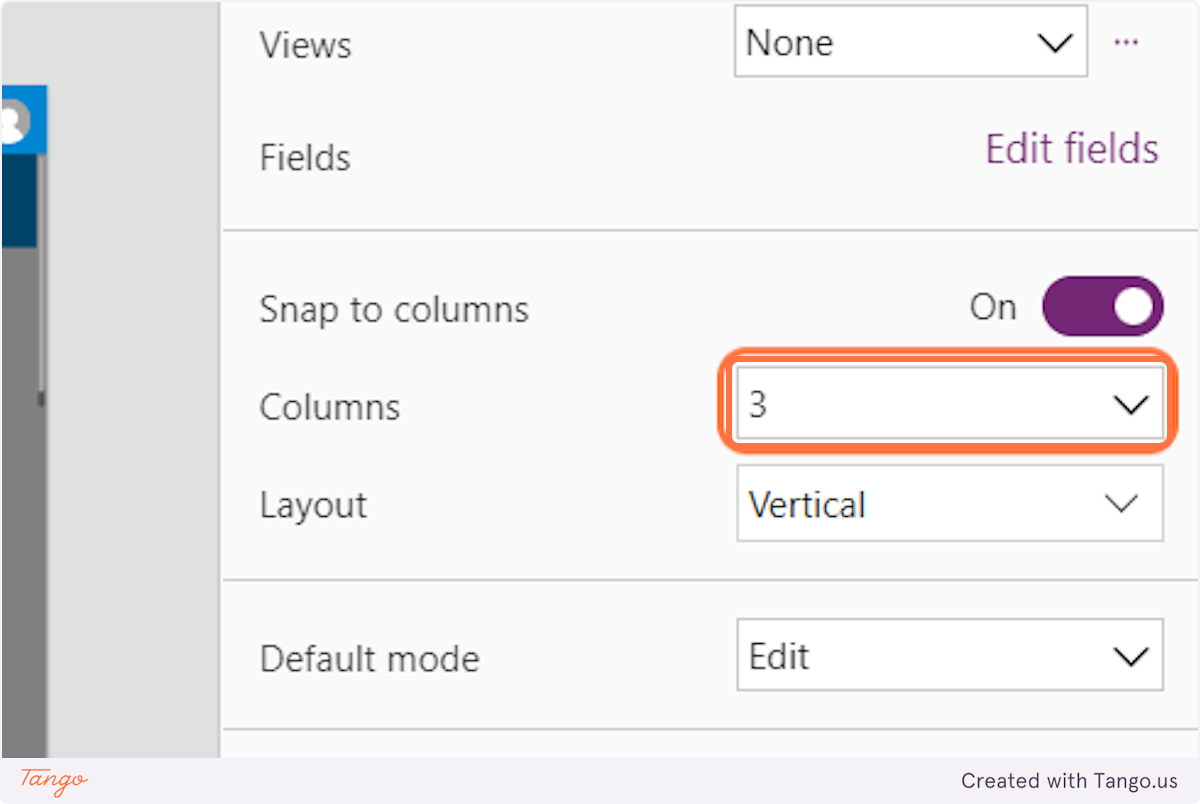
ii) Click on 1 to appear 1 field in each row
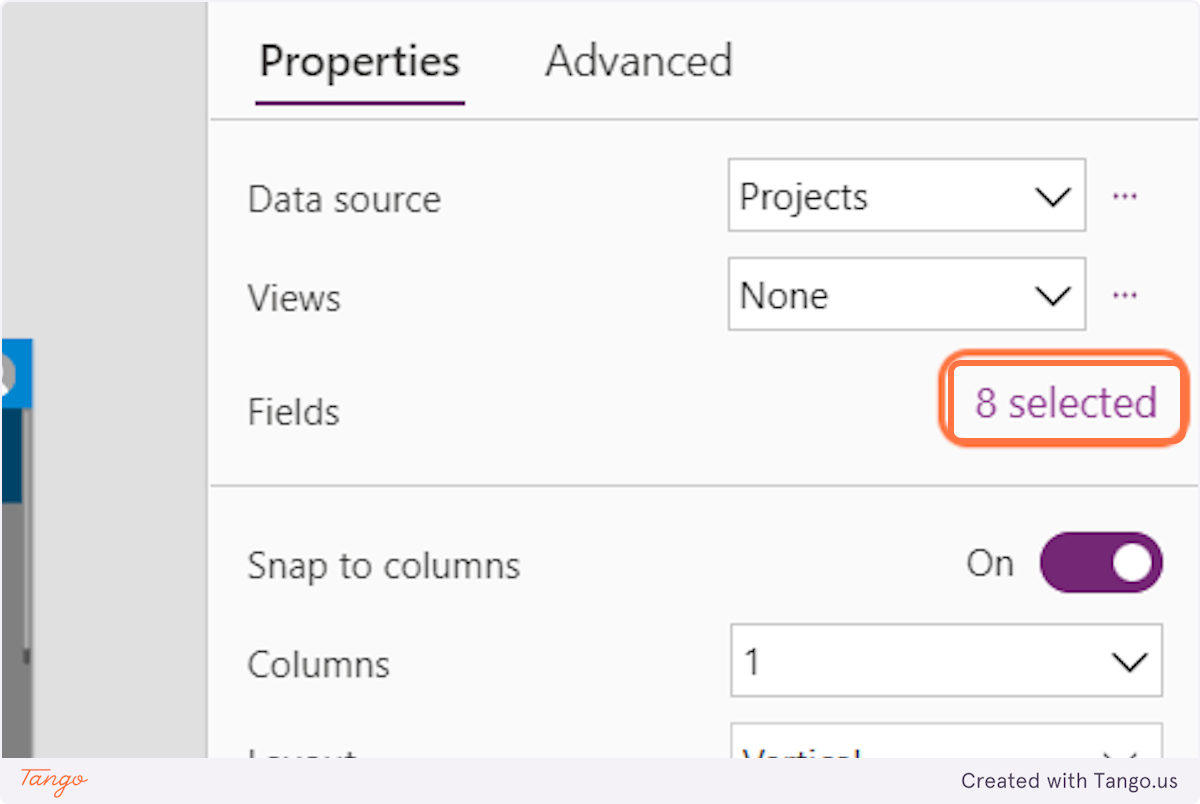
iii) Click on 'number selected' to edit the fields that you want to appear in your form
iv) Click on '+Add field' if you want to include a field that didn't appear by default
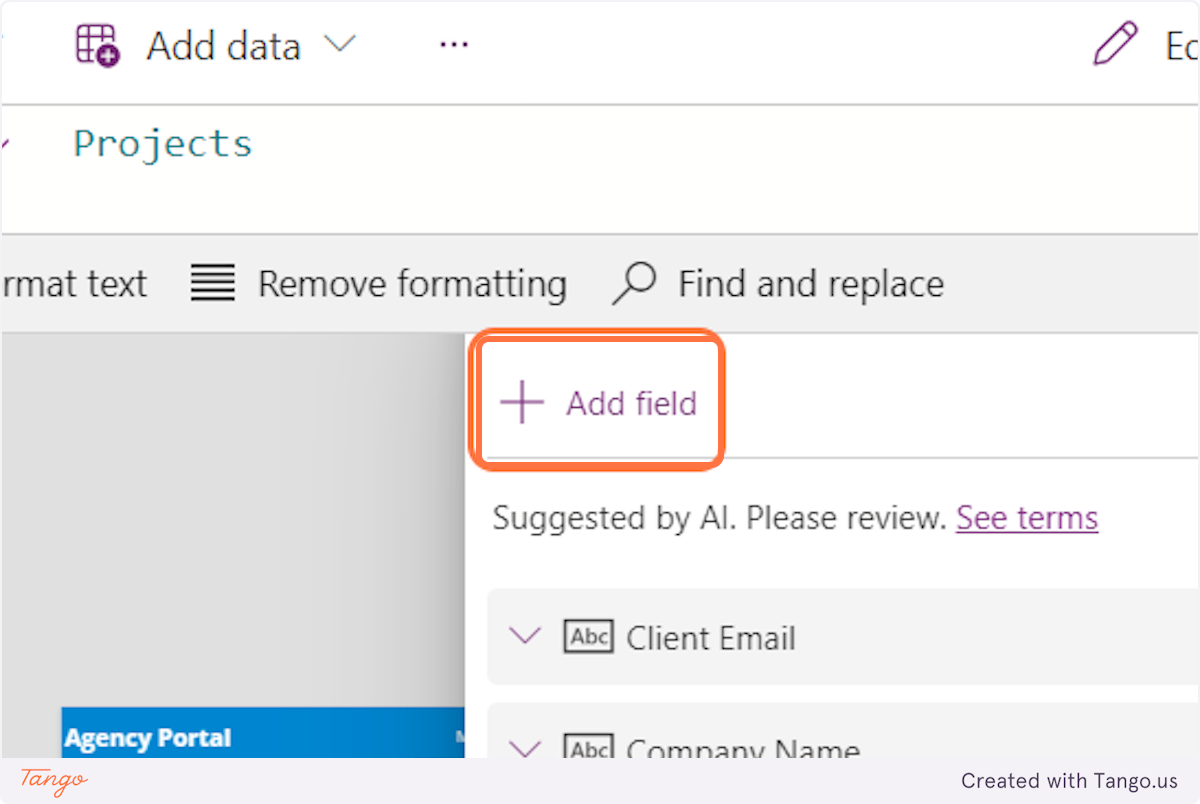
v) Choose the field you want to add
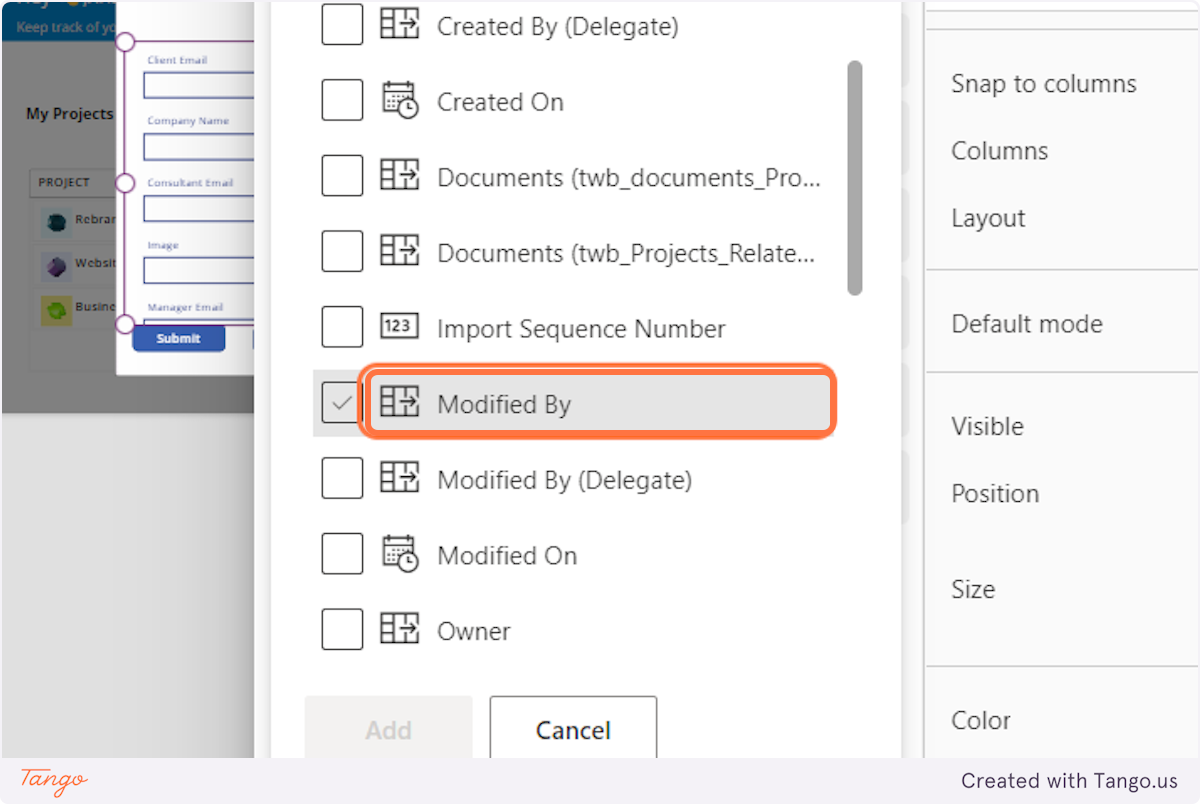
vi) Click on Add

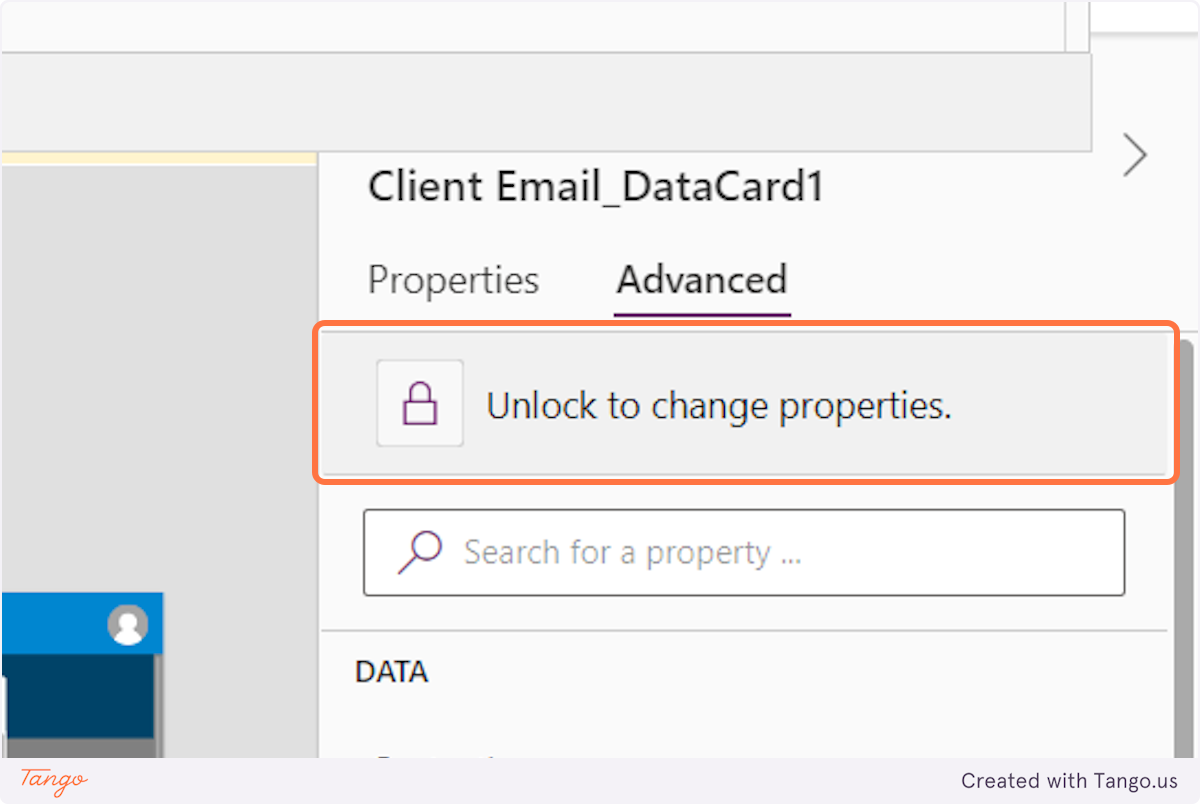
vii) Click on a Datacard if you want to make changes to it

Ensure that you unlocked the Datacard so to be able to make changes
- Click on Advanced

- Click on Unlock to change properties.
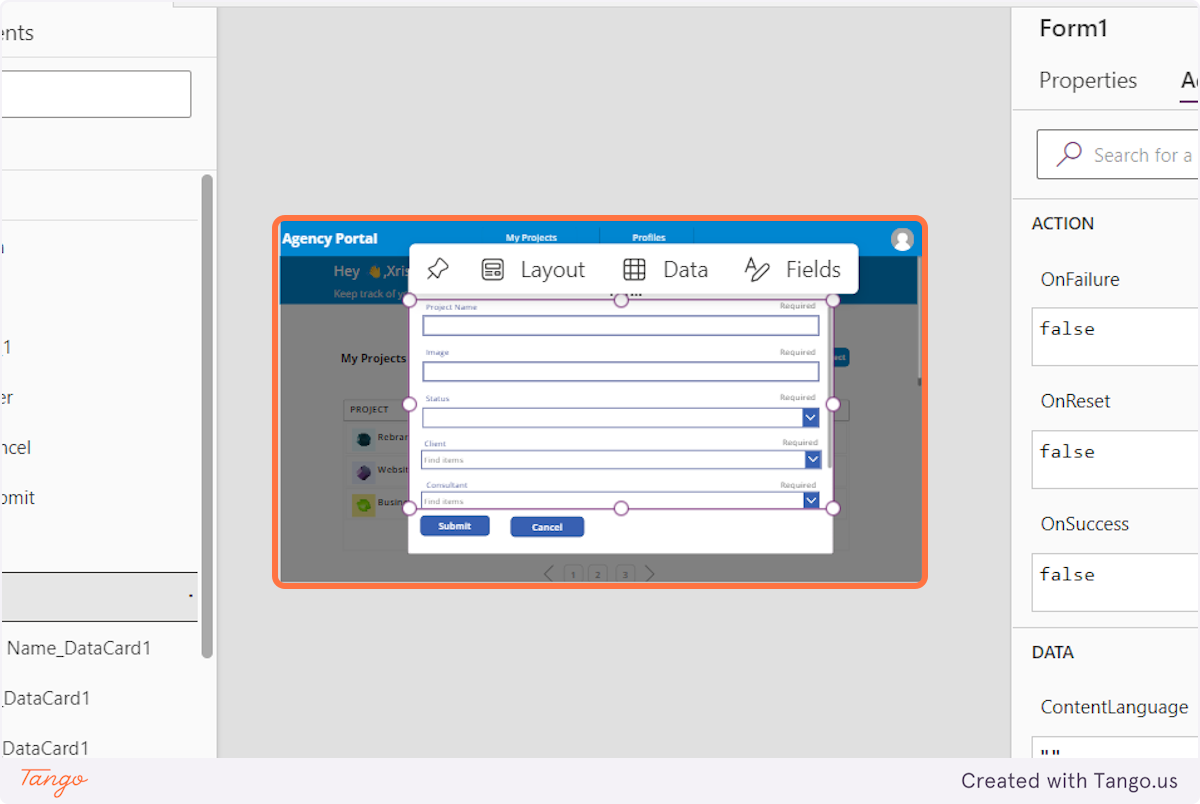
viii) Position the edit form inside the container so that there is free space at the top and at the bottom of the container where the label and buttons are placed
Step 7
Make the button ‘Submit’ functional.
We want to make the submission process smooth, with clear feedback to the user about the success or failure of their submission.
i) Click on Submit Button
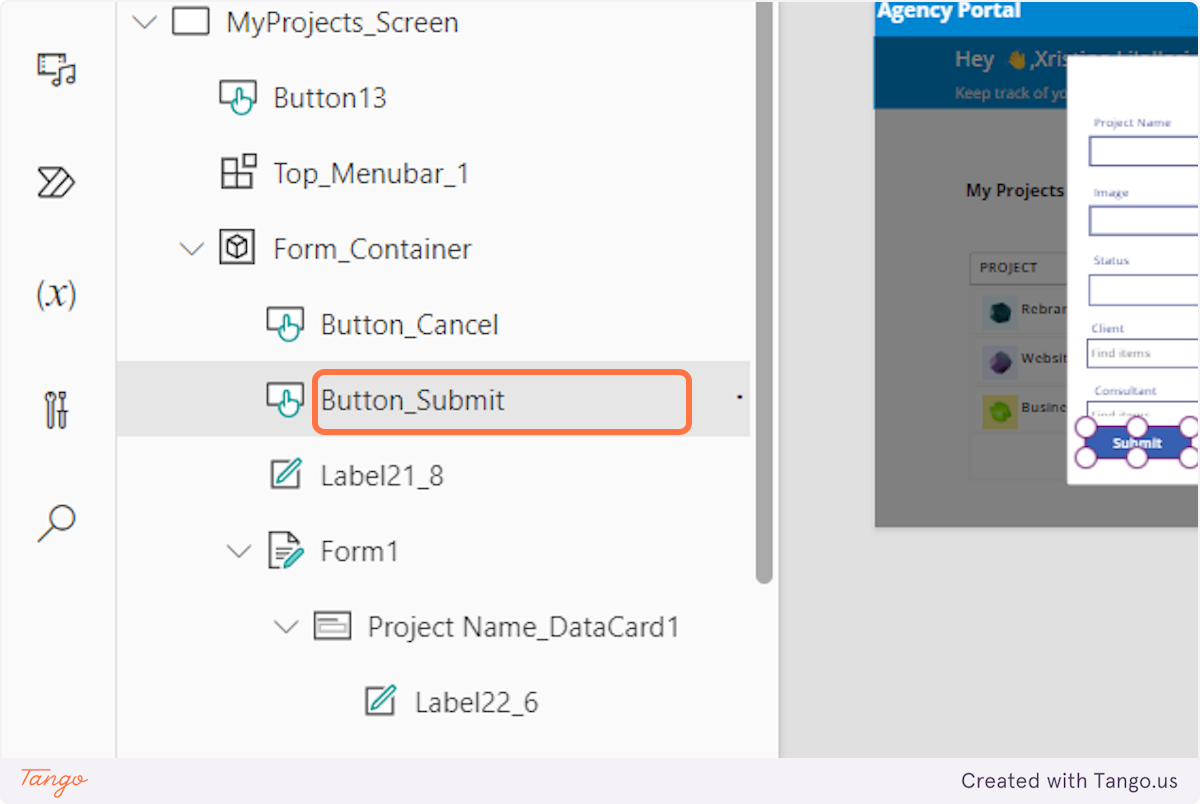
ii) Click on OnSelect Property
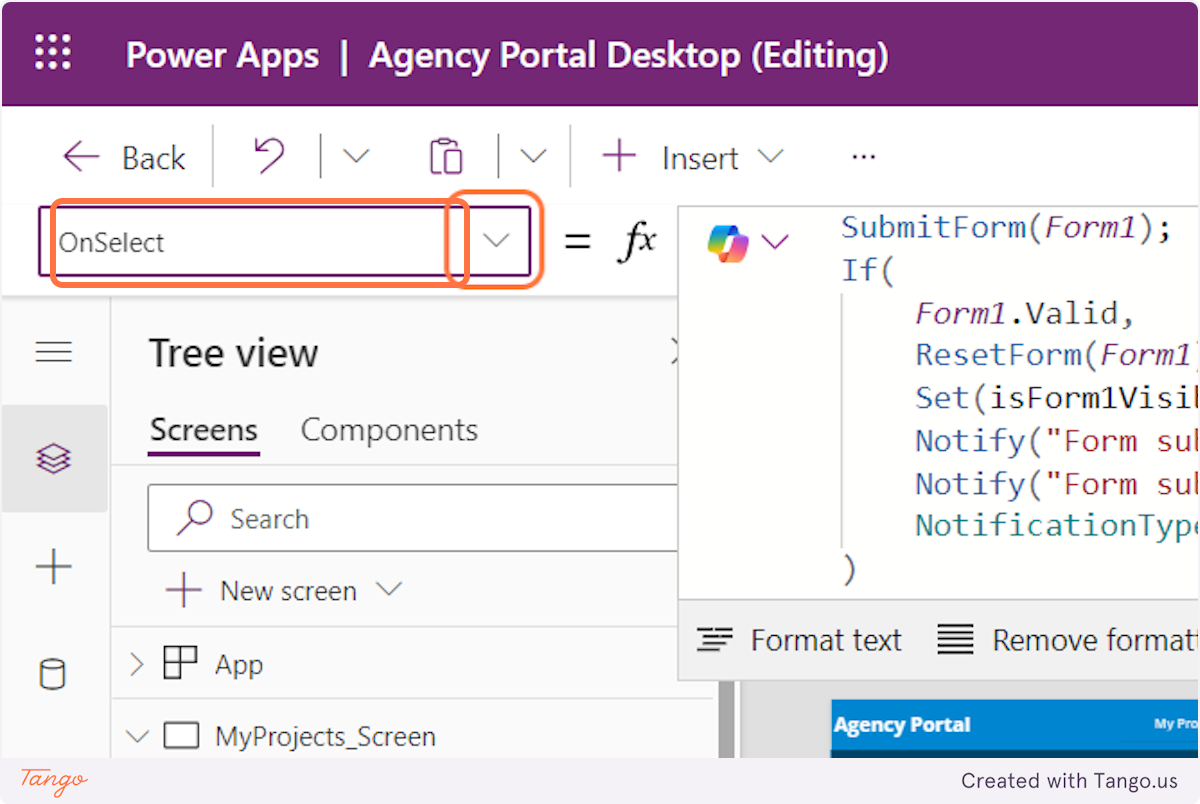
iii) Set the formula

Code applied to the submit button:
SubmitForm(Form1);
If(
Form1.Valid,
ResetForm(Form1);
Set(isForm1Visible, false);
Notify("Form submitted successfully!", NotificationType.Success),
Notify("Form submission failed. Please check the required fields.", NotificationType.Error)
)
Let’s break this down:
- SubmitForm(Form1);
Triggers the submission of ‘Form1’. It attempts to save the data entered in the form to the connected data source.
- If(Form1.Valid,...);
Check if ‘Form1’ is valid. It returns true if all required fields are filled out correctly according to the form’s validation rules.
- ResetForm(Form1);
If the form is valid, this command clears all the input fields, preparing the form for a new entry.
- Set(isForm1Visible, false);
The pop-up form gets hidden after a successful submission.
- Notify("Form submitted successfully!" NotificationType.Success)
The notify function shows a notification with a success message to the user.
- Notify("Form submission failed. Please check the required fields.", NotificationType.Error)
If the form is not valid, a failure message is shown, indicating that the form submission failed, prompting the user to check the required fields.
Step 8
Make the button ‘Cancel’ functional.
i) Click on Cancel Button
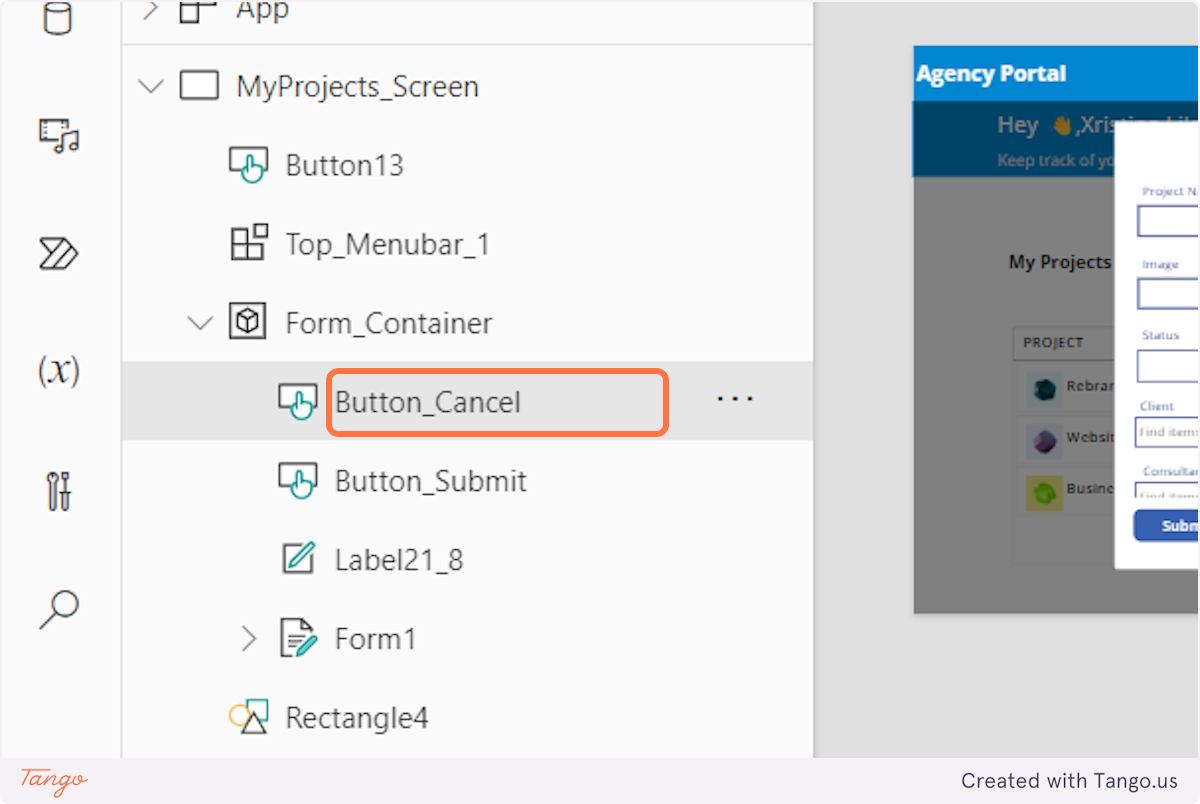
ii) Click on OnSelect Property
iii) Set the formula
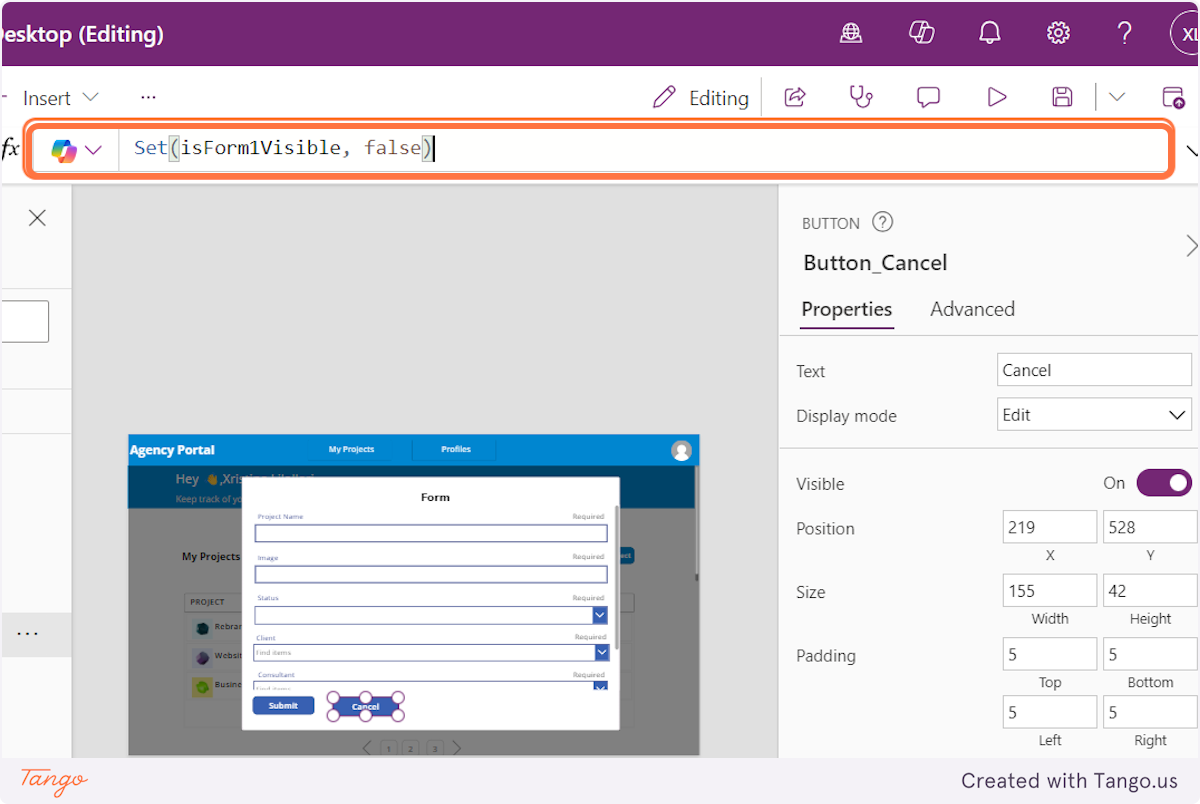
- Set(isForm1Visible, false)
Hides the form, when the cancel button is clicked. Provides users the option to exit the form if they decide not to make any changes.
Step 9
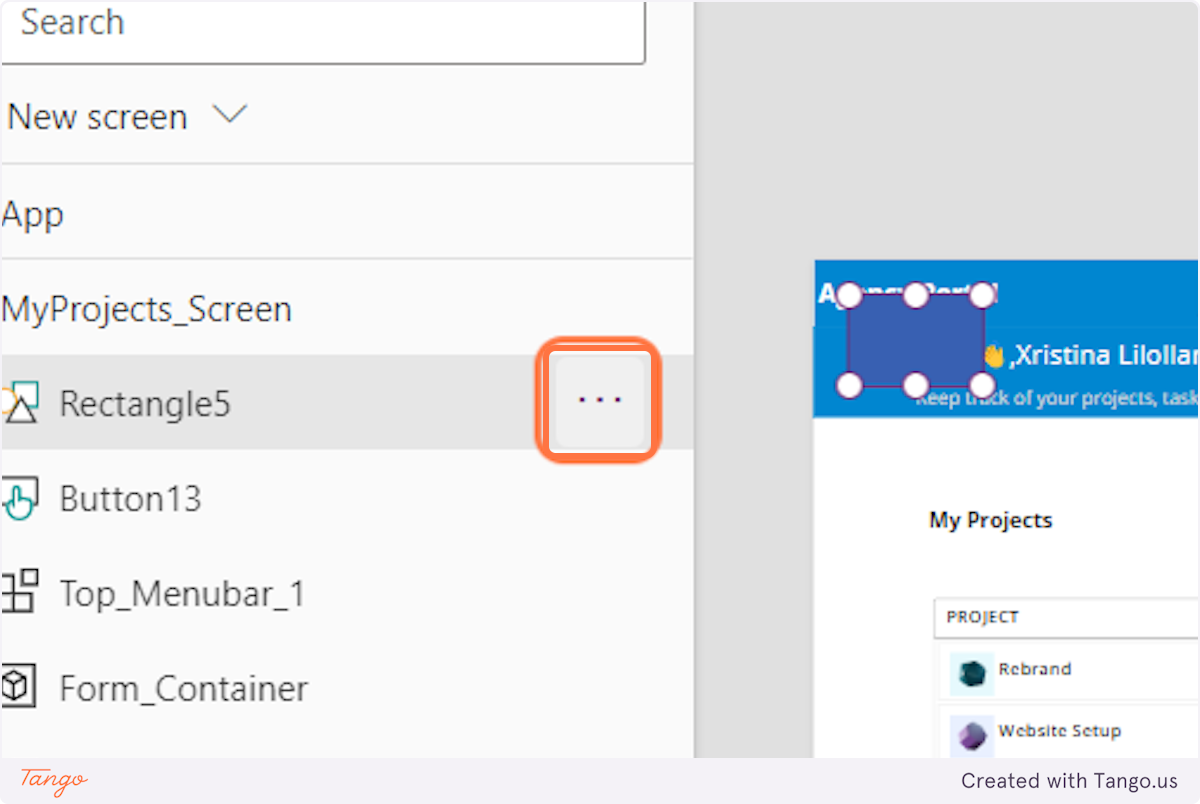
Add a rectangle to use as a background color when the pop-up appears.
** The rectangle has to be added outside the form container
i) Click on the screen you added the pop-up
ii) Click on Insert
iii) Click on Rectangle

iv) Click on More options
v) Click on Send backward until it appears down the form container you created previously
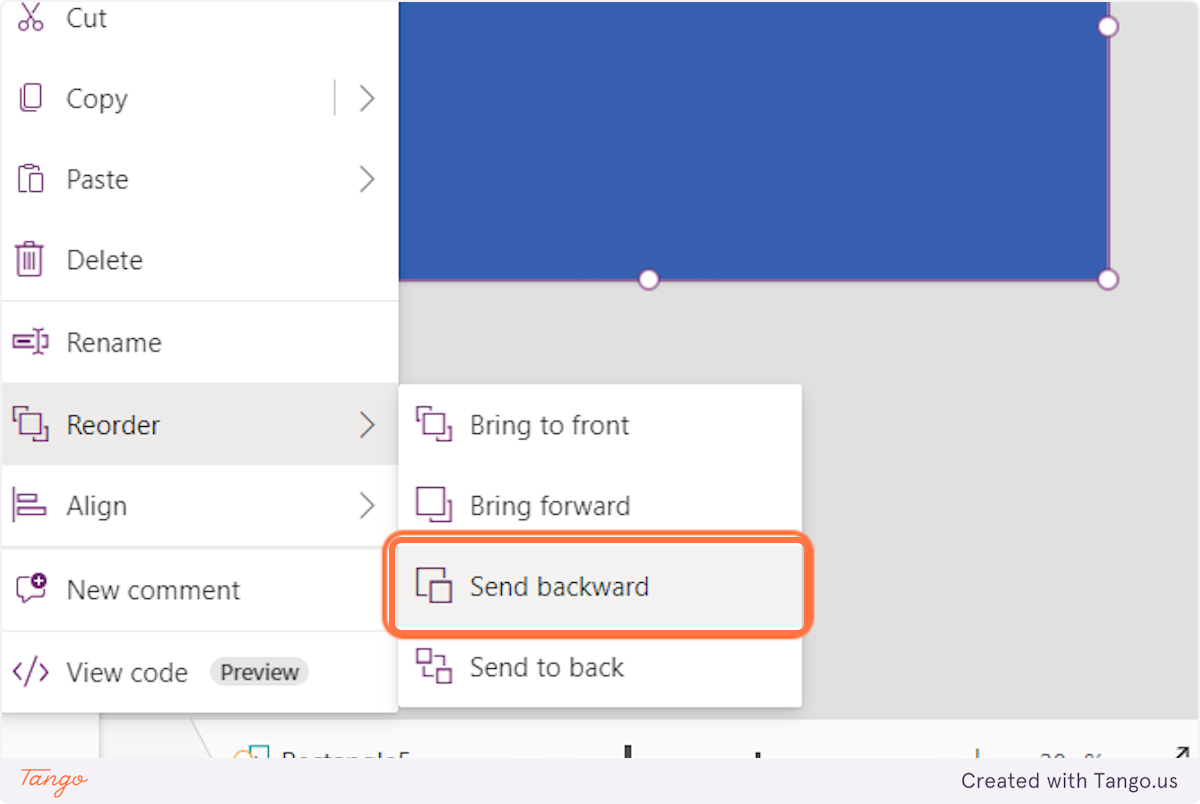
vi) This is the right order so that the rectangle appears in the background of the form

vii) Resize the rectangle so it covers the whole screen
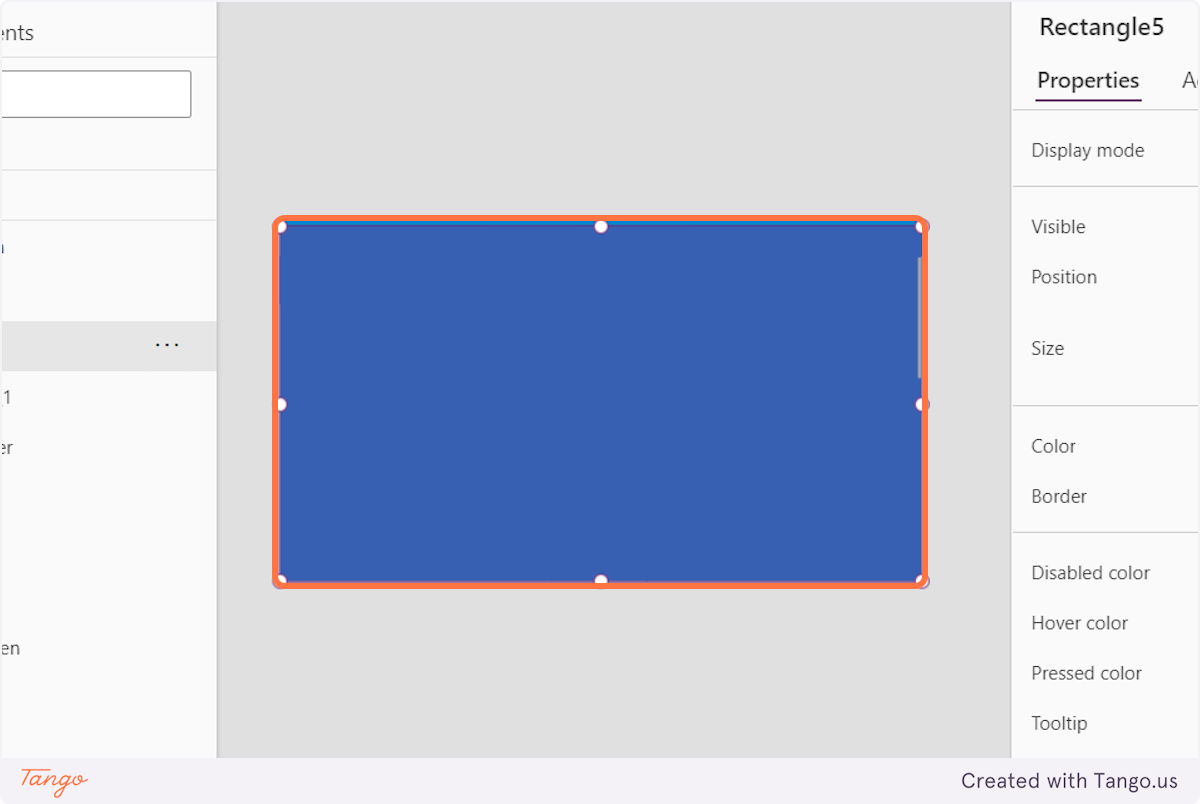
viii) Click on Color
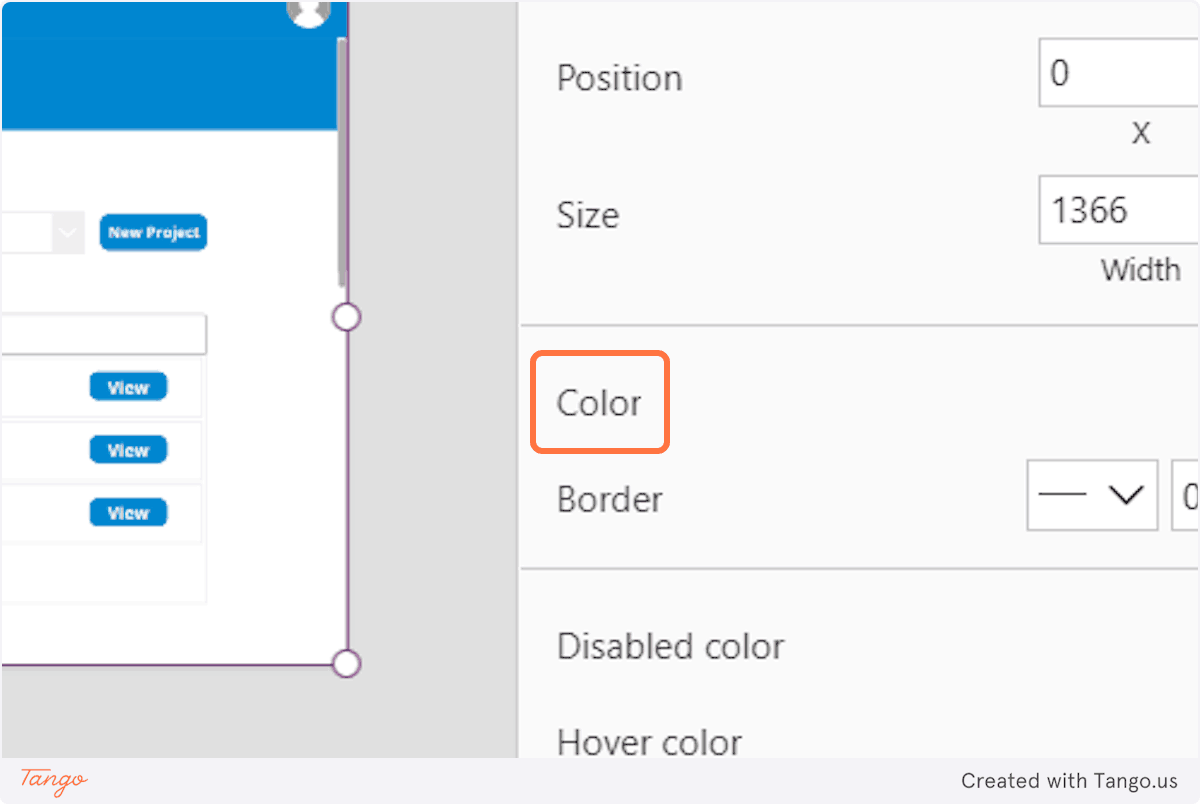
ix) Set a light gray color

x) Click on Property dropdown

xi) Click on Visible
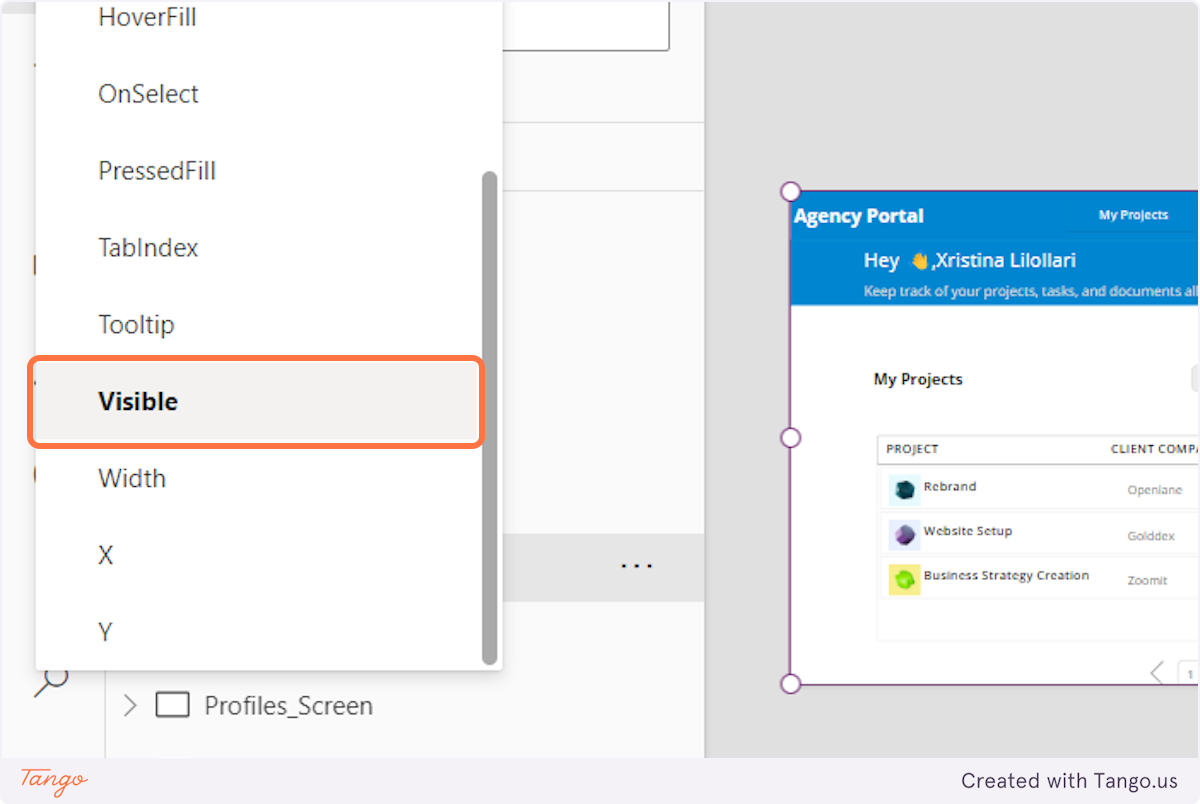
xii) Set the variable 'isForm1Visible' that controls when the rectangle will appear or disappear
Conclusion
Creating a pop-up window in Powerapps involves designing a hidden form, setting up a button to toggle its visibility, and adding functionality like submission or cancellation.
By using variables to manage the visibility of the pop-up and connecting actions to buttons, you can effectively improve your app’s interactivity and provide a better user experience.
If you are intrested in learing more about PowerApps you can check the following tutorials:

